1-click AWS Deployment 1-click Azure Deployment 1-click Google Deployment
Overview
Red Hat Enterprise Linux is an Open Source Linux distribution developed by Red Hat company, which can run all major processor architectures. Unlike other Linux distributions which are free to download, install and use, RHEL can be downloaded and used, with the exception the 30-day evaluation version, only if you buy a subscription
Red Hat Enterprise Linux minor releases are combination of individual security, enhancement, and bug fix errata. The Red Hat Enterprise Linux 7.3 Release Notes document describes the major changes made to the Red Hat Enterprise Linux 7 operating system and its accompanying applications for this minor release, as well as known problems and a complete list of all currently available Technology Previews.
Red Hat® Enterprise Linux® is the world’s leading enterprise Linux platform.* It’s an open source operating system (OS). It’s the foundation from which you can scale existing apps—and roll out emerging technologies—across bare-metal, virtual, container, and all types of cloud environments.
OVERVIEW OF SECURITY HARDENING IN RHEL
Because of increased reliance on powerful, networked computers to help run businesses and keep track of our personal information, entire industries have been formed around the practice of network and computer security. Enterprises have solicited the knowledge and skills of security experts to properly audit systems and tailor solutions to fit the operating requirements of their organization. Because most organizations are increasingly dynamic in nature, their workers are accessing critical company IT resources locally and remotely, hence the need for secure computing environments has become more pronounced.
Inopportunely, many organizations, as well as individual users, regard security as more of an addendum, a process that is overlooked in favor of increased power, productivity, convenience, ease of use, and budgetary concerns. Proper security implementation is often enacted postmortem — after an unauthorized intrusion has already occurred. Taking the correct measures prior to connecting a site to an untrusted network, such as the Internet, is an effective means of thwarting many attempts at intrusion.
What is computer security?
Computer security is a general term that covers a wide area of computing and information processing. Industries that depend on computer systems and networks to conduct daily business transactions and access critical information regard their data as an important part of their overall assets. Several terms and metrics have entered our daily business vocabulary, such as total cost of ownership (TCO), return on investment (ROI), and quality of service (QoS). Using these metrics, industries can calculate aspects such as data integrity and high-availability (HA) as part of their planning and process management costs. In some industries, such as electronic commerce, the availability and trustworthiness of data can mean the difference between success and failure.
1.Standardizing security
Enterprises in every industry rely on regulations and rules that are set by standards-making bodies such as the American Medical Association (AMA) or the Institute of Electrical and Electronics Engineers (IEEE). The same concepts hold true for information security. Many security consultants and vendors agree upon the standard security model known as CIA, or Confidentiality, Integrity, and Availability. This three-tiered model is a generally accepted component to assessing risks of sensitive information and establishing security policy. The following describes the CIA model in further detail:
- Confidentiality — Sensitive information must be available only to a set of pre-defined individuals. Unauthorized transmission and usage of information should be restricted. For example, confidentiality of information ensures that a customer’s personal or financial information is not obtained by an unauthorized individual for malicious purposes such as identity theft or credit fraud.
- Integrity — Information should not be altered in ways that render it incomplete or incorrect. Unauthorized users should be restricted from the ability to modify or destroy sensitive information.
- Availability — Information should be accessible to authorized users any time that it is needed. Availability is a warranty that information can be obtained with an agreed-upon frequency and timeliness. This is often measured in terms of percentages and agreed to formally in Service Level Agreements (SLAs) used by network service providers and their enterprise clients.
The RHEL components Knowledgebase article provides an overview of the Red Hat Enterprise Linux 8 core crypto components, documenting which are they, how are they selected, how are they integrated into the operating system, how do they support hardware security modules and smart cards, and how do crypto certifications apply to them.
Security controls
Computer security is often divided into three distinct master categories, commonly referred to as controls:
- Physical
- Technical
- Administrative
These three broad categories define the main objectives of proper security implementation. Within these controls are sub-categories that further detail the controls and how to implement them.
Physical controls
Physical control is the implementation of security measures in a defined structure used to deter or prevent unauthorized access to sensitive material. Examples of physical controls are:
- Closed-circuit surveillance cameras
- Motion or thermal alarm systems
- Security guards
- Picture IDs
- Locked and dead-bolted steel doors
- Biometrics (includes fingerprint, voice, face, iris, handwriting, and other automated methods used to recognize individuals)
. Technical controls
Technical controls use technology as a basis for controlling the access and usage of sensitive data throughout a physical structure and over a network. Technical controls are far-reaching in scope and encompass such technologies as:
- Encryption
- Smart cards
- Network authentication
- Access control lists (ACLs)
- File integrity auditing software
Administrative controls
Administrative controls define the human factors of security. They involve all levels of personnel within an organization and determine which users have access to what resources and information by such means as:
- Training and awareness
- Disaster preparedness and recovery plans
- Personnel recruitment and separation strategies
- Personnel registration and accounting
Vulnerability assessment
All of the security procedures and technologies currently available cannot guarantee that any systems are completely safe from intrusion. Routers help secure gateways to the Internet. Firewalls help secure the edge of the network. Virtual Private Networks safely pass data in an encrypted stream. Intrusion detection systems warn you of malicious activity. However, the success of each of these technologies is dependent upon a number of variables, including:
- The expertise of the staff responsible for configuring, monitoring, and maintaining the technologies.
- The ability to patch and update services and kernels quickly and efficiently.
- The ability of those responsible to keep constant vigilance over the network.
Given the dynamic state of data systems and technologies, securing corporate resources can be quite complex. Due to this complexity, it is often difficult to find expert resources for all of your systems. While it is possible to have personnel knowledgeable in many areas of information security at a high level, it is difficult to retain staff who are experts in more than a few subject areas. This is mainly because each subject area of information security requires constant attention and focus. Information security does not stand still.
A vulnerability assessment is an internal audit of your network and system security; the results of which indicate the confidentiality, integrity, and availability of your network. Typically, vulnerability assessment starts with a reconnaissance phase, during which important data regarding the target systems and resources is gathered. This phase leads to the system readiness phase, whereby the target is essentially checked for all known vulnerabilities. The readiness phase culminates in the reporting phase, where the findings are classified into categories of high, medium, and low risk; and methods for improving the security (or mitigating the risk of vulnerability) of the target are discussed
If you were to perform a vulnerability assessment of your home, you would likely check each door to your home to see if they are closed and locked. You would also check every window, making sure that they closed completely and latch correctly. This same concept applies to systems, networks, and electronic data. Malicious users are the thieves and vandals of your data. Focus on their tools, mentality, and motivations, and you can then react swiftly to their actions.
Defining assessment and testing
When performing an outside-looking-in vulnerability assessment, you are attempting to compromise your systems from the outside. Being external to your company provides you with the cracker’s point of view. You see what a cracker sees — publicly-routable IP addresses, systems on your DMZ, external interfaces of your firewall, and more. DMZ stands for “demilitarized zone”, which corresponds to a computer or small subnetwork that sits between a trusted internal network, such as a corporate private LAN, and an untrusted external network, such as the public Internet. Typically, the DMZ contains devices accessible to Internet traffic, such as web (HTTP) servers, FTP servers, SMTP (e-mail) servers and DNS servers.
When you perform an inside-looking-around vulnerability assessment, you are at an advantage since you are internal and your status is elevated to trusted. This is the point of view you and your co-workers have once logged on to your systems. You see print servers, file servers, databases, and other resources.
There are striking distinctions between the two types of vulnerability assessments. Being internal to your company gives you more privileges than an outsider. In most organizations, security is configured to keep intruders out. Very little is done to secure the internals of the organization (such as departmental firewalls, user-level access controls, and authentication procedures for internal resources). Typically, there are many more resources when looking around inside as most systems are internal to a company. Once you are outside the company, your status is untrusted. The systems and resources available to you externally are usually very limited.
Consider the difference between vulnerability assessments and penetration tests. Think of a vulnerability assessment as the first step to a penetration test. The information gleaned from the assessment is used for testing. Whereas the assessment is undertaken to check for holes and potential vulnerabilities, the penetration testing actually attempts to exploit the findings.
Assessing network infrastructure is a dynamic process. Security, both information and physical, is dynamic. Performing an assessment shows an overview, which can turn up false positives and false negatives. A false positive is a result, where the tool finds vulnerabilities which in reality do not exist. A false negative is when it omits actual vulnerabilities.
Security administrators are only as good as the tools they use and the knowledge they retain. Take any of the assessment tools currently available, run them against your system, and it is almost a guarantee that there are some false positives. Whether by program fault or user error, the result is the same. The tool may find false positives, or, even worse, false negatives.
Now that the difference between a vulnerability assessment and a penetration test is defined, take the findings of the assessment and review them carefully before conducting a penetration test as part of your new best practices approach.Subsequently, Red Hat has released Red Hat Single Sign-On as a web SSO solution based on the Keycloak community project. Red Hat Single Sign-On provides greater capabilities than Ipsilon and is designated as the standard web SSO solution across the Red Hat product portfolio.
Red Hat Enterprise Linux 7.3 is available as a single kit on the following architectures:
- 64-bit AMD
- 64-bit Intel
- IBM POWER7+ and POWER8 (big endian)
- IBM POWER8 (little endian)
- IBM z Systems
Red Hat Enterprise Linux 7.3 installation is supported only on 64-bit hardware. Red Hat Enterprise Linux 7.3 is able to run 32-bit operating systems, including previous versions of Red Hat Enterprise Linux, as virtual machines.
Red Hat Enterprise Linux 7.3 (big endian) is currently supported as a KVM guest on Red Hat Enterprise Virtualization for Power, and on PowerVM.
Red Hat Enterprise Linux 7.3 (little endian) is currently supported as a KVM guest on Red Hat Enterprise Virtualization for Power, on PowerVM and PowerNV (bare metal).
Red Hat Enterprise Linux 7.3 supports IBM zEnterprise 196 hardware or later; IBM z10 Systems mainframe systems are no longer supported and will not boot Red Hat Enterprise Linux 7.3.
Installing RHEL 7.3 Server
RHEL 7.3 Installer
To start your installation of RHEL 7.3, highlight the “Install Red Hat Enterprise Linux 7.3” option and press enter. Your installation will now start.

Testing the Media
We always recommended that we you should test your media before carrying out an installation for the first time. If you wish to test your media, choose the option “Test this media and install Red Hat Enterprise Linux 7.3“. After a media check, your installation will start automatically.
Welcome to Red Hat Enterprise Linux 7.3
At this screen you will need to choose the language that you would like to use during your installation. In this example, “English“, “English (United Kingdom)” has been selected. Once you have made your selection, click on continue in the lower right hand corner of the screen.

Installation Summary
At this screen various configuration options are available. Any option that is highlighted must be addressed before you can continue with your installation. It is from this screen that you can configure your Localization settings, Security Policy, Software and System settings.

Date and Time
From this screen you need to choose your geographic location from either the map or from the pull down menu. In this example “Europe” and “London” have been selected. You can adjust the time and date by clicking on the relevant arrows in the lower left and lower right hand corners of the screen. You may also configure your system to use “NTP” for time synchronisation by clicking on the small gear icon in the upper right corner. (see step below)

NTP
If you have chosen to use a NTP server for server time synchronisation, then you will need to add the address/name of the server you wish to use. Before this step can be configured, you will need to configure your network settings first!

Keyboard Layout
Your keyboard settings may be configured from this screen. Additional keyboard layouts may be added if required. If you have added additional keyboard layouts, you can move your chosen layout to the top of the list to make this the new default layout. The layout configuration may be tested by typing into the text box in the upper right hand corner. To add/delete or move layouts, simply use the relevant arrow keys in the lower left hand corner of the screen. Once you have made any changes, click on the “Done” button in the upper left hand corner of the screen.

Language Support
At this screen you need to verify or choose your Language settings. In the example, “English“, “English (United Kingdom)” has been chosen. Click “Done” to continue.

Installation Source
If you have booted from the standard iso image of RHEL 7.3, then no further action is required at this screen. Click on “Done” to continue with your installation.

Software Selection
At this screen you can choose which “Base Environment” is to be used for your installation. In this example, “Minimal Install” has been selected. Any additional “Add-Ons” that are available may be selected from the right hand options panel. In this example, no “Add-Ons” have been selected. Click “Done” to continue with your installation.

Installation Destination
This screen allows you to configure your disk partitioning layout. Two options are available. “Automatically configure partitioning” and “I will configure partitioning”. For this installation of RHEL 7.3, I am going to choose the option of manually configuring the disk partition layout “I will configure partitioning”
For this installation I am going to create the following partition scheme using Logical Volume Management: Volume Groups (VG), Logical Volumes (LV) size of partition/file system in MB. You may wish to size your partitions/file systems differently to match your requirements. Note, as a rule of thumb, the swap size should be half the size of the physical memory. In this example I have set the swap size to be 1000MB as this RHEL system has 2GB of physical memory. The size of the disk used in this exercise has a capacity of 20GB.
| Mount Point | VG Name | LV Name | Size |
| /boot | Standard Partition | – | 500MB |
| / | sysVG | rootLV | 3000MB |
| swap | sysVG | swapLV | 1000MB |
| /home | sysVG | homeLV | 2000MB |
| /opt | sysVG | optLV | 2000MB |
| /tmp | sysVG | tmpLV | 1000MB |
| /var | sysVG | varLV | 2000MB |
| /usr | sysVG | usrLV | 3000MB |
| /spare | sysVG | spareLV | 5975MB |
Once you have selected the option “I will configure partitioning“, click on the “Done” button in the upper left hand corner of the screen.

Manual Partitioning
From this screen we can see that we have a “20GB” disk available to create our partitions/file systems. Available space is indicated in the lower left of the screen. To start creating our partitions and file systems, we will need to click on the “+” plus button in the lower left hand corner of the screen.

Add a New Mount Point
Each time you click on the click on the “+” plus button in the lower left hand corner of the screen, you will be presented with a small pop up menu. It is from this menu that you can select the “Mount Point” or enter the name of a mount point to create. You also need to specify the “Desired Capacity” to be used with each mount point.

Create Boot Partition
The first partition we are going to create is the boot partition. The “Mount Point” can be selected from the drop down menu and the desired capacity can by typed into the “Desired Capacity” box. Once the details have been entered, click on Add Mount Point”. Notice, the Device Type is set to “Standard Partition” for a boot partition. A size of 500MB was specified in this example.

Adding Additional File systems
To add the remainder of our file systems, simply click on the + Plus button. Enter the appropriate values as per the table above. In this exercise we are going to change the default name of the Volume Group to be “sysVG“.

The remainder of all file systems will have a Device Type of “LVM” a Volume Group of “sysVG“. To change the name of the default Volume Group from “rhel”, click on the “Modify” button. A Volume Group configuration box will appear. Simply change the name from the default to “sysVG“. The Logical Volume name is entered into the box “Name. For example, if you are creating the “/spare” filesystem, then the name “spareLV” will be used.
You will notice that a filesystem called “/spare” is to be created. This file system is created last as we are going to assign all remaining space to this filesystem (5975MB in this example). The reason we allocate the remaining space to “/spare” is to allow us to easily allocate this space back to the Volume Group “sysVG”. Once the system is built, we can remove this filesystem and all space will be then available to our system Volume Group “sysVG”. This space can then be given to any of the file systems within the Volume Group “sysVG”. Details of how to reclaim this space will be covered later. Once you have configured all the file systems, you should end up with a layout similar to the one below. Once you are happy with your configuration, click on “Done” to continue.

Summary of Changes
A summary of changes will now be displayed. If you need to make any modifications, then select “Cancel and Return to Custom Partitioning”. To continue, click on the “Accept Changes” button.

Kdump
“Kdump” is a mechanism that will allow in the event of a system crash information to be collected for determining the cause of a system crash. In this example, I have chosen to “Disable” kdump. To disable “kdump”, un-check the “Enable Kdump” option. Now click “Done” to continue with the installation.

Configure Network and Hostname
At this screen you can enter the hostname to be used for your server and click on “Configure” to manually configure our network interfaces. To update the screen with the newly entered hostname, click on the “Apply” button. If you do not wish to assign a static IP address to your system and you wish to use “DHCP” for the automatic allocation of an IP address, then you can simply click on the “OFF/ON” box in the upper right hand corner of the screen.In this example, we are going to assign a static IP address. Generally all servers normally require a static IP address. This is an address that is assigned specifically to your server and will not change after a restart.
Host name in this box enter a unique name to identify your system on a network. In this example, I will be entering “rhel73srva”. Click “Apply” to update.
Click “Configure” to start configuring your network settings.

Configuring a Static IP Address
Next, you should see a “Pop-Up” menu where we are going to add our IP address, Netmask, Gateway and DNS server information. In the following example I will be using the following Network Addressing:
IP Address = 192.168.0.88
Netmask = 255.255.255.0
Gateway = 192.168.0.1
DNS Server = 192.168.0.1
You will need to enter your own details here. (Modify where necessary)
From the “Tabs” across the top of the menu, select “IPv4 Settings”
From the “Method” pull down menu, select “Manual”
Now click in the Address, Netmask and Gateway boxes and enter your settings.
Finally, give the name of your DNS Server (IP Address)
Once all settings have been entered, click “Save” to continue.

Activate Network Interface
To apply our static IP address information to our interface, click on the “ON/OFF” button in the upper right of the screen. Your interface should now activate. Confirmation of your active addressing information is displayed. Click on “Done” to continue with your installation.

Security Policy
From this screen you can select a policy that matches your needs. In this example I have gone with the default policy. Click “Done” to continue.

Begin Installation
Once all configuration settings have been entered, we are now ready to initiate the installation. This is done by clicking on the “Begin Installation” button in the lower right corner of the screen.

User Account Configuration
The next section of this installation involves defining the root password and creating a new user. Click on each of the highlighted options in turn to enter the requested information. Whilst you are entering the requested details, the installation will continue in the background.

Root Password
You must specify a root password to be used for the administration of your system. Note, if you supply a weak password, you will be asked to press “Done” twice to confirm you have chosen a weak password! The strength of your password is also indicated.

Create User
From this screen you must define the name of a user. In this example I have also chosen the use to be an “Administrator”. Again, if you supply a weak password, you will be asked to confirm this. Once you have supplied the relevant credentials, simply click “Done” to continue with the installation.

Finish Configuration
At this point, Red Hat Enterprise Linux 7.3 is now installed, however, there a few more tasks still to carry out. Click on the “Finish Configuration” button in the lower right hand corner.

Complete
Red Hat Enterprise Linux has now been successfully installed. Your system needs to be re-booted before you can use it. Click on “Reboot” to finalise your installation. Remember to remove any media from your drives.

Login Screen
At this screen you can now login to your server with the accounts you created earlier.

Verify your File systems
You can verify that the file systems that were created earlier have been mounted by issuing the command df -hT.

Reclaim space by removing /spare
One of the earlier steps within the installation process was to assign any remaining space to a file system called /spare.
We are now going to remove this filesystem and the space will be allocated back to the “sysVG” Volume group.
The following steps need to be followed to free this space:
Unmount the filesystem “/spare by issuing the command: umount /spare
Remove the Logical Volume “spareLV” by issuing the command: lvremove /dev/sysVG/spareLV
Edit the file /etc/fstab and remove the following line:
/dev/mapper/sysVG-spareLV /spare xfs defaults 0 0
You can issue the command “pvs“. You should now see space available within the Volume Group “sysVG” (5.84GB).

Display assigned IP address
To verify that we have the correct IP address that we assigned, you can issue the command: ip a s. You should now see output similar to the one below.

Register Installation with Red Hat
Before you can access any repositories from the Red Hat Network, you will need to register your system. In the example that follows, I will be registering a 30 day evaluation copy of RHEL 7.3.
[root@rhel73srva ~]# subscription-manager register
Registering to: subscription.rhsm.redhat.com:443/subscription
Username: xxxxxxxxxxx
Password:
The system has been registered with ID: xxxxxxxx-xxxx-xxxx-xxxx-xxxxxxxxxxxx
You will need to specify the Username that you used to register with the Red Hat Network.
List Available Subscriptions
To list available subscriptions we can issue the command: subscription-manager list –available
[root@rhel73srva ~]# subscription-manager list --available
+-------------------------------------------+
    Available Subscriptions
+-------------------------------------------+
Subscription Name:   30 Day Red Hat Enterprise Linux Server Self-Supported
                     Evaluation
Provides:            Red Hat Container Images Beta
                     Red Hat Beta
                     Oracle Java (for RHEL Server)
                     Red Hat Enterprise Linux Atomic Host Beta
                     Red Hat Container Images
                     Red Hat Enterprise Linux Server
                     Red Hat Enterprise Linux Atomic Host
SKU:                 RHXXXXX
Contract:            xxxxxxxx
Pool ID:             xxxxxxxxxxxxxxxxxxxxxxxxxxxxxxxx
Provides Management: No
Available:           2
Suggested:           1
Service Level:       Self-Support
Service Type:        L1-L3
Subscription Type:   Instance Based
Ends:                03/12/16
System Type:         Physical
From the above we can see that we have a 30 day evaluation Subscription for RHEL 7.3
Add a Subscription
To add a subscription to our server we need to issue the following “subscription-manager” command along with the “Pool ID” that was obtained from the above output:
[root@rhel73srva ~]# subscription-manager subscribe --pool=xxxxxxxxxxxxxxxxxxxxxxxxxxxxxxxx
Successfully attached a subscription for: 30 Day Red Hat Enterprise Linux Server Self-Supported Evaluation
Verify Connection to Repositories
Now that you have activated your repositories, you can issue the “yum repolist command to confirm this.
[root@rhel73srva ~]# yum repolist
Loaded plugins: product-id, search-disabled-repos, subscription-manager
rhel-7-server-rpms                                       | 3.5 kB     00:00
(1/3): rhel-7-server-rpms/7Server/x86_64/group             | 701 kB   00:00
(2/3): rhel-7-server-rpms/7Server/x86_64/updateinfo        | 1.7 MB   00:01
(3/3): rhel-7-server-rpms/7Server/x86_64/primary_db        |  31 MB   00:10
repo id                           repo name
rhel-7-server-rpms/7Server/x86_64 Red Hat Enterprise Linux 7 Server (RPMs 13,352 repolist: 13,352—RHEL 7.3 helps address the need for faster networking, with the addition of lightweight tunnels. These enable guest instances of RHEL 7.3 to be more secure, efficient, scalable, and flexible. Additionally, bulk packet memory allocator enhancements improve performance for both 40 and 100GB networking interfaces.
At the same time, high-transaction applications like databases, event processing, and virtual machines need improved input-output (IO) rates and lower latencies. New hardware technologies like non-volatile memory address these concerns, and RHEL 7.3 supports these next-generation memory devices. In addition, RHEL 7.3 makes performance-sensitive Parallel NFS (pNFS) clusters easier to manage, with support for the Block SCSI layout format and the Flex Files layout format.
REDHAT is owned by REDHAT (https://www.redhat.com/en) and they own all related trademarks and IP rights for this software.
Cognosys Provides Hardened images of REDHAT on the cloud ( AWS marketplace, Azure and Google Cloud Platform).
Deploy REDHAT securely on cloud i.e. AWS marketplace, Azure and Google Cloud Platform (GCP)
Features
New features in Red Hat Enterprise Linux 7.3.
1. Docker
The biggest new addition to RHEL 7 is tight integration of Docker, the explosively popular application-virtualization technology. With Docker itself hitting 1.0 status, the timing on RHEL 7 couldn’t be more fitting.Apps packaged by Docker are isolated from the system and from each other, so they can be moved between systems and still run as expected. RHEL 7 is meant to be able to use Docker as efficiently as possible so that apps don’t contend for resources or get confused about which edition of a runtime to use.Long-term plans on the road map for Docker in RHEL involve possibly breaking the OS itself into a series of Docker containers, allowing as little or as much of a system to be deployed as needed with minimal overhead. Dubbed “Project Atomic,” the initiative is still in the early stages, with Red Hat planning to deploy it first via its Fedora Linux distribution, nominally used as a testing ground for cutting-edge technologies.
2. Systemd
The inclusion of the systemd process manager may spark controversy among system administrators and Linux mavens. Systemd was developed to replace the init system in use since the days of proprietary Unix, and it allows, for example, more efficient loading of services during the boot process.
3. XFS by default
A third major change, though not likely to raise nearly as many eyebrows, applies to the default file system used by RHEL to XFS.Originally created by Silicon Graphics International, XFS has long been in production use with Linux systems, and on RHEL 7 it’ll support file systems of up to 500TB in size. RHEL 6 used ext4 as the default, although it shipped with XFS as an option. Red Hat competitor Suse Linux also supports XFS, although it defaults to ext3 on installation.Unfortunately, there’s no real way to migrate from other file systems currently in use on RHEL — such as ext4 or btrfs– other than backing up and restoring.
4. Microsoft-compatible identity management
Even admins who aren’t fans of Microsoft Windows have a grudging respect for Microsoft Active Directory. RHEL 7 improves the way RHEL deals with AD by adding two key new features. Cross-realm trusts can now be established between RHEL 7 and AD, so AD users can access resources on the Linux side without having to go through another sign-on step. The other big AD-related addition to RHEL 7, realmd, automates both the discovery of AD (or other Red Hat identity services) based on DNS information and the process of joining to it.
5. Performance Co-Pilot
Performance tuning without live statistics is like driving with the windshield painted over, so RHEL 7 introduces a new performance-monitoring system PCP (Performance Co-Pilot), originally created by Silicon Graphics International but now available as part of RHEL 7. In addition to monitoring and recording system stats, PCP sports APIs and a tool set for making that data available to other subsystems, such as — you guessed it — the newly introduced systemd.
Another minor addition in this vein: new performance profiles. RHEL 6 already had performance profiles, which are ways to tune RHEL overall to meet specific usage scenarios. RHEL 7 not only defaults to a new profile that emphasizes maximum throughput performance, but includes another new default profile for balancing performance against energy savings.
6.New variable for disabling colored output for systemd
This update introduces the SYSTEMD_COLORS environment variable for systemd, which enables turning on or off systemd color output. SYSTEMD_COLORS should be set to a valid boolean value.
7.Systemd units can now be enabled using aliases
The systemd init system uses aliases. Aliases are symbolic links to the service files, and can be used in commands instead of the actual names of services. For example, the package providing the /usr/lib/systemd/system/nfs-server.service service file also provides an alias /usr/lib/systemd/system/nfs.service, which is a symbolic link to the nfs-server.service. This enables, for example, using the systemctl status nfs.service command instead of systemctl status nfs-server.service.
Previously, running the systemctl enable command using an alias instead of the real service name failed with an error. With this update, the bug is fixed, and systemctl enable successfully enables units referred to by their aliases. (BZ#1142378)
8.New systemd option: RandomizedDelaySec
This update introduces the RandomizedDelaySec option for systemd timers, which schedules an event to occur later by a random number of seconds. For example, setting the option to 10 will postpone the event by a random number of seconds between 0 and 10. The new option is useful for spreading workload over a longer time period to avoid several events executing at the same time.
9.Security and Identity Management:
-
- Updates to SELinux, a mechanism for enforcing granular, system-level access control policies for faster policy creation and improved overall ease of use. SELinux is notoriously hard to use. Siddharth Nagar, RHEL’s product manager, promises, “RHEL 7.3 provides what is really an ease-of-use enhancement to SELinux.”
-
- RHEL 7.3 now provides a consistent compliance checking mechanism across containerized and traditional non-container workloads for better overall operations efficiency. This is provided through enhancements to OpenSCAP, an open source implementation of the Security Content Automation Protocol (SCAP). This provides a standardized compliance-checking solution for enterprise-level Linux infrastructure. Configuring SCAP-based policies with the OpenSCAP Workbench graphical user interface has also been made easier.
- Improvements to Red Hat’s Identity Management solution. These include better performance for large installations, support for smart card authentication with Active Directory, and support for configurable authentication strength across individual hosts and services.
10.Reliability:
RHEL 7.3 has improved its built-in disaster recovery solution. Specific enhancements in support of this include:
1.The ability to configure pacemaker to manage multi-site and stretch clusters across geo-locations for disaster recovery and scalability.
2.The ability to better configure and trigger notifications when the status of a managed cluster changes with the introduction of enhanced pacemaker alerts.
11.Linux Containers:
RHEL 7.3 bolsters support for Linux containers via numerous incremental improvements in addition to enhanced management tools (Atomic CLI / Cockpit) and an updated container runtime (docker engine). It also includes a new container-signing capability as a Technology Preview.
AWS
Installation Instructions For Redhat
Installation Instructions For Redhat
Note: How to find PublicDNS in AWS
Step 1) SSH Connection: To connect to the deployed instance, Please follow Instructions to Connect to Redhat instance on AWS Cloud
1) Download Putty.
2) Connect to the virtual machine using SSH key Refer this link:
- Hostname: PublicDNS / IP of machine
- Port : 22
Step 2) Other Information:
1.Default ports:
- Linux Machines: SSH Port – 22
2. To access Webmin interface for management please follow this link
Configure custom inbound and outbound rules using this link
Installation Instructions For Redhat
Step 1) VM Creation:
1.Click the Launch on Compute Engine button to choose the hardware and network settings.
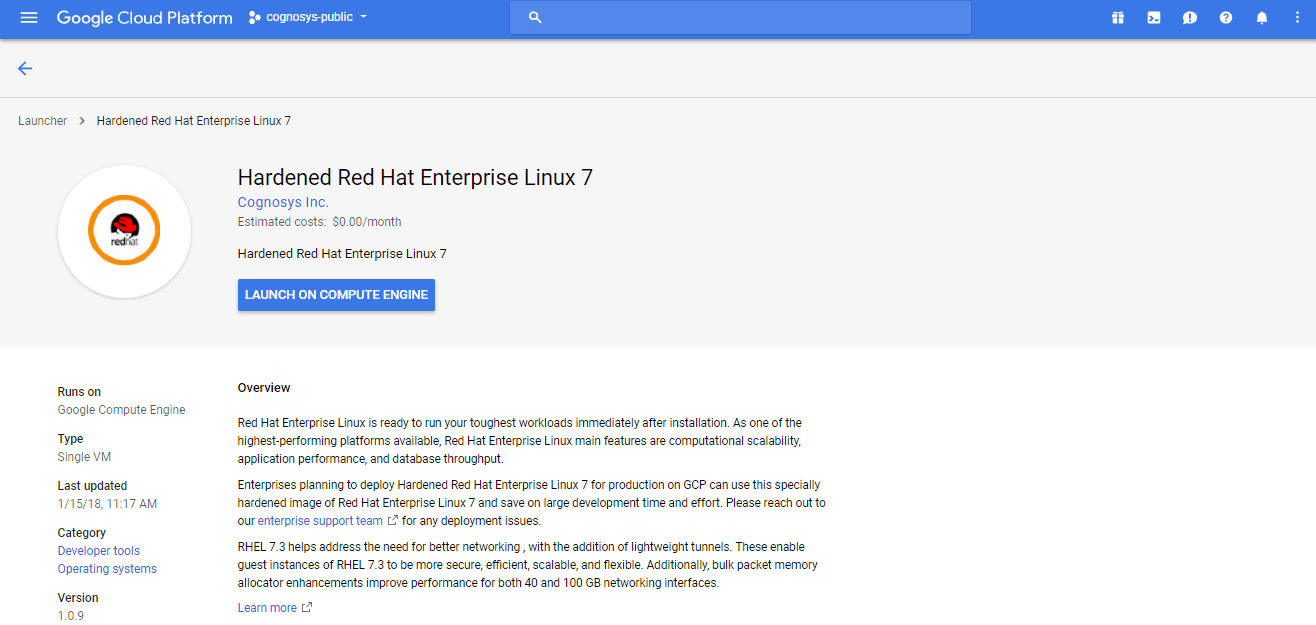
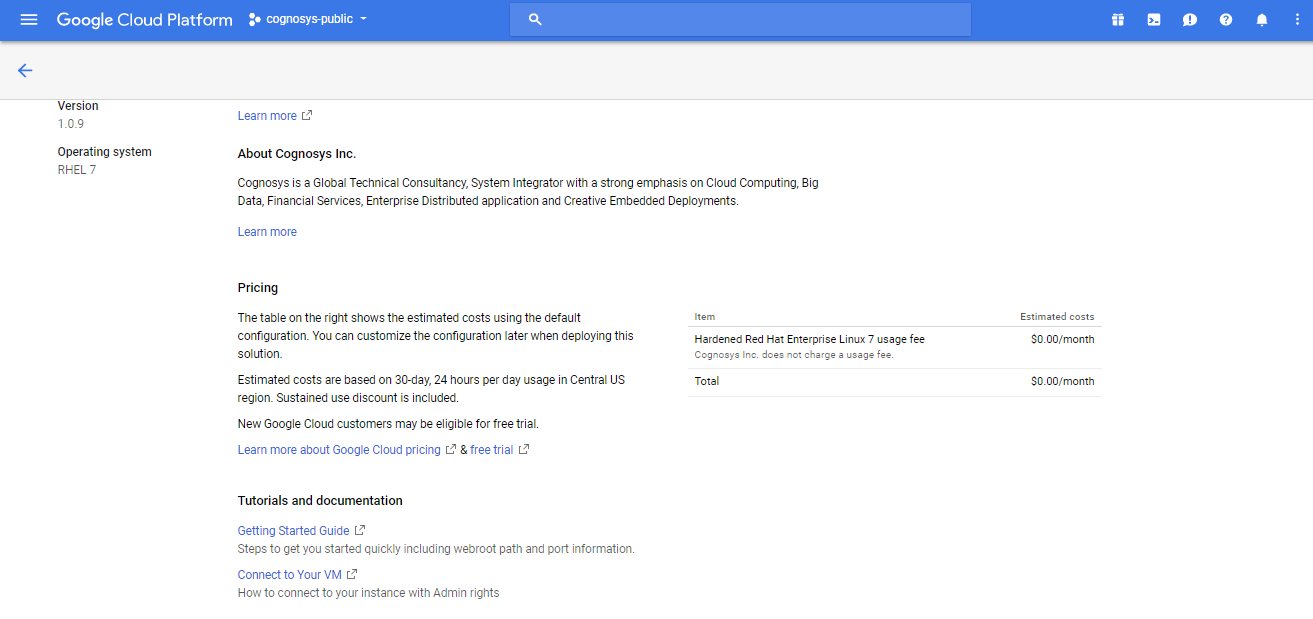
2.You can see at this page, an overview of Cognosys Image as well as some estimated costs of VM.
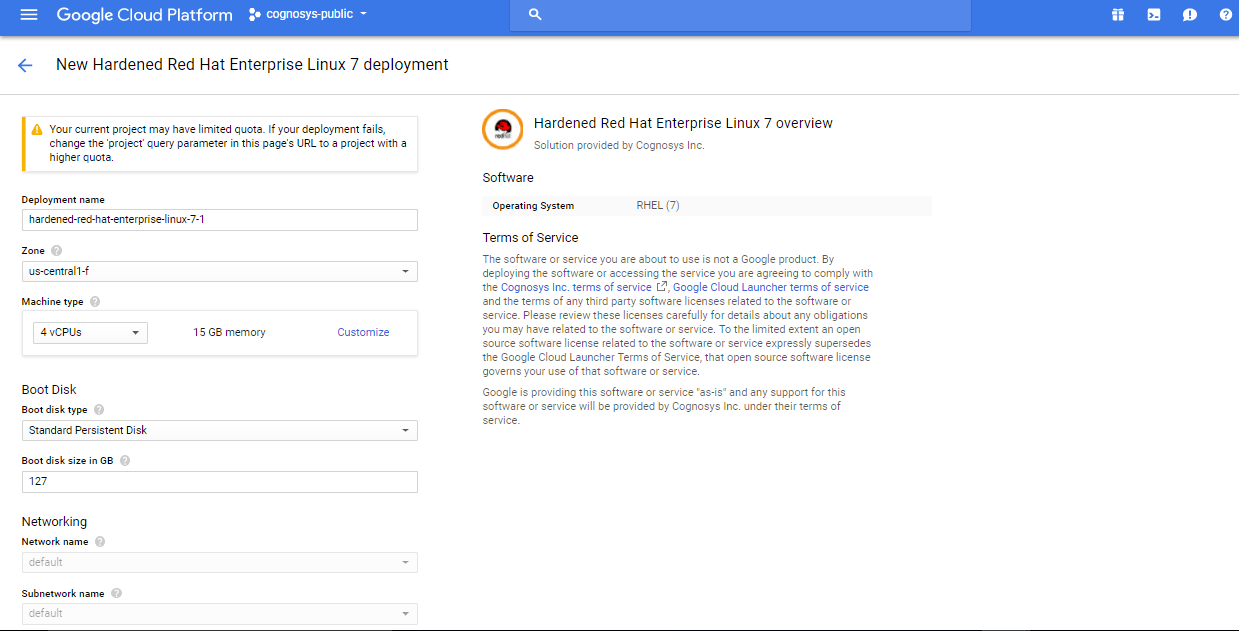
3.In the settings page, you can choose the number of CPUs and amount of RAM, the disk size and type etc.
Step 2) SSH Connection: To connect to the deployed instance, Please follow Instructions to Connect to Redhat instance on Google Cloud
1) Download Putty.
2) Connect to the virtual machine using SSH key
- Hostname: PublicDNS / IP of machine
- Port : 22
Step 3) Other Information:
1.Default ports:
- Linux Machines: SSH Port – 22
2. To access Webmin interface for management please follow this link
Video
Redhat Installation
