
1-click AWS Deployment 1-click Azure Deployment
Overview
MySQL is the most popular Open Source Relational SQL Database Management System. MySQL is one of the best RDBMS being used for developing various web-based software applications. MySQL is developed, marketed and supported by MySQL AB, which is a Swedish company. This tutorial will give you a quick start to MySQL and make you comfortable with MySQL programming.
Audience
- This tutorial is prepared for the beginners to help them understand the basics-to-advanced concepts related to MySQL languages.
- Prerequisites
- Before you start doing practice with various types of examples given in this tutorial, it is being assumed that you are already aware about what a database is, especially an RDBMS and what is a computer programming language.
Before we proceed to explain the MySQL database system, let us revise a few definitions related to the database.
- Database− A database is a collection of tables, with related data.
- Table− A table is a matrix with data. A table in a database looks like a simple spreadsheet.
- Column− One column (data element) contains data of one and the same kind, for example the column postcode.
- Row− A row (= tuple, entry or record) is a group of related data, for example the data of one subscription.
- Redundancy− Storing data twice, redundantly to make the system faster.
- Primary Key− A primary key is unique. A key value can not occur twice in one table. With a key, you can only find one row.
- Foreign Key− A foreign key is the linking pin between two tables.
- Compound Key− A compound key (composite key) is a key that consists of multiple columns, because one column is not sufficiently unique.
- Index− An index in a database resembles an index at the back of a book.
- Referential Integrity− Referential Integrity makes sure that a foreign key value always points to an existing row.
MySQL is a fast, easy-to-use RDBMS being used for many small and big businesses. MySQL is developed, marketed and supported by MySQL AB, which is a Swedish company. MySQL is becoming so popular because of many good reasons −
- MySQL is released under an open-source license. So you have nothing to pay to use it.
- MySQL is a very powerful program in its own right. It handles a large subset of the functionality of the most expensive and powerful database packages.
- MySQL uses a standard form of the well-known SQL data language.
- MySQL works on many operating systems and with many languages including PHP, PERL, C, C++, JAVA, etc.
- MySQL works very quickly and works well even with large data sets.
- MySQL is very friendly to PHP, the most appreciated language for web development.
- MySQL supports large databases, up to 50 million rows or more in a table. The default file size limit for a table is 4GB, but you can increase this (if your operating system can handle it) to a theoretical limit of 8 million terabytes (TB).
- MySQL is customizable. The open-source GPL license allows programmers to modify the MySQL software to fit their own specific environments.
Administrative MySQL Command
Here is the list of the important MySQL commands, which you will use time to time to work with MySQL database −
- USE Databasename− This will be used to select a database in the MySQL workarea.
- SHOW DATABASES− Lists out the databases that are accessible by the MySQL DBMS.
- SHOW TABLES− Shows the tables in the database once a database has been selected with the use command.
- SHOW COLUMNS FROM tablename:Shows the attributes, types of attributes, key information, whether NULL is permitted, defaults, and other information for a table.
- SHOW INDEX FROM tablename− Presents the details of all indexes on the table, including the PRIMARY KEY.
- SHOW TABLE STATUS LIKE tablename\G− Reports details of the MySQL DBMS performance and statistics.
- MySQL works very well in combination of various programming languages like PERL, C, C++, JAVA and PHP. Out of these languages, PHP is the most popular one because of its web application development capabilities.
- PHP provides various functions to access the MySQL database and to manipulate the data records inside the MySQL database. You would require to call the PHP functions in the same way you call any other PHP function.
Structured Query Language (SQL)
SQL is the core of a relational database which is used for accessing and managing the database. By using SQL, you can add, update or delete rows of data, retrieve subsets of information, modify databases and perform many actions. The different subsets of SQL are as follows:
- DDL (Data Definition Language) – It allows you to perform various operations on the database such as CREATE, ALTER and DELETE objects.
- DML (Data Manipulation Language) – It allows you to access and manipulate data. It helps you to insert, update, delete and retrieve data from the database.
- DCL (Data Control Language) – It allows you to control access to the database. Example – Grant or Revoke access permissions.
- TCL (Transaction Control Language) – It allows you to deal with the transaction of the database. Example – Commit, Rollback, Savepoint, Set Transaction.
MySQL is the most prevalent Open Source SQL database management system, it is developed, circulated, and braced by Oracle Corporation.
- MySQL is a database management system.
A database is a structured collection of data. It may be anything from a simple shopping list to a picture gallery or the vast amounts of information in a corporate network. To add, access, and process data stored in a computer database, you need a database management system such as MySQL Server. Since computers are very good at handling large amounts of data, database management systems play a central role in computing, as standalone utilities, or as parts of other applications.
- MySQL databases are relational.
A relational database stores data in separate tables rather than putting all the data in one big storeroom. The database structures are organized into physical files optimized for speed. The logical model, with objects such as databases, tables, views, rows, and columns, offers a flexible programming environment. You set up rules governing the relationships between different data fields, such as one-to-one, one-to-many, unique, required or optional, and “pointers” between different tables. The database enforces these rules, so that with a well-designed database, your application never sees inconsistent, duplicate, orphan, out-of-date, or missing data.
The SQL part of “MySQL” stands for “Structured Query Language”. SQL is the most common standardized language used to access databases.
MySQL software is Open Source.
Open Source means that it is possible for anyone to use and modify the software. Anybody can download the MySQL software from the Internet and use it without paying anything. If you wish, you may study the source code and change it to suit your needs. The MySQL software uses the to define what you may and may not do with the software in different situations. If you feel uncomfortable with the GPL or need to embed MySQL code into a commercial application, you can buy a commercially licensed version from us.
- The MySQL Database Server is very fast, reliable, scalable, and easy to use.
If that is what you are looking for, you should give it a try. MySQL Server can run comfortably on a desktop or laptop, alongside your other applications, web servers, and so on, requiring little or no attention. If you dedicate an entire machine to MySQL, you can adjust the settings to take advantage of all the memory, CPU power, and I/O capacity available. MySQL can also scale up to clusters of machines, networked together.
- MySQL Server works in client/server or embedded systems.
The MySQL Database Software is a client/server system that consists of a multithreaded SQL server that supports different back ends, several different client programs and libraries, administrative tools, and a wide range of application programming interfaces (APIs).
We also provide MySQL Server as an embedded multithreaded library that you can link into your application to get a smaller, faster, easier-to-manage standalone product.
- A large amount of contributed MySQL software is available.
MySQL Server has a practical set of features developed in close cooperation with our users.
Install mysql server 5.6 on Ubuntu 14.04 LTS
Installing mysql-server 5.6 is very easy. Follow the given below steps
Step 1: Install MySQL Server 5.6
Install mysql-server 5.6 with apt-get command.
sudo apt-get update
sudo apt-get install mysql-server-5.6
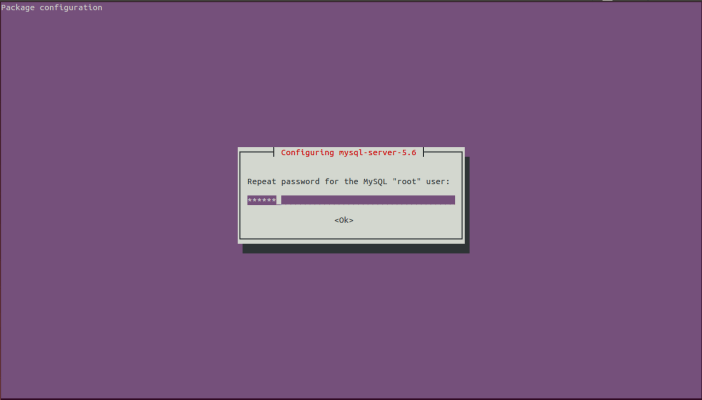
During installation of MySQL Server packages,on your terminal you will screen of setting mysql root password. Hence, give the mysql user root password.
Given below is screenshot of screen.

Now it will again ask mysql root password for confirmation. Rewrite the same mysql root password which you have given on first screen.
Step 2 : Login into MySQL Server
After mysql server installation get finishes , it start the mysql service automatically. Hence, you can login now in MySQL Server with user root.
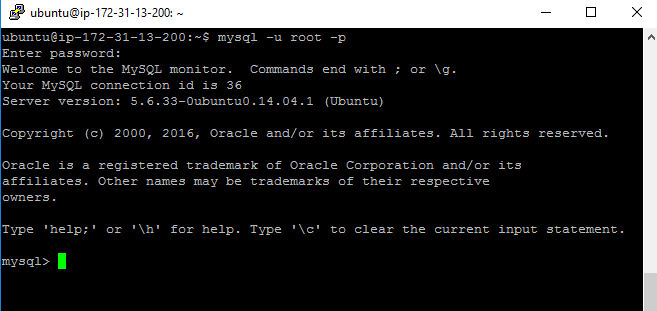
To login into MySQL Server, use the below given command.It will ask the mysql root password which you have set during mysql server installation.
mysql -u root -p
Given below is the reference from my server
sharad@ubuntu:~$ mysql -u root -p
Enter password:
Welcome to the MySQL monitor.  Commands end with ; or g.
Your MySQL connection id is 36
Server version: 5.6.17-0ubuntu0.14.04.1 (Ubuntu)

Copyright (c) 2000, 2014, Oracle and/or its affiliates. All rights reserved.

Oracle is a registered trademark of Oracle Corporation and/or its
affiliates. Other names may be trademarks of their respective
owners.

Type 'help;' or 'h' for help. Type 'c' to clear the current input statement.

mysql> show databases;
+--------------------+
| Database           |
+--------------------+
| information_schema |
| mysql              |
| performance_schema |
+--------------------+
3 rows in set (0.04 sec)

mysql> exit
Bye
Step 3 :MySQL Service to Start/Stop/Restart/Status
(a) To restart the mysql service
sudo service mysql restart
(b) To start mysql Service
sudo service mysql start
(c) To stop mysql service
sudo service mysql stop
(c) To get status of mysql service
sudo service mysql status
NOTE: For start/stop/restart/status of mysql , use service command.
In case, if you are using init.d script (/etc/init.d/mysql), it will show some error as given below.
sharad@ubuntu:~$
sharad@ubuntu:~$ sudo /etc/init.d/mysql restart
 * Stopping MySQL database server mysqld                                                                                                  [ OK ]
 * Starting MySQL database server mysqld                                                                                                         No directory, logging in with HOME=/
                                                                                                                                          [ OK ]
 * Checking for tables which need an upgrade, are corrupt or were
not closed cleanly.
sharad@ubuntu:~$
Hence, it is good to use service command for start/stop of mysql service
Replication in MySQL 5.6: GTIDs benefits and limitations:
Global Transactions Identifiers are one of the new features regarding replication in MySQL 5.6. They open up a lot of opportunities to make the life of DBAs much easier when having to maintain servers under a specific replication topology. However you should keep in mind some limitations of the current implementation. This post is the first one of a series of articles focused on the implications of enabling GTIDs on a production setup.
Basically the steps are:
- Make the master read-only so that the slaves can execute all events and be in sync with the master
- Change configuration for all servers and restart them
- Use
CHANGE MASTER TOto instruct all servers to use GTIDs - Disable read-only mode
This procedure will switch all your servers from regular replication to GTID replication. But if you are running a production system, you will probably want to gradually enable GTID replication for an easier rollback in the event of a problem. And some items in the documentation are not so clear.
For instance:
- Do we really need to restart all the servers at the same time? Downtime is something we like to avoid!
- Is it necessary to make the master read-only?
- Can we use regular replication for some slaves and GTID replication for other slaves at the same time?
To find an answer to these questions, let’s create a simple replication configuration with one master and two slaves, all running MySQL 5.6 with GTIDs disabled.
First try: configure only one of the servers with GTIDs
Let’s stop slave #2, change configuration and restart it:
|
1
2
3
4
5
|
mysql> show slave statusG
[...]
Slave_IO_Running: No
Slave_SQL_Running: Yes
[...]
|
The error log tells us why the IO thread has not started:
|
1
|
2013–05–17 13:21:26 3130 [ERROR] Slave I/O: The slave IO thread stops because the master has GTID_MODE OFF and this server has GTID_MODE ON, Error_code: 1593
|
So unfortunately if you want replication to work correctly, gtid_mode must be ON on all servers or OFF on all servers, but not something in the middle.
This time, replication on slave #1 will stop:
|
1
|
2013–05–17 13:32:08 2563 [ERROR] Slave I/O: The slave IO thread stops because the master has GTID_MODE ON and this server has GTID_MODE OFF, Error_code: 1593
|
These simple tests answer the first two questions: replication works only if all servers have the same value for gtid_mode, so you should restart them at the same time, which is best done by making the master read-only. However, “at the same time” means “at the same binlog position”, so you can perfectly restart the servers one by one.
Second try: GTIDs enabled, mixing regular replication and GTID replication
This time, we will enable GTID replication on slave #1, but not on slave #2
|
1
2
3
4
|
# slave #1
mysql> change master to master_auto_position = 1;
mysql> start slave;
|
and let’s create a new table on the master table
|
1
|
mysql> create table test.t (id int not null auto_increment primary key);
|
Executing SHOW TABLES FROM test on both slaves shows that the table has been created everywhere. So once GTIDs are enabled on all servers, you can have some slaves using file-based positioning and some other slaves using GTID-based positioning.
This answers the second question: we can have different replication modes on different servers, but only if all servers have gtid_mode set to ON. Could it be interesting to run file-based replication when gtid_mode is ON? I can’t think of any use case, so in practice, you’ll probably use either file-based replication only (gtid_mode=off for all servers) or GTID-based replication only (gtid_mode=on for all servers).
Additional question: how can you know if a slave is using GTID-based replication by inspecting the output of SHOW SLAVE STATUS? Look at the last field, Auto_Position:
|
1
2
3
4
5
6
7
8
9
|
# Slave #1
mysql> show slave statusG
[...]
Auto_Position: 1 -> GTID–based positioning
# Slave #2
mysql> show slave statusG
[...]
Auto_Position: 0 -> File–based positioning
|
Enabling GTID-based replication can be tricky if your application does not easily tolerate downtime or read-only mode, especially if you have a lot of servers to reconfigure. It would be really nice to be able to mix servers where gtid_mode is ON with servers where gtid_mode is OFF. This would greatly simplify the transition to GTID-based replication and allow easier rollbacks if something goes wrong.
The main benefit of using GTIDs is to have much easier failover than with file-based replication. We will see how to change the replication topology when using GTID-based replication. That will show where GTIDs shine and where improvements are expected.
This is the second post of a series of articles focused on MySQL 5.6 GTIDs. You can find part one here.
Our goal will be to go from setup #1 to setup #2 on the picture below, following various scenarios:

For these tests, all servers are running on 127.0.0.1 with ports ranging from 10000 for s0 to 10004 for s4.
Scenario #1: All slaves have processed all the writes
This is the easiest case, we will make s2 a master and redirect replication on the other servers to s2. This scenario can happen when you want to perform a planned failover.
With GTIDs, all the operations are straightforward:
|
1
2
3
4
5
6
7
8
9
10
11
12
|
#For s2 (the new master), we remove its configuration as a slave
s1> stop slave;
s1> reset slave all;
# For s0
s0> change master to master_host=‘127.0.0.1’,master_user=‘rsandbox’,master_password=‘rsandbox’,master_port=10001,master_auto_position=1;
s0> start slave;
# For s1, s3 and s4
mysql> stop slave;
mysql> change master to master_port=10002;
mysql> start slave;
|
Those of you who have already done these operations with file-based replication know that it is usually very tedious and that proper recording of binlog file/binlog position needs to be done with care if you don’t want to break replication or corrupt your data.
Scenario #2: One of the slaves is behind
Now let’s imagine that s0 has crashed, and that s1 has not received all writes (and therefore s3 and s4 are also lagging behind).
|
1
2
3
4
5
6
7
8
9
10
11
12
13
14
|
s2> select count(*) from t;
+—————+
| count(*) |
+—————+
| 2 |
+—————+
# s1 is behind
s1> select count(*) from t;
+—————+
| count(*) |
+—————+
| 0 |
+—————+
|
Can we still use master_auto_position = 1? Let’s hope so, as it is one of the ideas of GTIDs: having for each event across the cluster a monotonically incremental identifier for each event.
Notice that this is the same problem for s0 (which will be late when it comes back) and s1, s3 and s4.
Let’s give it a try!
|
1
2
3
4
5
6
7
8
9
10
11
12
|
# For s0,s1, s3, s4
mysql> stop slave;
mysql> change master to master_port=10002;
mysql> start slave;
# And then check the number of records from the t table
s1> select count(*) from t;
+—————+
| count(*) |
+—————+
| 2 |
+—————+
|
Great! So again, using GTIDs avoids the tedious work of looking for the binlog position of a specific event. The only part were we should pay attention is the server we choose for promotion: if it is not up-to-date, data may be lost or replication may be broken.
Scenario #3: The master has crashed before sending all writes
If the binary logs of the master are no longer readable, you will probably lose the events that have not been sent to the slaves (your last chance is to be able to recover data from the crashed master, but that’s another story). In this case, you will have to promote the most up-to-date slave and reconfigure the other slaves as we did above.
So we will suppose that we can read the binary logs of the crashed master. The first thing to do after choosing which slave will be the new master is to recover the missing events with mysqlbinlog.
Let’s say that we want to promote s1 as the new master. We need to know the coordinates of the last event executed:
|
1
2
3
4
|
s1> show slave statusG
[...]
Executed_Gtid_Set: 219be3a9–c3ae–11e2–b985–0800272864ba:1,
3d3871d1–c3ae–11e2–b986–0800272864ba:1–4
|
We can see that it’s not obvious to know which was the last executed event: is it 219be3a9-c3ae-11e2-b985-0800272864ba:1 or 3d3871d1-c3ae-11e2-b986-0800272864ba:4 ? A ‘Last_Executed_GTID’ column would have been useful.
In our case we can check that 3ec18c45-c3ae-11e2-b986-0800272864ba is the server UUID of s2, and that the other one is from s0 (for s0 which is crashed, the server UUID can be read in the auto.cnf file in the datadir).
So the last executed event is 219be3a9-c3ae-11e2-b985-0800272864ba:1. How can I instruct mysqlbinlog to start reading from there? Unfortunately, there is no --start-gtid-position option or equivalent. See bug #68566.
Does it mean that we cannot easily recover the data with mysqlbinlog? There is a solution of course, but very poor in my opinion: look for the binlog file/position of the last executed event and use mysqlbinlog with the good old --start-position option! Even with GTIDs, you cannot totally forget old-style replication positioning.
Reconfiguring replication when using GTIDs is usually straightforward: just connect the slave to the correct master with master_auto_position = 1. This can even be made easier with mysqlfailover from the MySQL Utilities (this will be the topic of a future post).
Unfortunately, this will not work for every use case, and until this is fixed, it is good to be aware of the current limitations.
–MySQL is the most popular Open Source Relational SQL database management system. MySQL is one of the best RDBMS being used for developing web-based software applications.
MySQL is a fast, easy-to-use RDBMS being used for many small and big businesses. MySQL is developed, marketed, and supported by MySQL AB, which is a Swedish company. MySQL is becoming so popular because of many good reasons:
- MySQL is released under an open-source license. So you have nothing to pay to use it.
- MySQL is a very powerful program in its own right. It handles a large subset of the functionality of the most expensive and powerful database packages.
- MySQL uses a standard form of the well-known SQL data language.
- MySQL works on many operating systems and with many languages including PHP, PERL, C, C++, JAVA, etc.
- MySQL works very quickly and works well even with large data sets.
- MySQL is very friendly to PHP, the most appreciated language for web development.
- MySQL supports large databases, up to 50 million rows or more in a table. The default file size limit for a table is 4GB, but you can increase this (if your operating system can handle it) to a theoretical limit of 8 million terabytes (TB).
- MySQL is customizable. The open-source GPL license allows programmers to modify the MySQL software to fit their own specific environments.
Cognosys provides hardened and ready to run images of MYSQL 5.6 on all public cloud (MYSQL 5.6 on AWS marketplace and MYSQL 5.6 on Azure).
Deploy your MYSQL 5.6 securely on cloud i.e. AWS marketplace and Azure and Google Cloud Platform (GCP)
Click on the respective cloud provider tab for technical information.
Secured MySQL 5.6 on Centos 7.3
Secured MySQL 5.6 on Ubuntu 14.04 LTS
Features
Features of MySQL
- Ease of Management – The software very easily gets downloaded and also uses an event scheduler to schedule the tasks automatically.
- Robust Transactional Support – Holds the ACID (Atomicity, Consistency, Isolation, Durability) property, and also allows distributed multi-version support.
- Comprehensive Application Development – MySQL has plugin libraries to embed the database into any application. It also supports stored procedures, triggers, functions, views and many more for application development.
- High Performance – Provides fast load utilities with distinct memory caches and table index partitioning.
- Low Total Cost Of Ownership – This reduces licensing costs and hardware expenditures.
- Open Source & 24 * 7 Support – This RDBMS can be used on any platform and offers 24*7 support for open source and enterprise edition.
- Secure Data Protection – MySQL supports powerful mechanisms to ensure that only authorized users have access to the databases.
- High Availability – MySQL can run high-speed master/slave replication configurations and it offers cluster servers.
- Scalability & Flexibility – With MySQL you can run deeply embedded applications and create data warehouses holding a humongous amount of data.
- Numeric – This data type includes integers of various sizes, floating-point(real) of various precisions and formatted numbers.
- Character-string – These data types either have a fixed, or a varying number of characters. This data type also has a variable-length string called CHARACTER LARGE OBJECT (CLOB) which is used to specify columns that have large text values.
- Bit-string – These data types are either of a fixed length or varying length of bits. There is also a variable-length bit string data type called BINARY LARGE OBJECT(BLOB), which is available to specify columns that have large binary values, such as images.
- Boolean – This data type has TRUE or FALSE values. Since SQL, has NULL values, a three-valued logic is used, which is UNKNOWN.
- Date & Time – The DATE data type has: YEAR, MONTH, and DAY in the form YYYY-MM-DD. Similarly, the TIME data type has the components HOUR, MINUTE, and SECOND in the form HH:MM: SS. These formats can change based on the requirement.
- Timestamp & Interval – The TIMESTAMP data type includes a minimum of six positions, for decimal fractions of seconds and an optional WITH TIME ZONE qualifier in addition to the DATE and TIME fields. The INTERVAL data type mentions a relative value that can be used to increment or decrement an absolute value of a date, time, or timestamp.
Features Added in MySQL 5.6
The following features have been added to MySQL 5.6:
- Security improvements. These security improvements were made:
- MySQL now provides a method for loading validation credentials encrypted in an option file named .mylogin.cnf. To create the file, use the mysql_config_editor The file can be read later by MySQL client programs to obtain authentication credentials for connecting to a MySQL server. mysql_config_editorwrites the .mylogin.cnf file using encryption so the credentials are not stored as clear text, and its contents when decrypted by client programs are used only in memory. In this way, passwords can be stored in a file in non-cleartext format and used later without ever needing to be exposed on the command line or in an environment variable..
- MySQL now supports stronger encryption for user account passwords, available through an authentication plugin named sha256_passwordthat implements SHA-256 password hashing. This plugin is built in, so it is always available and need not be loaded explicitly.
- The usersystem table now has a password_expired column. Its default value is ‘N’, but can be set to ‘Y’ with the new ALTER USER statement. After an account’s password has been expired, all operations performed in subsequent connections to the server using the account result in an error until the user issues a SET PASSWORD statement to establish a new account password.
- MySQL now has provision for checking password security:
- In statements that assign a password supplied as a cleartext value, the value is checked against the current password policy and rejected if it is weak (the statement returns an ER_NOT_VALID_PASSWORD error). This affects the CREATE USER, GRANT, and SET PASSWORD Passwords given as arguments to the PASSWORD() and OLD_PASSWORD() functions are checked as well.
- The strength of potential passwords can be assessed using the new VALIDATE_PASSWORD_STRENGTH()SQL function, which takes a password argument and returns an integer from 0 (weak) to 100 (strong).
Both capabilities are implemented by the validate_password plugin mysql_upgrade now produces a warning if it finds user accounts with passwords hashed with the older pre-4.1 hashing method. Such accounts should be updated to use more secure password hashing.
- On Unix platforms, mysql_install_dbsupports a new option, –random-passwords, that provides for more secure MySQL installation. Invoking mysql_install_db with –random-passwords causes it to assign a random password to the MySQL root accounts, set the “password expired” flag for those accounts, and remove the anonymous-user MySQL accounts..
- Logging has been modified so that passwords do not appear in plain text in statements written to the general query log, slow query log, and binary log. The mysqlclient no longer logs to its history file statements that refer to passwords
- START SLAVEsyntax has been modified to permit connection parameters to be specified for connecting to the master. This provides an alternative to storing the password in the info file.
- MySQL now sets the access control granted to clients on the named pipe to the minimum necessary for successful communication on Windows. Newer MySQL client software can open named pipe connections without any additional configuration. If older client software cannot be upgraded immediately, the new named_pipe_full_access_groupsystem variable can be used to give a Windows group the necessary permissions to open a named pipe connection. Membership in the full-access group should be restricted and temporary.
- MySQL Enterprise. The format of the file generated by the audit log plugin was changed for better compatibility with Oracle Audit Vault
- The audit log plugin included in MySQL Enterprise Edition now has the capability of filtering audited events based on user account and event status. Several new system variables provide DBAs with filtering control. In addition, audit log plugin reporting capability has been improved by the addition of several status variables.
- MySQL Enterprise Edition now includes a set of encryption functions based on the OpenSSL library that expose OpenSSL capabilities at the SQL level. These functions enable Enterprise applications to perform the following operations:
- Implement added data protection using public-key asymmetric cryptography
- Create public and private keys and digital signatures
- Perform asymmetric encryption and decryption
- Use cryptographic hashing for digital signing and data verification and validation
MySQL Enterprise Edition now includes MySQL Enterprise Firewall, an application-level firewall that enables database administrators to permit or deny SQL statement execution based on matching against whitelists of accepted statement patterns. This helps harden MySQL Server against attacks such as SQL injection or attempts to exploit applications by using them outside of their legitimate query workload characteristics
Changes to server defaults. Beginning with MySQL 5.6.6, several MySQL Server parameter defaults differ from the defaults in previous releases. The motivation for these changes is to provide better out-of-box performance and to reduce the need for database administrators to change settings manually.
InnoDB enhancements. These InnoDB enhancements were added:
- You can create FULLTEXTindexes on InnoDB tables, and query them using the MATCH() … AGAINST This feature includes a new proximity search operator (@) and several new configuration options and INFORMATION_SCHEMA tables
- Several ALTER TABLEoperations can be performed without copying the table, without blocking inserts, updates, and deletes to the table, or both. These enhancements are known collectively as online DDL..
- InnoDBnow supports the DATA DIRECTORY=’directory‘ clause of the CREATE TABLE statement, which permits creating tables outside of the data directory. This enhancement provides the flexibility to createtables in locations that better suit your server environment. For example, you can place busy tables on an SSD device, or large tables on a high-capacity HDD
.
- InnoDBnow supports the notion of “transportable tablespaces”, allowing file-per-table tablespaces (.ibd files) to be exported from a running MySQL instance and imported into another running instance without inconsistencies or mismatches caused by buffered data, in-progress transactions, and internal bookkeeping details such as the space ID and LSN.
The FOR EXPORT clause of the FLUSH TABLE command writes any unsaved changes from InnoDB memory buffers to the .ibd file. After copying the .ibd file and a separate metadata file to the other server, the DISCARD TABLESPACE and IMPORT TABLESPACE clauses of the ALTER TABLE statement are used to bring the table data into a different MySQL instance.
This enhancement provides the flexibility to move tables that reside in file-per-table tablespaces around to better suit your server environment. For example, you could move busy tables to an SSD device, or move large tables to a high-capacity HDD device.
.
- You can now set the InnoDBpage size for uncompressed tables to 8KB or 4KB, as an alternative to the default 16KB. This setting is controlled by the innodb_page_size configuration option. You specify the size when creating the MySQL instance. All InnoDB tablespaces within an instance share the same page size. Smaller page sizes can help to avoid redundant or inefficient I/O for certain combinations of workload and storage devices, particularly SSD devices with small block sizes.
- Improvements to the algorithms for adaptive flushingmake I/O operations more efficient and consistent under a variety of workloads. The new algorithm and default configuration values are expected to improve performance and concurrency for most users. Advanced users can fine-tune their I/O responsiveness through several configuration options.
- You can code MySQL applications that access InnoDBtables through a NoSQL-style API. This feature uses the popular memcached daemon to relay requests such as ADD, SET, and GET for key-value pairs. These simple operations to store and retrieve data avoid the SQL overhead such as parsing and constructing a query execution plan. You can access the same data through the NoSQL API and SQL. For example, you might use the NoSQL API for fast updates and lookups, and SQL for complex queries and compatibility with existing applications.
- Optimizer statistics for InnoDBtables are gathered at more predictable intervals and can persist across server restarts, for improved plan stability. You can also control the amount of sampling done for InnoDB indexes, to make the optimizer statistics more accurate and improve the query execution plan.
- New optimizations apply to read-only transactions, improving performance and concurrency for ad-hoc queries and report-generating applications. These optimizations are applied automatically when practical, or you can specify START TRANSACTION READ ONLYto ensure the transaction is read-only.
- You can move the InnoDBundo log out of the system tablespace into one or more separate tablespaces. The I/O patterns for the undo log make these new tablespaces good candidates to move to SSD storage, while keeping the system tablespace on hard disk storage.
- You can improve the efficiency of the InnoDBchecksum feature by specifying the configuration option innodb_checksum_algorithm=crc32, which turns on a faster checksum algorithm. This option replaces the innodb_checksums Data written using the old checksum algorithm (option value innodb) is fully upward-compatible; tablespaces modified using the new checksum algorithm (option value crc32) cannot be downgraded to an earlier version of MySQL that does not support the innodb_checksum_algorithm option.
- The InnoDBredo log files now have a maximum combined size of 512GB, increased from 4GB. You can specify the larger values through the innodb_log_file_size The startup behavior now automatically handles the situation where the size of the existing redo log files does not match the size specified by innodb_log_file_size and innodb_log_files_in_group.
- The –innodb-read-onlyoption lets you run a MySQL server in read-only mode. You can access InnoDB tables on read-only media such as a DVD or CD, or set up a data warehouse with multiple instances all sharing the same data directory.
- A new configuration option, innodb_compression_level, allows you to select a compression level for InnoDBcompressed tables, from the familiar range of 0-9 used by zlib. You can also control whether compressed pages in the buffer pool are stored in the redo log when an update operation causes pages to be compressed again. This behavior is controlled by the innodb_log_compressed_pages configuration option.
- Data blocks in an InnoDBcompressed table contain a certain amount of empty space (padding) to allow DML operations to modify the row data without re-compressing the new values. Too much padding can increase the chance of a compression failure, requiring a page split, when the data does need to be re-compressed after extensive changes. The amount of padding can now be adjusted dynamically, so that DBAs can reduce the rate of compression failures without re-creating the entire table with new parameters, or re-creating the entire instance with a different page size. The associated new configuration options are innodb_compression_failure_threshold_pct, innodb_compression_pad_pct_max.
- Several new InnoDB-related INFORMATION_SCHEMAtables provide information about the InnoDB buffer pool, metadata about tables, indexes, and foreign keys from the InnoDB data dictionary, and low-level information about performance metrics that complements the information from the Performance Schema tables.
- To ease the memory load on systems with huge numbers of tables, InnoDBnow frees up the memory associated with an opened table using an LRU algorithm to select tables that have gone the longest without being accessed. To reserve more memory to hold metadata for open InnoDB tables, increase the value of the table_definition_cache configuration option. InnoDB treats this value as a “soft limit” for the number of open table instances in the InnoDB data dictionary cache. For additional information, refer to the table_definition_cache
- InnoDBhas several internal performance enhancements, including reducing contention by splitting the kernel mutex, moving flushing operations from the main thread to a separate thread, enabling multiple purge threads, and reducing contention for the buffer pool on large-memory systems.
- InnoDBuses a new, faster algorithm to detect deadlocks. Information about all InnoDB deadlocks can be written to the MySQL server error log, to help diagnose application issues.
- To avoid a lengthy warmup period after restarting the server, particularly for instances with large InnoDBbuffer pools, you can reload pages into the buffer pool immediately after a restart. MySQL can dump a compact data file at shutdown, then consult that data file to find the pages to reload on the next restart. You can also manually dump or reload the buffer pool at any time, for example during benchmarking or after complex report-generation queries.
- As of MySQL 5.6.16, innochecksumprovides support for files greater than 2GB in size. Previously, innochecksum only supported files up to 2GB in size.
- As of MySQL 5.6.16, new global configuration parameters, innodb_status_output and innodb_status_output_locks, allow you to dynamically enable and disable the standard InnoDB Monitor and InnoDB Lock Monitor for periodic output. Enabling and disabling monitors for periodic output by creating and dropping specially named tables is deprecated and may be removed in a future release. For additional information.
- As of MySQL 5.6.17, Online DDL support is extended to the following operations for regular and partitioned InnoDBtables:
- OPTIMIZE TABLE
- ALTER TABLE … FORCE
- ALTER TABLE … ENGINE=INNODB(when run on an InnoDB table)
Online DDL support reduces table rebuild time and permits concurrent DML..
- As of MySQL 5.6.42, the zlib library version bundled with MySQL was raised from version 1.2.3 to version 1.2.11. MySQL implements compression with the help of the zlib library.
If you use InnoDB compressed tables Partitioning. These table-partitioning enhancements were added:
- The maximum number of partitions is increased to 8192. This number includes all partitions and all subpartitions of the table.
- It is now possible to exchange a partition of a partitioned table or a subpartition of a sub partitioned table with a nonpartitioned table that otherwise has the same structure using the ALTER TABLE … EXCHANGE PARTITION This can be used, for example, to import and export partitions.
- Explicit selection of one or more partitions or subpartitions is now supported for queries, as well as for many data modification statements, that act on partitioned tables. For example, assume a table twith some integer column c has 4 partitions named p0, p1, p2, and p3. Then the query SELECT * FROM t PARTITION (p0, p1) WHERE c < 5 returns only those rows from partitions p0 and p1 for which c is less than 5.
The following statements support explicit partition selection:
- SELECT
- DELETE
- INSERT
- REPLACE
- UPDATE
- LOAD DATA.
- LOAD XML.
For syntax, see the descriptions of the individual statements. Partition lock pruning greatly improves performance of many DML and DDL statements acting on tables with many partitions by helping to eliminate locks on partitions that are not affected by these statements. Such statements include many SELECT, SELECT … PARTITION, UPDATE, REPLACE, INSERT, as well as many other statements. For more information, including a complete listing of the statements whose performance has thus been improved.
- Performance Schema. The Performance Schema includes several new features:
- Instrumentation for table input and output. Instrumented operations include row-level accesses to persistent base tables or temporary tables. Operations that affect rows are fetch, insert, update, and delete.
- Event filtering by table, based on schema and/or table names.
- Event filtering by thread. More information is collected for threads.
- Summary tables for table and index I/O, and for table locks.
- Instrumentation for statements and stages within statements.
- Configuration of instruments and consumers at server startup, which previously was possible only at runtime.
- MySQL NDB Cluster. MySQL NDB Cluster is released as a separate product; the most recent GA releases are based on MySQL 5.6 and use version 7.3 of the NDB storage engine. Clustering support is not available in mainline MySQL Server 5.6 releases.
- Replication and logging. These replication enhancements were added:
- MySQL now supports transaction-based replication using global transaction identifiers(also known as “GTIDs”). This makes it possible to identify and track each transaction when it is committed on the originating server and as it is applied by any slaves.
Enabling of GTIDs in a replication setup is done primarily using the new gtid_mode and enforce_gtid_consistency system variables. For information about additional options and variables introduced in support of GTIDs,
When using GTIDs it is not necessary to refer to log files or positions within those files when starting a new slave or failing over to a new master, which greatly simplifies these tasks. For more information about provisioning servers for GTID replication with or without referring to binary log files,
GTID-based replication is completely transaction-based, which makes it simple to check the consistency of masters and slaves. If all transactions committed on a given master are also committed on a given slave, consistency between the two servers is guaranteed.
.
- MySQL row-based replication now supports row image control. By logging only those columns required for uniquely identifying and executing changes on each row (as opposed to all columns) for each row change, it is possible to save disk space, network resources, and memory usage. You can determine whether full or minimal rows are logged by setting the binlog_row_imageserver system variable to one of the values minimal (log required columns only), full (log all columns), or noblob (log all columns except for unneeded BLOB or TEXT columns).
- Binary logs written and read by the MySQL Server are now crash-safe, because only complete events (or transactions) are logged or read back. By default, the server logs the length of the event as well as the event itself and uses this information to verify that the event was written correctly. You can also cause the server to write checksums for the events using CRC32 checksums by setting the binlog_checksumsystem variable. To cause the server to read checksums from the binary log, use the master_verify_checksum system variable. The –slave-sql-verify-checksum system variable causes the slave SQL thread to read checksums from the relay log.
- MySQL now supports logging of master connection information and of slave relay log information to tables as well as files. Use of these tables can be controlled independently, by the master_info_repositoryand relay_log_info_repository system variable system variables. Setting master_info_repository to TABLE causes connection information logging to the slave_master_info Setting relay_log_info_repository to TABLE causes relay log information logging to the slave_relay_log_info table. Both tables are created automatically in the mysql system database.
In order for replication to be resilient to unexpected halts, the slave_master_info and slave_relay_log_info tables must each use a transactional storage engine, and beginning with MySQL 5.6.6, these tables are created using InnoDB for this reason. (Bug #13538891) If you are using a previous MySQL 5.6 release in which both of these tables use MyISAM, this means that, prior to starting replication, you must convert both of them to a transactional storage engine (such as InnoDB) if you wish for replication to be resilient to unexpected halts. You can do this in such cases by means of the appropriate ALTER TABLE … ENGINE=… statements. You should not attempt to change the storage engine used by either of these tables while replication is actually running.
- mysqlbinlognow has the capability to back up a binary log in its original binary format. When invoked with the –read-from-remote-server and –raw options, mysqlbinlog connects to a server, requests the log files, and writes output files in the same format as the originals
- MySQL now supports delayed replication such that a slave server deliberately lags behind the master by at least a specified amount of time. The default delay is 0 seconds. Use the new MASTER_DELAYoption for CHANGE MASTER TO to set the delay.
Delayed replication can be used for purposes such as protecting against user mistakes on the master (a DBA can roll back a delayed slave to the time just before the disaster) or testing how the system behaves when there is a lag. A replication slave having multiple network interfaces can now be caused to use only one of these (to the exclusion of the others) by using the MASTER_BIND option when issuing a CHANGE MASTER TO statement.
- The log_bin_basenamesystem variable has been added. This variable contains the complete filename and path to the binary log file. Whereas the log_bin system variable shows only whether or not binary logging is enabled, log_bin_basename reflects the name set with the –log-bin server option.
Similarly, the relay_log_basename system variable shows the filename and complete path to the relay log file.
- MySQL Replication now supports parallel execution of transactions with multithreading on the slave. When parallel execution is enabled, the slave SQL thread acts as the coordinator for a number of slave worker threads as determined by the value of the slave_parallel_workers server system variable. The current implementation of multithreading on the slave assumes that data and updates are partitioned on a per-database basis, and that updates within a given database occur in the same relative order as they do on the master. However, it is not necessary to coordinate transactions between different databases. Transactions can then also be distributed per database, which means that a worker thread on the slave can process successive transactions on a given database without waiting for updates to other databases to complete.
Since transactions on different databases can occur in a different order on the slave than on the master, simply checking for the most recently executed transaction is not a guarantee that all previous transactions on the master have been executed on the slave. This has implications for logging and recovery when using a multithreaded slave. For information about how to interpret binary logging information when using multithreading on the slave, Optimizer enhancements. These query optimizer improvements were implemented:
- The optimizer now more efficiently handles queries (and subqueries) of the following form:
SELECT … FROM single_table … ORDER BY non_index_column [DESC] LIMIT [M,]N;
That type of query is common in web applications that display only a few rows from a larger result set. For example:
SELECT col1, … FROM t1 … ORDER BY name LIMIT 10;SELECT col1, … FROM t1 … ORDER BY RAND() LIMIT 15;
The sort buffer has a size of sort_buffer_size. If the sort elements for N rows are small enough to fit in the sort buffer (M+N rows if M was specified), the server can avoid using a merge file and perform the sort entirely in memory. The optimizer implements Disk-Sweep Multi-Range Read. Reading rows using a range scan on a secondary index can result in many random disk accesses to the base table when the table is large and not stored in the storage engine’s cache. With the Disk-Sweep Multi-Range Read (MRR) optimization, MySQL tries to reduce the number of random disk access for range scans by first scanning the index only and collecting the keys for the relevant rows. Then the keys are sorted and finally the rows are retrieved from the base table using the order of the primary key. The motivation for Disk-sweep MRR is to reduce the number of random disk accesses and instead achieve a more sequential scan of the base table data The optimizer implements Index Condition Pushdown (ICP), an optimization for the case where MySQL retrieves rows from a table using an index. Without ICP, the storage engine traverses the index to locate rows in the base table and returns them to the MySQL server which evaluates the WHERE condition for the rows. With ICP enabled, and if parts of the WHERE condition can be evaluated by using only fields from the index, the MySQL server pushes this part of the WHERE condition down to the storage engine. The storage engine then evaluates the pushed index condition by using the index entry and only if this is satisfied is base row be read. ICP can reduce the number of accesses the storage engine has to do against the base table and the number of accesses the MySQL server has to do against the storage engine..
- The EXPLAINstatement now provides execution plan information for DELETE, INSERT, REPLACE, and UPDATE Previously, EXPLAIN provided information only for SELECT statements. In addition, the EXPLAIN statement now can produce output in JSON format.
- The optimizer more efficiently handles subqueries in the FROMclause (that is, derived tables). Materialization of subqueries in the FROM clause is postponed until their contents are needed during query execution, which improves performance. In addition, during query execution, the optimizer may add an index to a derived table to speed up row retrieval from it.
- The optimizer uses semi join and materialization strategies to optimize subquery execution.
- A Batched Key Access (BKA) join algorithm is now available that uses both index access to the joined table and a join buffer. The BKA algorithm supports inner join, outer join, and semi join operations, including nested outer joins and nested semi joins. Benefits of BKA include improved join performance due to more efficient table scanning. For more information.
- for use by developers. The interface is provided by a set of optimizer_trace_xxxsystem variables and the OPTIMIZER_TRACE table
- Condition handling. MySQL now supports the GET DIAGNOSTICS GET DIAGNOSTICS provides applications a standardized way to obtain information from the diagnostics area, such as whether the previous SQL statement produced an exception and what it was.
In addition, several deficiencies in condition handler processing rules were corrected so that MySQL behavior is more like standard SQL:
- Block scope is used in determining which handler to select. Previously, a stored program was treated as having a single scope for handler selection.
- Condition precedence is more accurately resolved.
- Diagnostics area clearing has changed. Bug #55843 caused handled conditions to be cleared from the diagnostics area before activating the handler. This made condition information unavailable within the handler. Now condition information is available to the handler, which can inspect it with the GET DIAGNOSTICS The condition information is cleared when the handler exits, if it has not already been cleared during handler execution.
- Previously, handlers were activated as soon as a condition occurred. Now they are not activated until the statement in which the condition occurred finishes execution, at which point the most appropriate handler is chosen. This can make a difference for statements that raise multiple conditions, if a condition raised later during statement execution has higher precedence than an earlier condition and there are handlers in the same scope for both conditions. Previously, the handler for the first condition raised would be chosen, even if it had a lower precedence than other handlers. Now the handler for the condition with highest precedence is chosen, even if it is not the first condition raised by the statement.
- Data types. These data type changes have been implemented:
- MySQL now permits fractional seconds for TIME, DATETIME, and TIMESTAMPvalues, with up to microseconds (6 digits) precision.
- Previously, at most one TIMESTAMP column per table could be automatically initialized or updated to the current date and time. This restriction has been lifted. Any TIMESTAMP column definition can have any combination of DEFAULT CURRENT_TIMESTAMP and ON UPDATE CURRENT_TIMESTAMP In addition, these clauses now can be used with DATETIME column definitions.
- In MySQL, the TIMESTAMP data type differs in nonstandard ways from other data types in terms of default value and assignment of automatic initialization and update attributes. These behaviors remain the default but now are deprecated, and can be turned off by enabling the explicit_defaults_for_timestamp system variable at server startup.
- Host cache. MySQL now provides more information about the causes of errors that occur when clients connect to the server, as well as improved access to the host cache, which contains client IP address and host name information and is used to avoid DNS lookups. These changes have been implemented:
- New Connection_errors_xxx status variables provide information about connection errors that do not apply to specific client IP addresses.
- Counters have been added to the host cache to track errors that do apply to specific IP addresses, and a new host_cachePerformance Schema table exposes the contents of the host cache so that it can be examined using SELECT Access to host cache contents makes it possible to answer questions such as how many hosts are cached, what kinds of connection errors are occurring for which hosts, or how close host error counts are to reaching the max_connect_errors system variable limit.
- The host cache size now is configurable using the host_cache_sizesystem variable.
.
- The OpenGIS specification defines functions that test the relationship between two geometry values. MySQL originally implemented these functions such that they used object bounding rectangles and returned the same result as the corresponding MBR-based functions. Corresponding versions are now available that use precise object shapes. These versions are named with an ST_ prefix. For example, Contains() uses object bounding rectangles, whereas ST_Contains() uses object shapes.
Features Deprecated in MySQL 5.6
The following features are deprecated in MySQL 5.6 and may be or will be removed in a future series. Where alternatives are shown, applications should be updated to use them.
For applications that use features deprecated in MySQL 5.6 that have been removed in a higher MySQL series, statements may fail when replicated from a MySQL 5.6 master to a higher-series slave, or may have different effects on master and slave. To avoid such problems, applications that use features deprecated in 5.6 should be revised to avoid them and use alternatives when possible.
- The ERROR_FOR_DIVISION_BY_ZERO, NO_ZERO_DATE, and NO_ZERO_IN_DATESQL modes are deprecated and setting the sql_mode value to include any of them generates a warning. In MySQL 5.7, these modes do nothing. Instead, their effects are included in the effects of strict SQL mode (STRICT_ALL_TABLES or STRICT_TRANS_TABLES). The motivation for the change in MySQL 5.7 is to reduce the number of SQL modes with an effect dependent on strict mode and make them part of strict mode itself.
To make advance preparation for an upgrade to MySQL 5.7. That discussion provides guidelines to assess whether your applications will be affected by the SQL mode changes in MySQL 5.7.
- Relying on implicit GROUP BY sorting in MySQL 5.6 is deprecated. To achieve a specific sort order of grouped results, it is preferable to use an explicit ORDER BY GROUP BY sorting is a MySQL extension that may change in a future release; for example, to make it possible for the optimizer to order groupings in whatever manner it deems most efficient and to avoid the sorting overhead.
- Pre-4.1 passwords and the mysql_old_password authentication plugin. Passwords stored in the older hash format used before MySQL 4.1 are less secure than passwords that use the native password hashing method and should be avoided. Pre-4.1 passwords and the mysql_old_password authentication plugin are now deprecated. To prevent connections using accounts that have pre-4.1 password hashes, the secure_auth system variable is now enabled by default. (To permit connections for accounts that have such password hashes, start the server with –secure_auth=0. However, because pre-4.1 passwords are deprecated, disabling secure_auth is also deprecated.)
Features Removed in MySQL 5.6
The following items are obsolete and have been removed in MySQL 5.6. Where alternatives are shown, applications should be updated to use them.
For MySQL 5.5 applications that use features removed in MySQL 5.6, statements may fail when replicated from a MySQL 5.5 master to a MySQL 5.6 slave, or may have different effects on master and slave. To avoid such problems, applications that use features removed in MySQL 5.6 should be revised to avoid them and use alternatives when possible.
- The –logserver option and the log system variable. Instead, use the general_log system variable to enable the general query log and the general_log_file system variable to set the general query log file name.
- The the log_slow_queriessystem variable. Instead, use the slow_query_log system variable to enable the slow query log and the slow_query_log_file system variable to set the slow query log file name.
- The –one-threadserver option. Use –thread_handling=no-threads
- The –safe-modeserver option.
- The –skip-thread-priorityserver option.
- The –table-cacheserver option. Use the table_open_cache system variable instead.
- The –init-rpl-roleand –rpl-recovery-rank options, the rpl_recovery_rank system variable, and the Rpl_status status variable.
- The engine_condition_pushdownsystem variable. Use the engine_condition_pushdown flag of the optimizer_switch variable instead.
- The have_csv, have_innodb, have_ndbcluster, and have_partitioningsystem variables. Use SHOW PLUGINS or query the PLUGINS table in the INFORMATION_SCHEMA database instead.
- The sql_big_tablessystem variable. Use big_tables
- The sql_low_priority_updatessystem variable. Use low_priority_updates
- The sql_max_join_sizesystem variable. Use max_join_size
- The max_long_data_sizesystem variable. Use max_allowed_packet
- The FLUSH MASTERand FLUSH SLAVE Use the RESET MASTER and RESET SLAVE statements instead.
- The SLAVE STARTand SLAVE STOP Use The START SLAVE and STOP SLAVE statements.
- The SHOW AUTHORSand SHOW CONTRIBUTORS
- The OPTIONand ONE_SHOT modifiers for the SET
- It is explicitly disallowed to assign the value DEFAULTto stored procedure or function parameters or stored program local variables (for example with a SET var_name = DEFAULT statement). It remains permissible to assign DEFAULT to system variables, as before.
- Most SHOW ENGINE INNODB MUTEXoutput is removed in 5.6.14. SHOW ENGINE INNODB MUTEX output is removed entirely in MySQL 5.7.2. Comparable information can be generated by creating views on Performance Schema tables.
——————————————————————————————————————————————————-
Major Features of MYSQL on cloud
- Partitioning to improve performance and management of very large database environments
- Row-based/Hybrid Replication for improved replication security
- Event Scheduler to create and schedule jobs that perform various database tasks
- XPath Support
- Dynamic General/Slow Query Log
- Performance/Load Testing Utility (mysqlslap)
- Improved! Full Text Search (faster, new dev templates)
- Improved! Archive engine (better compression, more features)
- Improved! User session and problem SQL identification
- Improved! MySQL embedded library (libmysqld)
- Additional INFORMATION_SCHEMA objects
- Faster data import operations (parallel file load)
- ACID Transactions to build reliable and secure business critical applications
- Stored Procedures to improve developer productivity
- Triggers to enforce complex business rules at the database level
- Views to ensure sensitive information is not compromised
- Information Schema to provide easy access to metadata
- Pluggable Storage Engine Architecture for maximum flexibility
- Archive Storage Engine for historical and audit data
AWS
Installation Instructions For Ubuntu
Note: How to find PublicDNS in AWS
Step 1) SSH Connection: To connect to the deployed instance, Please follow Instructions to Connect to Ubuntu instance on AWS Cloud
1) Download Putty.
2) Connect to the virtual machine using SSH key Refer this link:
- Hostname: PublicDNS / IP of machine
- Port : 22
Step 2) Database Login Details:
Please use MySQL root password Passw@rd123 for the MySQL configuration.
After your login with SSH you can login to MySQL using
SSH shell> mysql -u root -p
You shall be prompted for password where you can enter the password: Passw@rd123
Once you are connected to the MySQL server, a welcome message is displayed and the mysql> prompt appears
Note : Please change the password immediately after first login.
You can reset your root password with the following statement:
mysql> ALTER USER ‘root’@’localhost’ IDENTIFIED BY ‘new_password’;
You can come out of mysql Prompt with “exit” command.
Step 3) MySQL Information:
Server version: 5.6.33 MySQL Community Server
MySQL Services:
Using your Unix Login you can perform below actions on MySQL service
- To start MySQL Service: sudo service mysql start
- To stop MySQL Service: sudo service mysql stop
- To restart MySQL Service: sudo service mysql restart
- To get status of MySQL Service: sudo service mysql status
Step 4) Other Information:
1.Default ports
- MYSQL: 3306
Default ports: MySQL Port: 3306 this is by default not allowed on cloud firewall for security.
Configure custom inbound and outbound rules using this link
2. To access Webmin interface for management please follow this link
Installation Instructions For Redhat 7.3
Note : How to find PublicDNS in AWS
Step 1) SSH Connection: To connect to the deployed instance, Please follow Instructions to Connect to Redhat instance on AWS Cloud
1) Download Putty.
2) Connect to the virtual machine using SSH key Refer this link:
- Hostname: PublicDNS / IP of machine
- Port : 22
Step 2) Database Login Details:
Please use MySQL root password Passw@rd123 for the MySQL configuration.
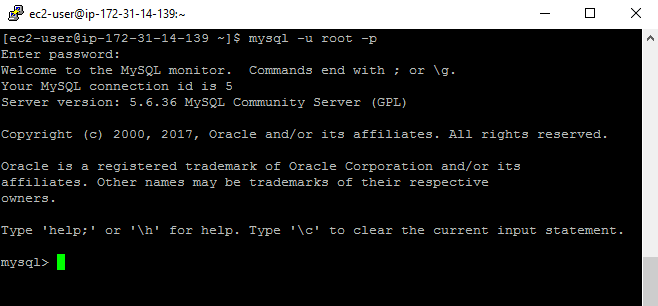
After your login with SSH, you can log in to MySQL using
SSH shell> Mysql -u root -p
You shall be prompted for password where you can enter the password: Passw@rd123
Once you are connected to the MySQL server, a welcome message is displayed and the mysql> prompt appears
Note: Please change the password immediately after the first login.
You can reset your root password with the following statement:
mysql> ALTER USER ‘root’@’localhost’ IDENTIFIED BY ‘new_password’;
You can come out of MySql Prompt with “exit” command.
Step 3) MySQL Information:
Server version: 5.6.36 MySQL Community Server
MySQL Services:
Using your Unix Login you can perform below actions on MySQL service
- To start MySQL Service: sudo systemctl start mysqld
- To stop MySQL Service: sudo systemctl stop mysqld
- To restart MySQL Service: sudo systemctl restart mysqld
- To get status of MySQL Service: sudo systemctl status mysqld
Step 4) Other Information:
1.Default ports:
- MYSQL: 3306
Default ports: MySQL Port: 3306 this is by default not allowed on cloud firewall for security.
Configure custom inbound and outbound rules using this link
2. To access Webmin interface for management please follow this link
Azure
Installation Instructions For Ubuntu
Note: How to find PublicDNS in Azure
Step 1) SSH Connection: To connect to the deployed instance, Please follow Instructions to Connect to Ubuntu instance on Azure Cloud
1) Download Putty.
2) Connect to the virtual machine using following SSH credentials:
- Hostname: PublicDNS / IP of machine
- Port : 22
Username: Your chosen username when you created the machine ( For example: Azureuser)
Password: Your Chosen Password when you created the machine ( How to reset the password if you do not remember)
Step 2) Database Login Details:
Please use MySQL root password Passw@rd123 for the MySQL configuration.
After your login with SSH, you can log in to MySQL using
SSH shell> Mysql -u root -p
You shall be prompted for password where you can enter the password: Passw@rd123
Once you are connected to the MySQL server, a welcome message is displayed and the mysql> prompt appears
Note: Please change the password immediately after the first login.
You can reset your root password with the following statement:
mysql> ALTER USER ‘root’@’localhost’ IDENTIFIED BY ‘new_password’;
You can come out of MySql Prompt with “exit” command.
Step 3) MySQL Information:
Server version: 5.6.33 MySQL Community Server
MySQL Services:
Using your Unix Login you can perform below actions on MySQL service
- To start MySQL Service: sudo systemctl start mysqld
- To stop MySQL Service: sudo systemctl stop mysqld
- To restart MySQL Service: sudo systemctl restart mysqld
- To get status of MySQL Service: sudo systemctl status mysqlds

Step 4)Other Information:
1.Default ports:
-
- MYSQL: 3306
Default ports: MySQL Port: 3306 this is by default not allowed on cloud firewall for security.
Configure custom inbound and outbound rules using this link
2. To access Webmin interface for management please follow this link
Installation Instructions For Centos
Note : How to find PublicDNS in Azure
Step 1) SSH Connection: To connect to the deployed instance, Please follow Instructions to Connect to Centos instance on Azure Cloud
1) Download Putty.
2) Connect to the virtual machine using following SSH credentials:
- Hostname: PublicDNS / IP of machine
- Port : 22
Username: Your chosen username when you created the machine ( For example: Azureuser)
Password: Your Chosen Password when you created the machine ( How to reset the password if you do not remember)
Step 2) Database Login Details:
Please use MySQL root password Passw@rd123 for the MySQL configuration.
After your login with SSH you can login to MySQL using
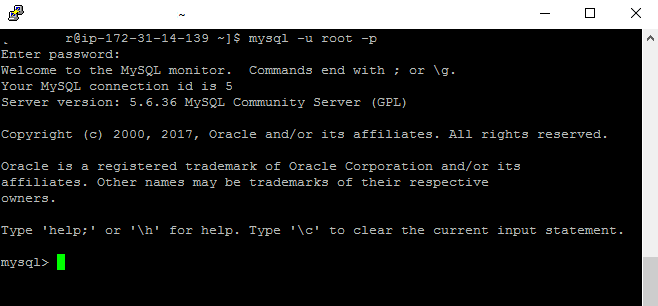
SSH shell> mysql -u root -p
You shall be prompted for password where you can enter the password: Passw@rd123
Once you are connected to the MySQL server, a welcome message is displayed and the mysql> prompt appears
Note : Please change password immediately after first login.
You can reset your root password with the following statement:
mysql> ALTER USER ‘root’@’localhost’ IDENTIFIED BY ‘new_password’;
You can come out of mysql Prompt with “exit” command.
Step 3) MySQL Information:
Server version: 5.6.33 MySQL Community Server
MySQL Services:
Using your Unix Login you can perform below actions on MySQL service
- To start MySQL Service: sudo systemctl start mysqld
- To stop MySQL Service: sudo systemctl stop mysqld
- To restart MySQL Service: sudo systemctl restart mysqld
- To get status of MySQL Service: sudo systemctl status mysqld

Step 4)Other Information:
1.Default ports: MySQL Port: 3306 this is by default not allowed on cloud firewall for security.
Configure custom inbound and outbound rules using this link
2. To access Webmin interface for management please follow this link
- Installation Instructions For Windows
- Installation Instructions For Ubuntu
- Installation Instructions For Redhat
- Installation Instructions For Centos
Installation Instructions For Windows
Step 1) VM Creation:
1.Click the Launch on Compute Engine button to choose the hardware and network settings.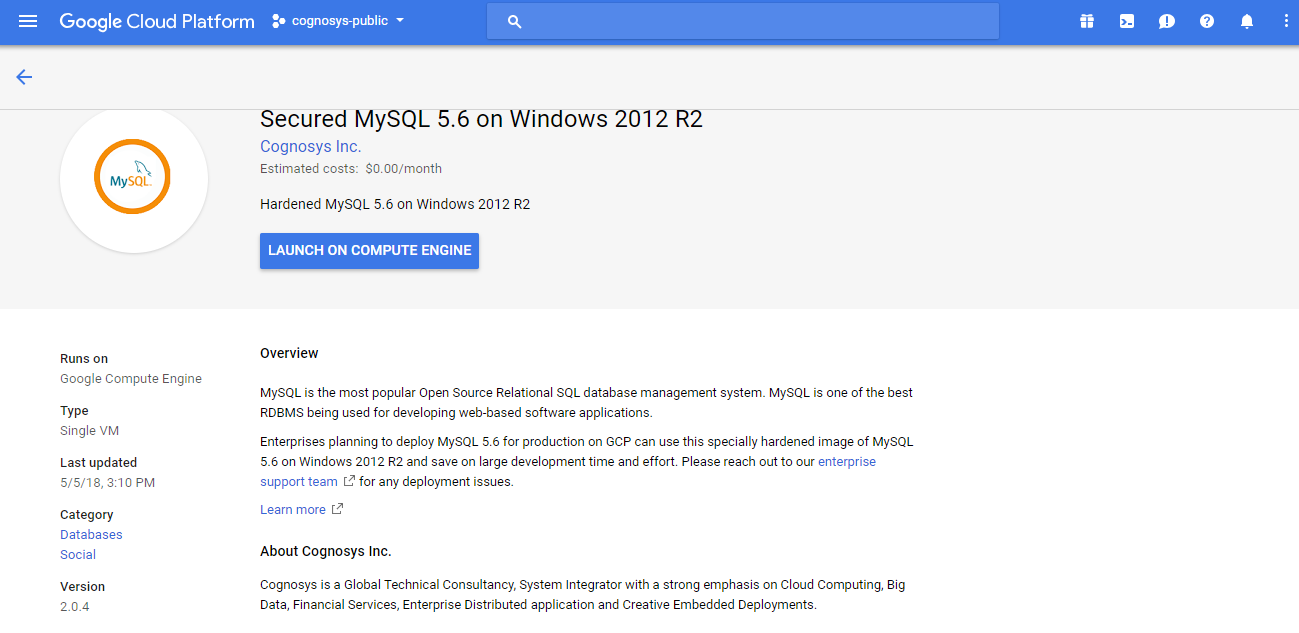
2.You can see at this page, an overview of Cognosys Image as well as some estimated costs of VM.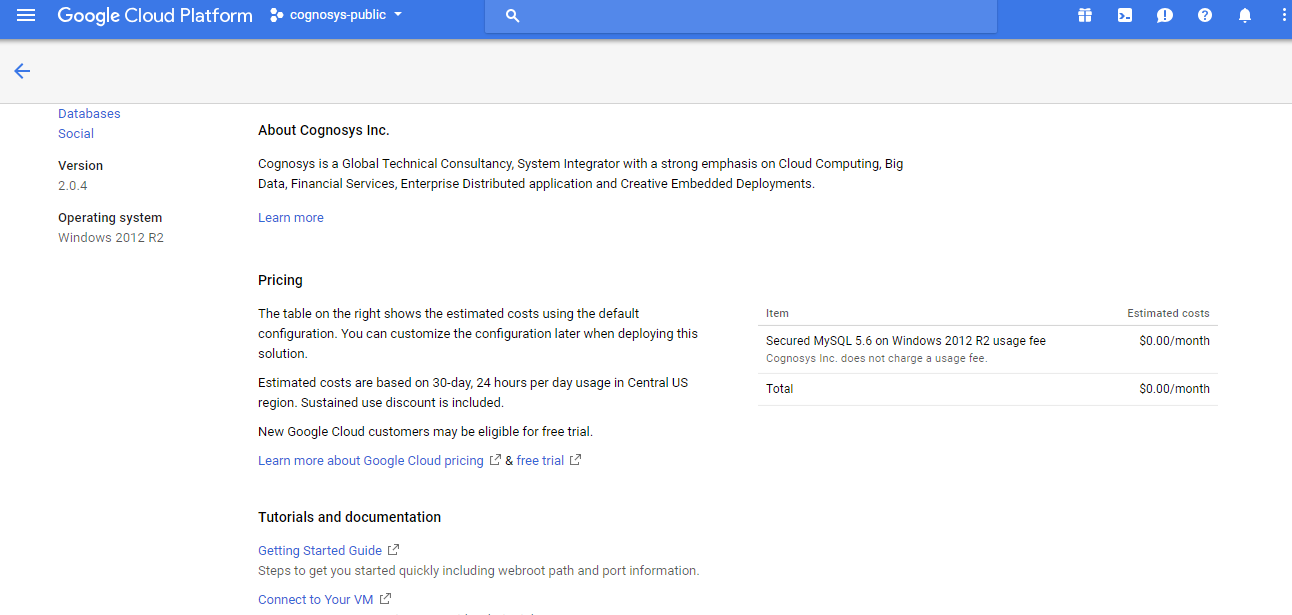
3.In the settings page, you can choose the number of CPUs and amount of RAM, the disk size and type etc.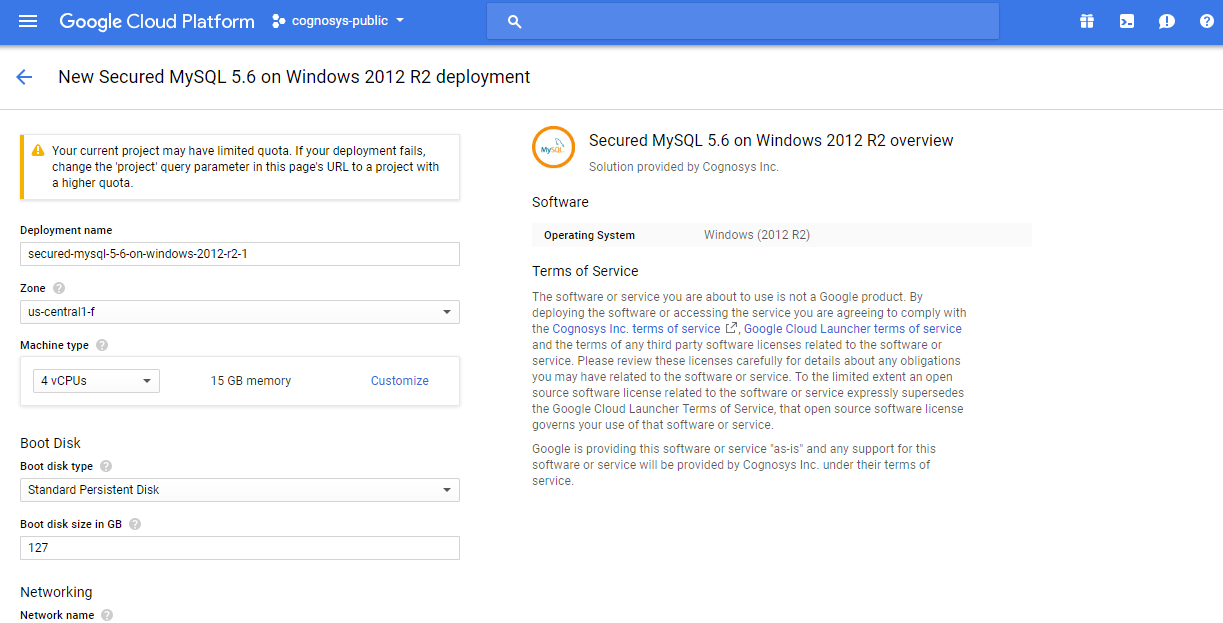
Step 2) RDP Connection: To initialize the DB Server connect to the deployed instance, Please follow Instructions to Connect to Windows instance on Google Cloud
Step 3) Database Login Details:
The below screen appears after successful deployment of the image.

For local MySQL root password, please use the temporary password generated automatically during image creation as shown above.
i) Please connect to Remote Desktop as given in step 2 to ensure stack is properly configured and DB is initialized.
ii) You can use MySQL server instance as localhost, username root and password as shown above.
If you have closed the deployment page you can also get the MySQL root password from VM Details “Custom metadata” Section
Installation Instructions For Ubuntu
1.Click the Launch on Compute Engine button to choose the hardware and network settings.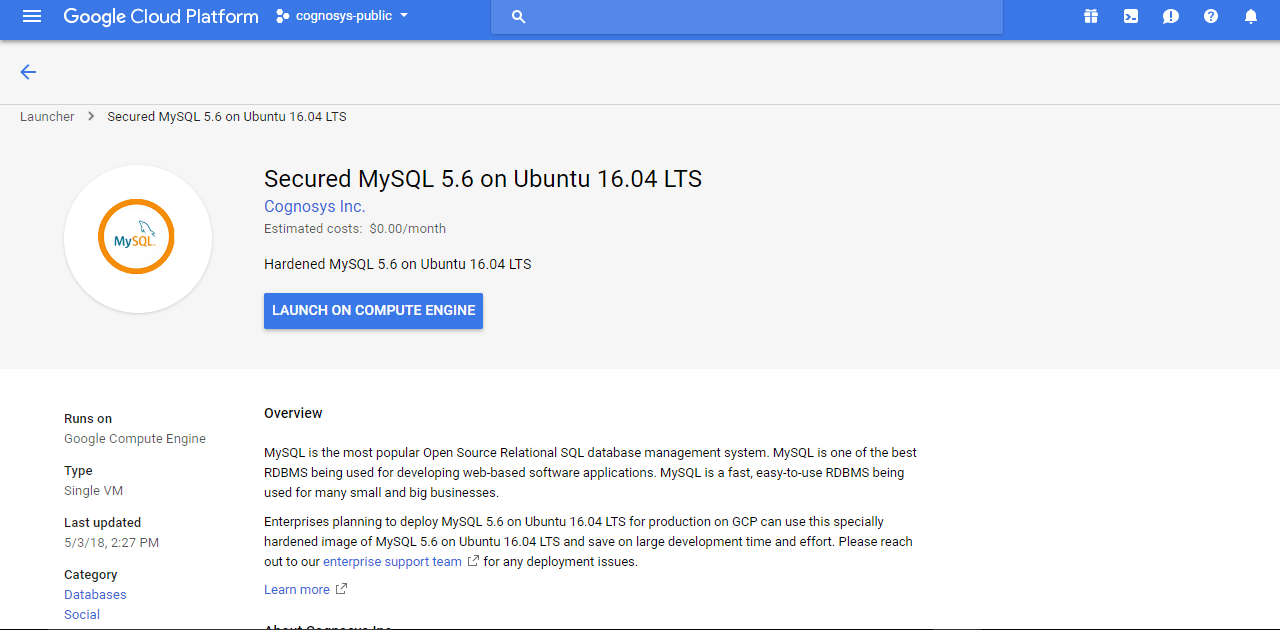
2.You can see at this page, an overview of Cognosys Image as well as some estimated costs of VM.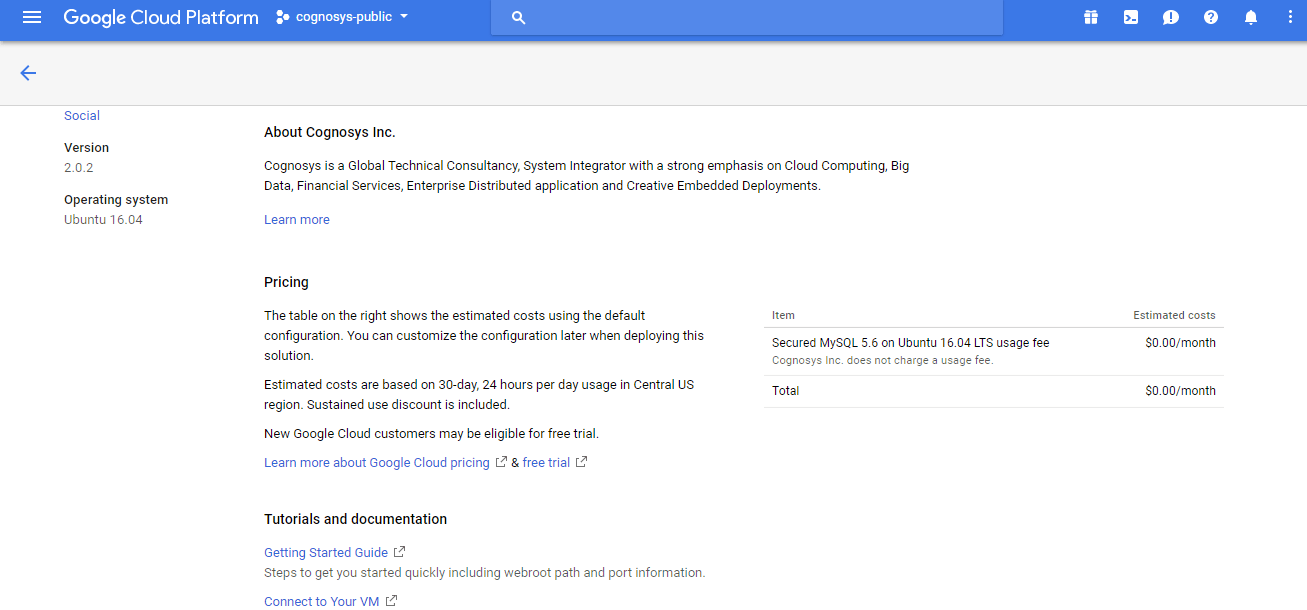
3.In the settings page, you can choose the number of CPUs and amount of RAM, the disk size and type etc.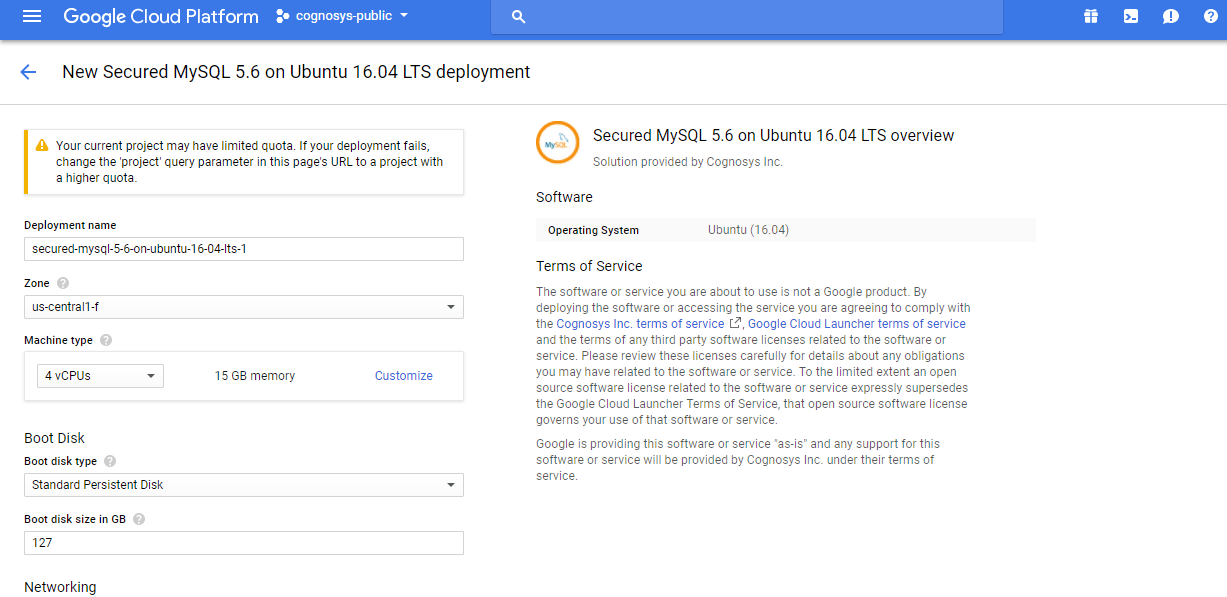
Step 2) SSH Connection: To connect to the deployed instance, Please follow Instructions to Connect to Ubuntu instance on Google Cloud
1) Download Putty.
2) Connect to the virtual machine using SSH key
- Hostname: PublicDNS / IP of machine
- Port : 22
Step 3) Database Login Details:
The below screen appears after successful deployment of the image.
For local MySQL root password, please use the temporary password generated automatically during image creation as shown above.
i) Please connect to Remote Desktop as given in step 2 to ensure stack is properly configured and DB is initialized.
ii) You can use MySQL server instance as localhost, username root and password as shown above.
If you have closed the deployment page you can also get the MySQL root password from VM Details “Custom metadata” Section
Step 4) MySQL Information:
Server version: 5.6.33 MySQL Community Server
MySQL Services:
Using your Unix Login you can perform below actions on MySQL service
- To start MySQL Service: sudo service mysql start
- To stop MySQL Service: sudo service mysql stop
- To restart MySQL Service: sudo service mysql restart
- To get status of MySQL Service: sudo service mysql status
Step 5) Other Information:
1.Default ports:
- Linux Machines: SSH Port – 22
- MYSQL: 3306
2. To access Webmin interface for management please follow this link
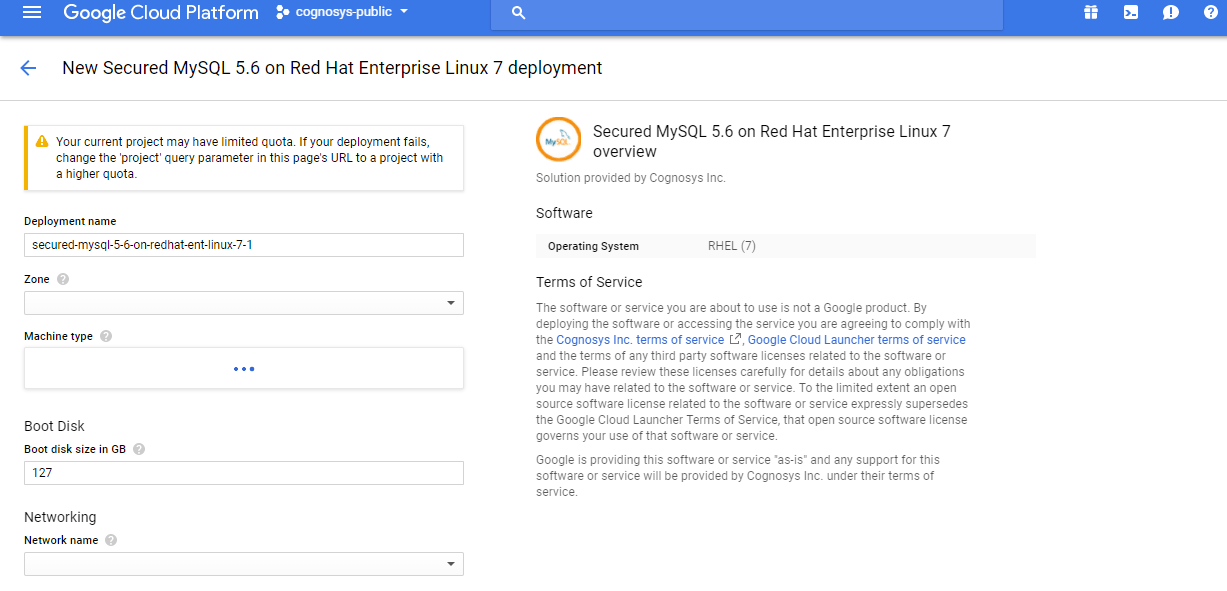
Installation Instructions For Redhat
Step 1) VM Creation:
1.Click the Launch on Compute Engine button to choose the hardware and network settings.

2.You can see at this page, an overview of Cognosys Image as well as some estimated costs of VM.

3.In the settings page, you can choose the number of CPUs and amount of RAM, the disk size and type etc.
Step 2) SSH Connection: To connect to the deployed instance, Please follow Instructions to Connect to Redhat instance on Google Cloud
1) Download Putty.
2) Connect to the virtual machine using SSH key
- Hostname: PublicDNS / IP of machine
- Port : 22
Step 3) Database Login Details:
The below screen appears after successful deployment of the image.
For local MySQL root password, please use the temporary password generated automatically during image creation as shown above.
i) Please connect to Remote Desktop as given in step 2 to ensure stack is properly configured and DB is initialized.
ii) You can use MySQL server instance as localhost, username root and password as shown above.
If you have closed the deployment page you can also get the MySQL root password from VM Details “Custom metadata” Section
Step 4) MySQL Information:
Server version: 5.6.36 MySQL Community Server
MySQL Services:
Using your Unix Login you can perform below actions on MySQL service
- To start MySQL Service: sudo systemctl start mysqld
- To stop MySQL Service: sudo systemctl stop mysqld
- To restart MySQL Service: sudo systemctl restart mysqld
- To get status of MySQL Service: sudo systemctl status mysqld
Step 5) Other Information:
1.Default ports:
- Linux Machines: SSH Port – 22
- MYSQL: 3306
2. To access Webmin interface for management please follow this link
Installation Instructions For CentOS
Step 1) SSH Connection: To connect to the deployed instance, Please follow Instructions to Connect to CentOS instance on Google Cloud
1) Download Putty.
2) Connect to virtual machine using following SSH credentials:
- Hostname: PublicDNS / IP of machine
- Port : 22
Username: Your chosen username when you created the machine
Password : Your Chosen Password when you created the machine ( How to reset the password if you do not remember)
Step 2) Other Information:
1.Default ports:
- Linux Machines: SSH Port – 22
2. To access Webmin interface for management please follow this link
