1-click AWS Deployment 1-click Azure Deployment 1-click Google Deployment
Overview
Kentico Cloud is a cloud-first headless CMS for digital agencies and their clients which allows you to manage all your content in one place, display that content on any channel using a REST API and personalize the customer experience.
Our industry changes regularly, and rapidly. When Luminary was founded in 1999, the concept of a CMS alone was revolutionary! (We were even building our own in Classic ASP…)
In a couple of short decades, we’ve seen several evolutions in the web content management system (WCMS) industry. In the beginning, eager technical agencies (such as Luminary) were experimenting with building their own in-house CMS platforms to perform basic content management. Then came a number of dedicated CMS vendors such as Kentico, WordPress, Sitecore and many, many others. As these products matured, the market leaders started to provide more complete digital marketing features such as e-commerce, email marketing, and more recently marketing automation and personalization. The market is now dominated by a smaller number of very mature (and very large) competing platforms that require significant IT infrastructure to host.
These market leaders are now working hard on “what’s next”, and just like so many others in our industry, Kentico and its competitors are looking to the cloud.
What a number of Kentico’s competitors have done to satisfy their TO THE CLOUD! ambitions, is simply pick up their existing CMS platform, and drop it in a cloud hosting provider (such as Amazon AWS or Microsoft Azure). To be fair, Kentico actually did this too, way back in 2011 with Kentico+, and was the first CMS platform provider to be certified for Azure. This is perfectly fine to do, and something we do ourselves quite a bit, as we regularly host Kentico EMS with Microsoft Azure in the cloud!
This is not Petr Palas’s vision for Kentico Cloud, however. This time, Kentico is aiming for a truly cloud-first platform, building inherently upon the advantages cloud-based services provide, including scalability, flexibility, redundancy, and speed to market. This requires a completely new architecture and paradigm shift, building on the learnings from the extremely successful Kentico EMS, but tackling the new challenges faced in this modern world of cloud-based digital marketing. As a Kentico MVP and through conversations with the product owners themselves at the 404 conference, I know that Kentico has huge plans for this product line. If its progress continues at the break-neck pace that its initial offerings suggest, then the next year or two will be very exciting in this space!
Kentico Cloud currently consists of three separate but complementary products; Kentico Draft, Kentico Deliver, and Kentico Engage.
Kentico Draft :
OK, so Kentico Draft has already been live for a while now (we’ve even used it in a couple of projects). Many of you might have caught on early however, that the domain used for Draft since its launch was kenticocloud.com! Draft was the first product in the Kentico Cloud family.
Draft is a purely cloud-based content gathering and editing tool. Designed in part to solve the problem of websites being built and then waiting on content before they can be launched, Draft allows you to create content types, sitemaps and taxonomy, upload structured content and images, and manage workflows, all in parallel with your website being developed. Then when the site build is complete, the content can be quickly and easily imported into the site. Draft is already fully supported for import into Kentico CMS/EMS
Kentico Deliver :
Deliver is a cloud-based, API-first or “Headless” CMS. Modern web applications are increasingly being built on a wide variety of platforms, from mobile apps, to front-end or JavaScript driven single page apps (SPAs). Kentico recognizes that developers are excited about new platforms such as ASP.NET MVC, .NET Core and NodeJS, or even having no “back-end” of a website at all, building the whole site in HTML, CSS and JavaScript and interfacing with a “Headless CMS” using JavaScript and REST APIs.
Kentico is an all-in-one CMS, E-commerce and Online Marketing platform that drives business results for companies of all sizes both on-premise or in the cloud. It gives customers and partners powerful, comprehensive tools and customer-centric solutions to create stunning websites and manage customer experiences easily in a dynamic business environment. The Kentico Web Content Management Solution‘s rich selection of out-of-the-box web parts, easy customizations and open API, quickly gets websites up and running. When combined with the full set of integrated solutions, including Online Marketing, E-commerce, Intranet, Collaboration, Kentico fully optimizes the digital customer experience across multiple channels.
Kentico is the only all-in-one platform built entirely in-house, meaning you avoid the frustrations of dealing with disparate systems – so you’re up and running quicker. Providing the right customer experience has never been so simple.
What is a Headless CMS:
Traditional CMS platforms manage your content for you, but also generate and serve the pages themselves to the browser. Kentico CMS is an example of this, with its Portal Engine for template creation, in-context or on-page editing, Preview mode, device previews, and all the other great features you’ve come to love.
A “Headless CMS” only manages the content for you, and leaves building the website and displaying that content completely up to you (or another connected system of course). Early competitors in the Headless CMS space include Prismic.io and Contently.
Many CMS vendors would consider and promote themselves as competitors in the headless CMS space, such as WordPress via its REST API. It is technically possible to use several CMS platforms including Kentico CMS as a Headless CMS via a REST API, but this is not something for which they were primarily designed. While you lose the friendly editing features mentioned above, a Headless CMS can provide many additional benefits, such as:
- Creating your content once, then delivering it across multiple channels or platforms, such as websites, apps, smartwatches, IoT devices and third-party content aggregators
- Building your web front-end in your technology of choice
- Finalizing your content before your website has been built (this has a range of benefits beyond the scope of this article!)
Kentico Deliver offers you all these benefits, along with a completely redesigned, user-centric interface. It does of course integrate perfectly with Draft for content you’ve already gathered there, or you could potentially pull your content from a range of other sources in the future.
Kentico promises to produce Software Development Kits (SDKs) for popular delivery platforms, such as ASP.NET, PHP, and even iOS and Android (mobile apps)
Kentico Engage
Kentico Engage is a truly cloud-first Digital Marketing platform.
Early competitors in this space could include HubSpot, Market, and Autopilot, yet many of these aren’t truly direct competitors, as they often try to provide a broader feature set, the way many existing CMS platforms do.
At the most basic level, engage can be implemented in your site using a simple JavaScript snippet, very much like Google Analytics or any number of other marketing or analytics tools. This immediately allows Engage to start gathering information on your visitors, analyzing behaviors, and providing insights. Where analytics tools are used to identify trends, engage also seeks to give you insights into individual users, helping you analyze and hopefully predict behavior for certain customer segments or personas.
The real power, however, is tapped by using Engages APIs in the development of your site, to leverage all that information you have gathered to drive dynamic personalization across any channel you are delivering your content on.
Powers Combined
While it’s great that any of the Kentico Cloud products can be used independently and integrated with pretty much any other platform out there, combining them together also presents a compelling option for a powerful, inexpensive, rapid, light-weight, cloud-based, omni-channel digital marketing platform (phew, that’s a lot of buzzwords!), all while keeping the choice of publishing platform and additional tools in your hands.
Headless or Not:
Straight up, I will say that this is a new product set from Kentico. It is not going to replace Kentico CMS and EMS. It is very much a targeted, market-driven response to an emerging trend that will continue to grow. However, the need for an extremely powerful, mature, full-featured, on-premise, all-in-one system such as Kentico EMS is not going anywhere!
So, when should you consider “going headless” with Kentico Cloud?
A few questions that might help guide your strategy:
- Do you have multiple delivery channels (such as website plus mobile app) for your centralized content?
- Are you already reliant on one or more existing systems (such as mailing lists, forms, or e-commerce) that you wish to continue using?
- Do you have a strong preference for a presentation technology which does not provide content management?
- Do you have a need to quickly deploy a stand-alone campaign, range or product site?
If you answer yes to any of the above, then Kentico Cloud could be worth considering.
- Do you require your marketers or content editors to create their own pages with a certain level of flexibility?
- Do you need an all-in-one solution that provides content management, marketing automation, e-commerce, or other connected digital features?
If you answered yes to either of these, then perhaps a full-featured, enterprise-ready platform such as Kentico EMS is a better fit.
Kentico Cloud is not a new version of Kentico EMS – it’s something very different. The market for feature-rich, enterprise-ready online marketing platforms such as Kentico EMS is not replaced by Kentico Cloud, only complemented. Kentico and its partners will continue to focus on implementing Kentico CMS and EMS for many years to come!
Kentico Cloud is an exciting foray by Kentico into the brave new world of cloud-first digital marketing. It positions Kentico, and its partners such as us, very well to tackle the new challenges and project types that a changing digital landscape presents us, from microservices and “API everywhere” movements, to changes in consumer technology such as wearables, VR and the Internet of Things. Yet in the short term, it may also present a modern, lightweight, rapid solution for your next digital project.
Installing Kentico – custom installation:
The following procedure describes the installation of Kentico in the most basic scenario for development purposes. You need to have an IIS server installed along with access to an SQL server.
- Click Next on the welcome screen of the installer.
- Select your country. The installer automatically tries to pre-select the appropriate country based on your system’s locale.
- Agree to the license terms.
- Click Next.
- Click Custom installation


- Check if the installation location for program files suits you (these are only the setup files, not the web project).
- When should I install only program files?

- Click Next.
- Check if the installation location for your web project suits you (the default path is C:\inetpub\wwwroot\Kentico11).

- Choose your installation type configuration. We recommend the default options:
- Local IIS/IIS Express – installs the web project into the local Internet Information Services server. If you do not have IIS installed, the tool automatically installs the simplified version, IIS Express.
- If you have an existing IIS installation on the machine, it must contain at least one Website (you can select the target Website in the installer). The selected website must have at least one Site Binding of the http type, otherwise an error will occur during the installation.
- .NET Framework 4.6 – uses the .NET Framework version 4.6 installed on your machine. If you do not have it installed, the Installer will install it automatically.
- Web site project – installs the web site project type.
- You can read about the differences between the two project types in Web Application Projects versus Web Site Projects on MSDN.
- To install a Microsoft Azure project, you need to select the Built-in web server in Visual Studio option.
- Local IIS/IIS Express – installs the web project into the local Internet Information Services server. If you do not have IIS installed, the tool automatically installs the simplified version, IIS Express.
- Click Next.
- Check I have access to the SQL server.
- What if I do not install the database with my web project?
- Select your SQL server from the list.
- Choose an authentication option for your SQL server.
- The most common is an SQL Server account, in which case fill in the user name and password.
If you choose the Integrated Windows authentication option:
Make sure that the login of the user you are authenticated as already exists in the SQL server database and has correct schema configured (recommended schema is dbo).
- Click Establish connection.
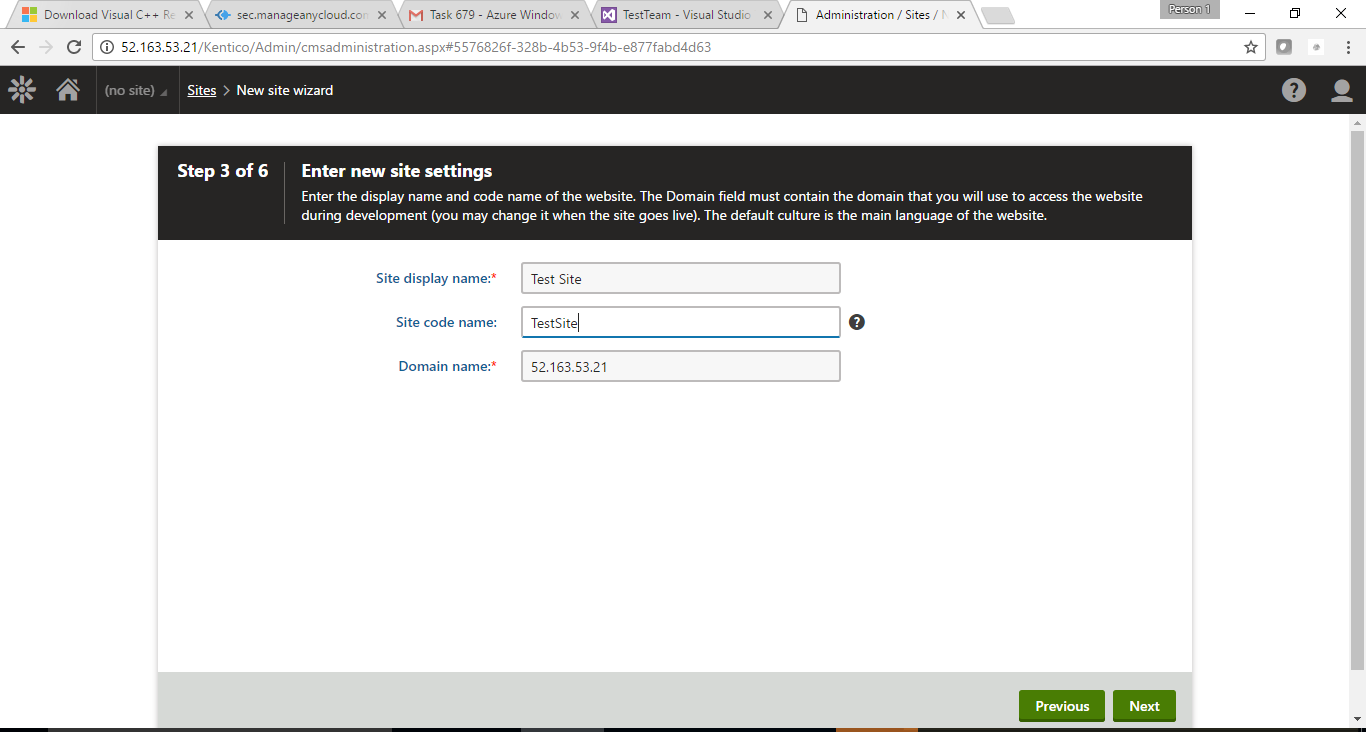
- Type the name of a new database for your web project
- .

- Click Next.
- Leave the default configuration of components (all components included) and click Next.
- What are performance counters for Health Monitoring
- What are Windows services for Scheduler and Health Monitoring

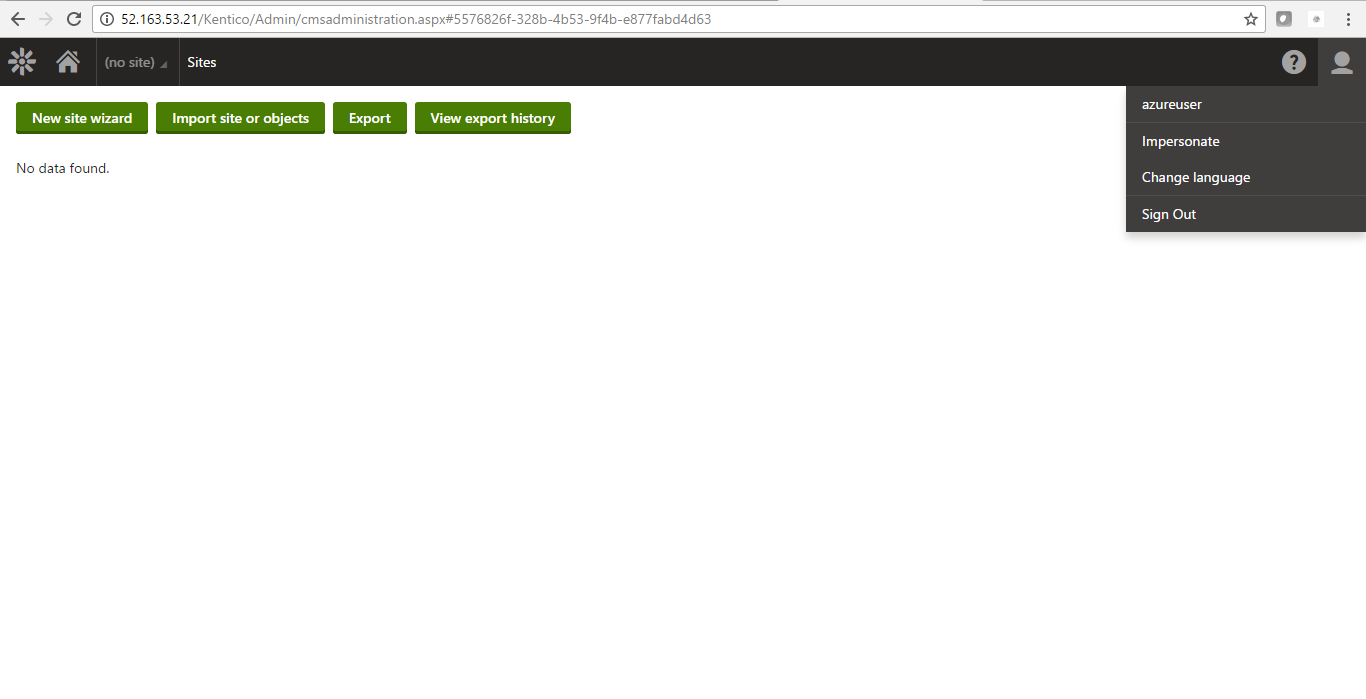
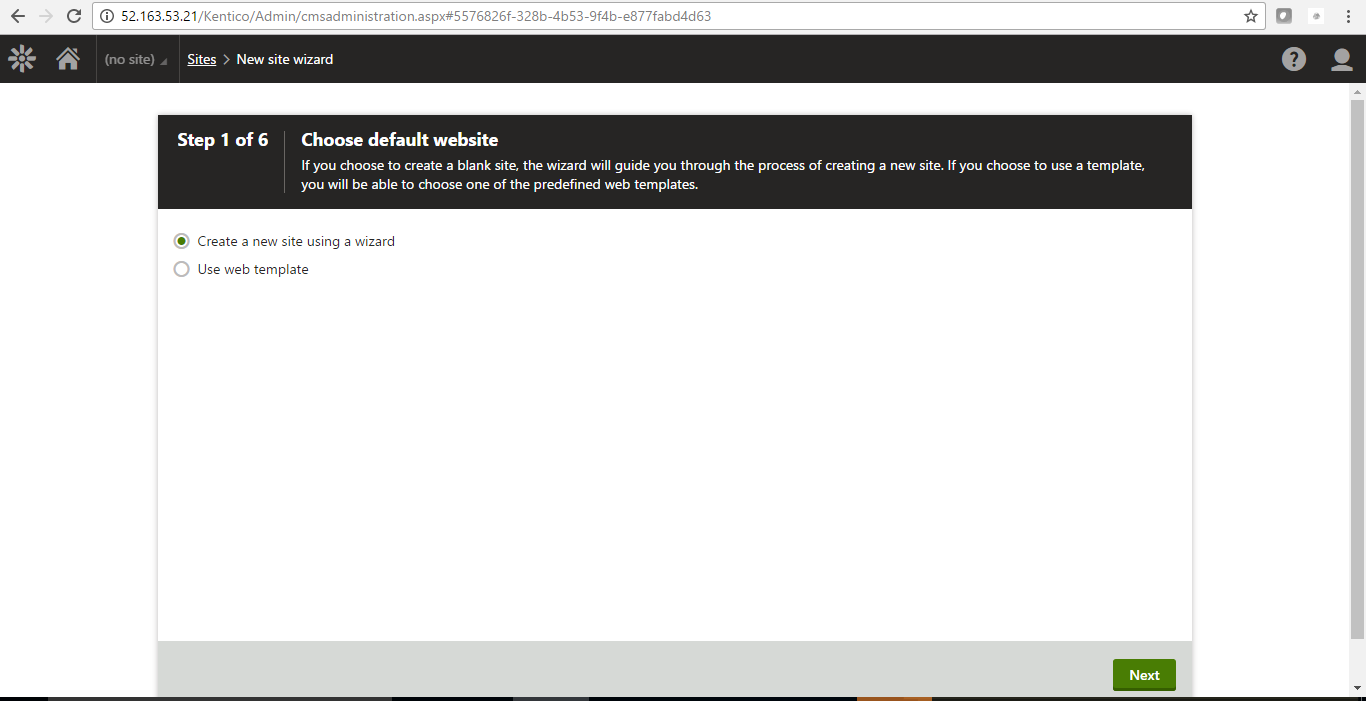
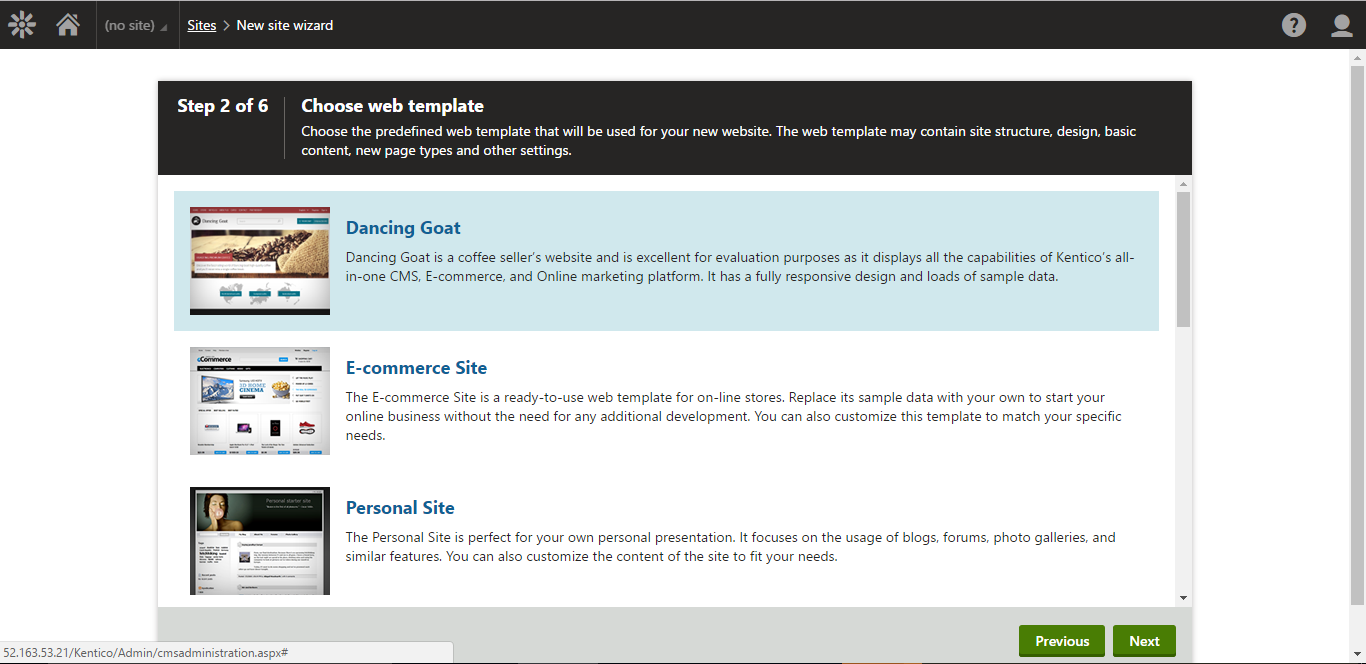
- Choose a site:
- Dancing Goat – a showcase of some of the Kentico Integrated Marketing Solution functionality and modern, responsive web design built within Kentico.
- E-commerce Site – a model of the Kentico e-commerce solution.
- Corporate Site – a showcase of most of Kentico’s capabilities.
- Blank Site – to begin the development of a new website from scratch.
- MVC Blank Site – a blank template used for sites that use an MVC application for their presentation. The site is only intended to be a repository for content displayed by an external MVC application. The content itself is managed by content editors.
License limitations for sample sites
Some of the sample sites use features that are only available in specific Kentico license editions. If you use a license edition lower than Kentico EMS, you may encounter problems when working with certain features (Content Personalization, for example). The initial trial license is equivalent to an EMS license.

- Click Next.
- Decide whether to enable the Kentico improvement program for the installed instance (via the Send anonymous usage records to Kentico checkbox)
- .


- Click Install.
After the installation is successfully finished, Kentico automatically opens in the default browser.


Kentico makes it easy for you. No sales talk! No pressure! No complications! Just an individual demo based on your needs and questions. Experience Kentico in action.
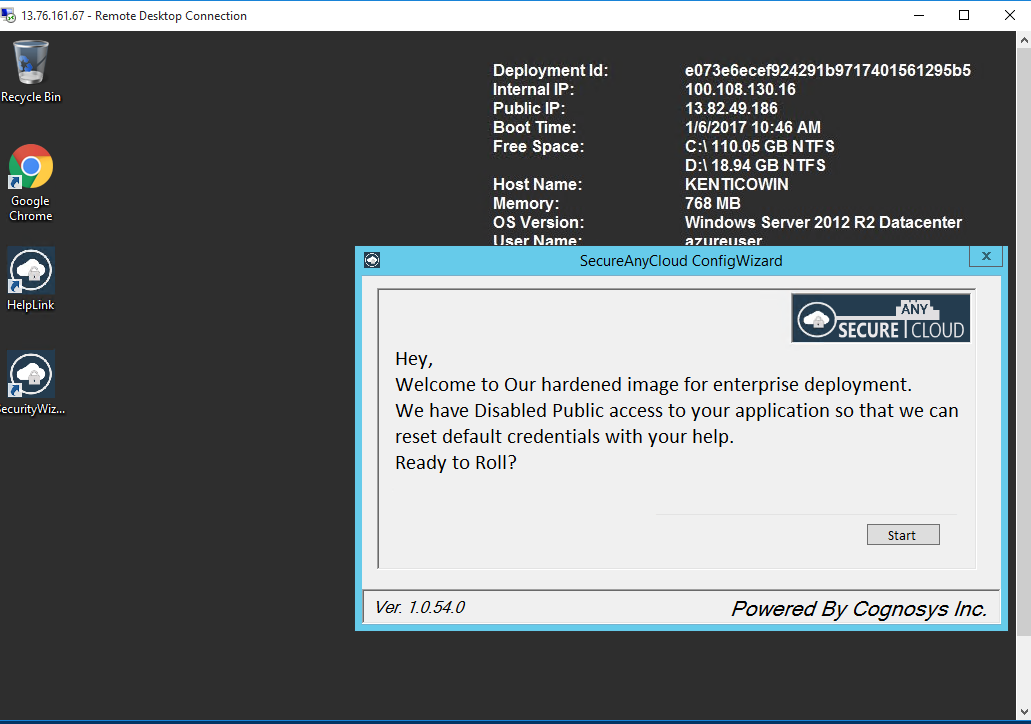
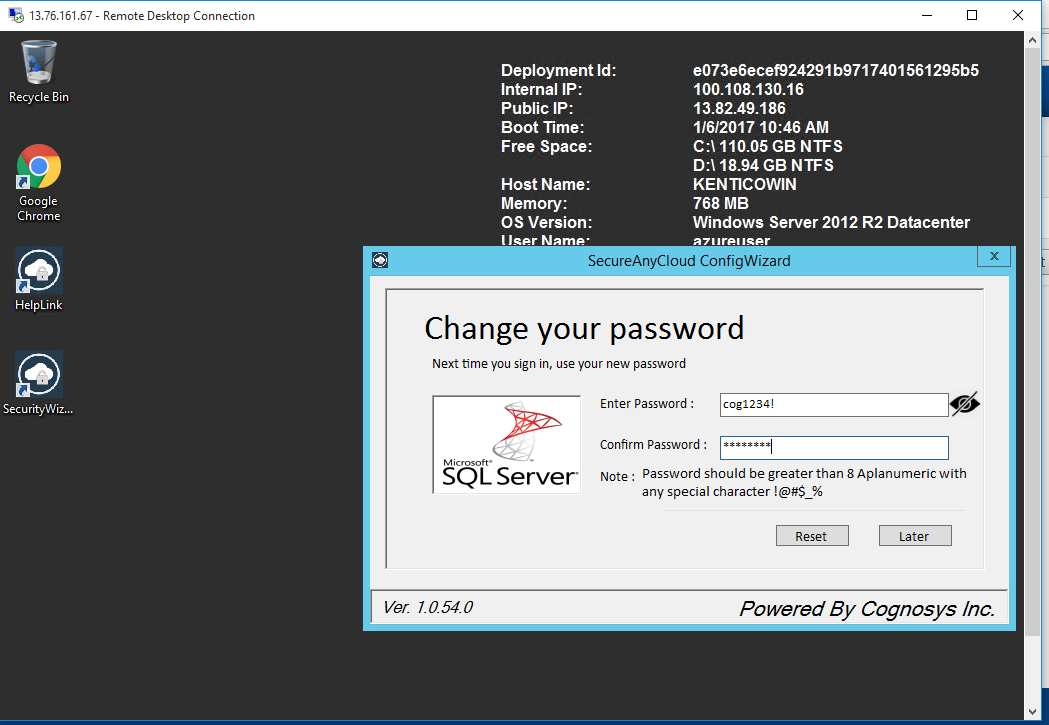
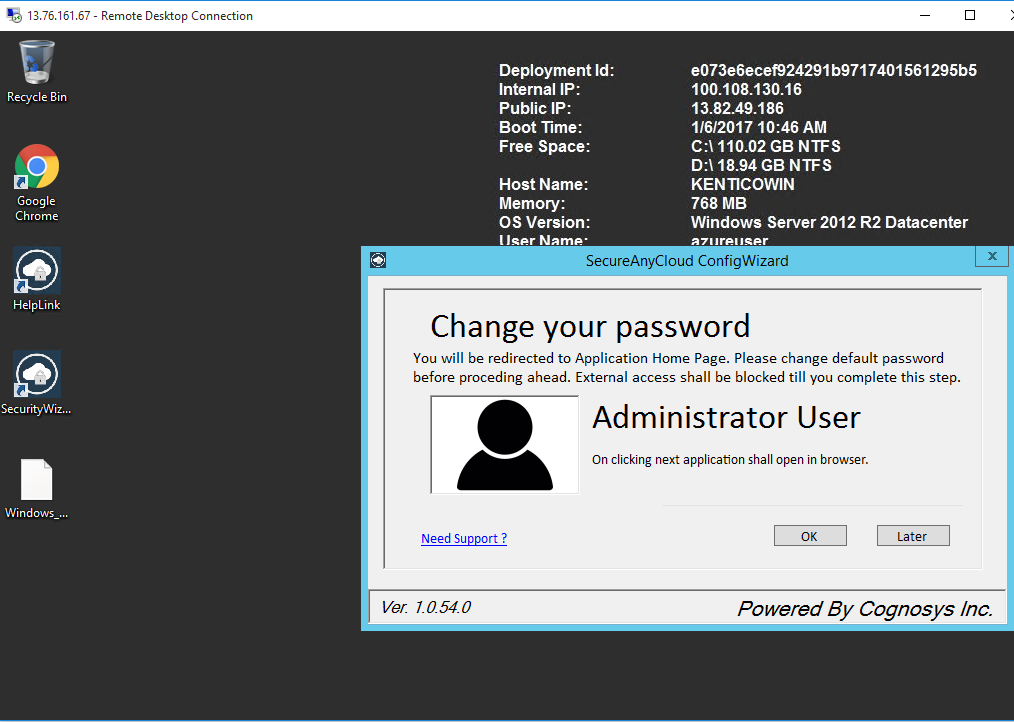
Cognosys provides hardened images of Kentico on all public cloud ( AWS marketplace, Azure and Google Cloud Platform).
Deploy your Kentico Web Content securely on cloud i.e. AWS marketplace, Azure and Google Cloud Platform (GCP) with Reliable Services offered by Cognosys at one-click with easy installation instructions provided.
Secured Kentico on Windows 2012 R2
Kentico on Cloud AWS – Windows

Kentico on Cloud Azure- Windows
Features
Major Features of Kentico:
Web Content Management
- ASP.NET MVC Support
- Booking System
- Categories
- Content Locking
- Content Rating
- Content-design Separation
- Custom Pages
- Custom Tables
- Document Management
Online Marketing
- A/B Testing
- Banner Management
- Contact Management
- Content Personalization
- Data.com Connector
- Email Marketing
Online Communities
- Abuse Reporting
- Avatars
- Bad Words
- Blogs
- Forums
- Friends
Intranet and Collaboration
- Departmental Sites
- Workgroups
- SharePoint CMS Integration
Platform
- Authentication
- Bing Maps
- Cloud Support – Azure, Amazon
- Continuous Integration
- Customizable Roles
AWS
Installation Instructions For Windows
Note : 1. Please use “kentico” in the place of “stack_name”
2. How to find PublicDNS in AWS
Step 1) RDP Connection: To connect to the deployed instance, Please follow Instructions to Connect to Windows instance on AWS Cloud
1) Connect to virtual machine using following RDP credentials :
- Hostname: PublicDNS / IP of machine
- Port : 3389
Username: To connect to the operating system, use RDP and the username is Administrator.
Password : Please Click here to know how to get password .
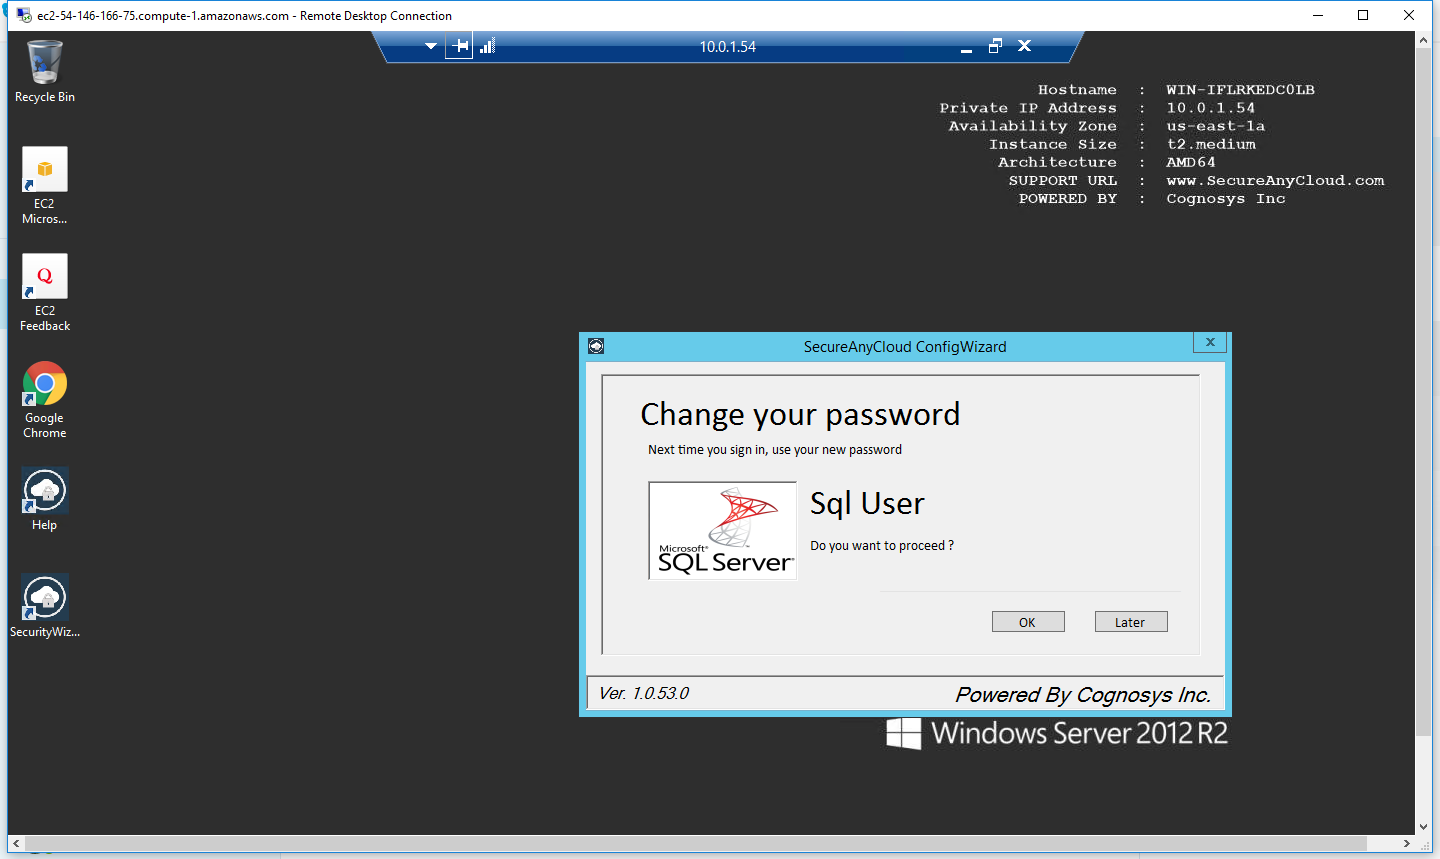
Step 2) Database Login Details:
- SQL Username: sa
- SQL Password : Passw@rd123
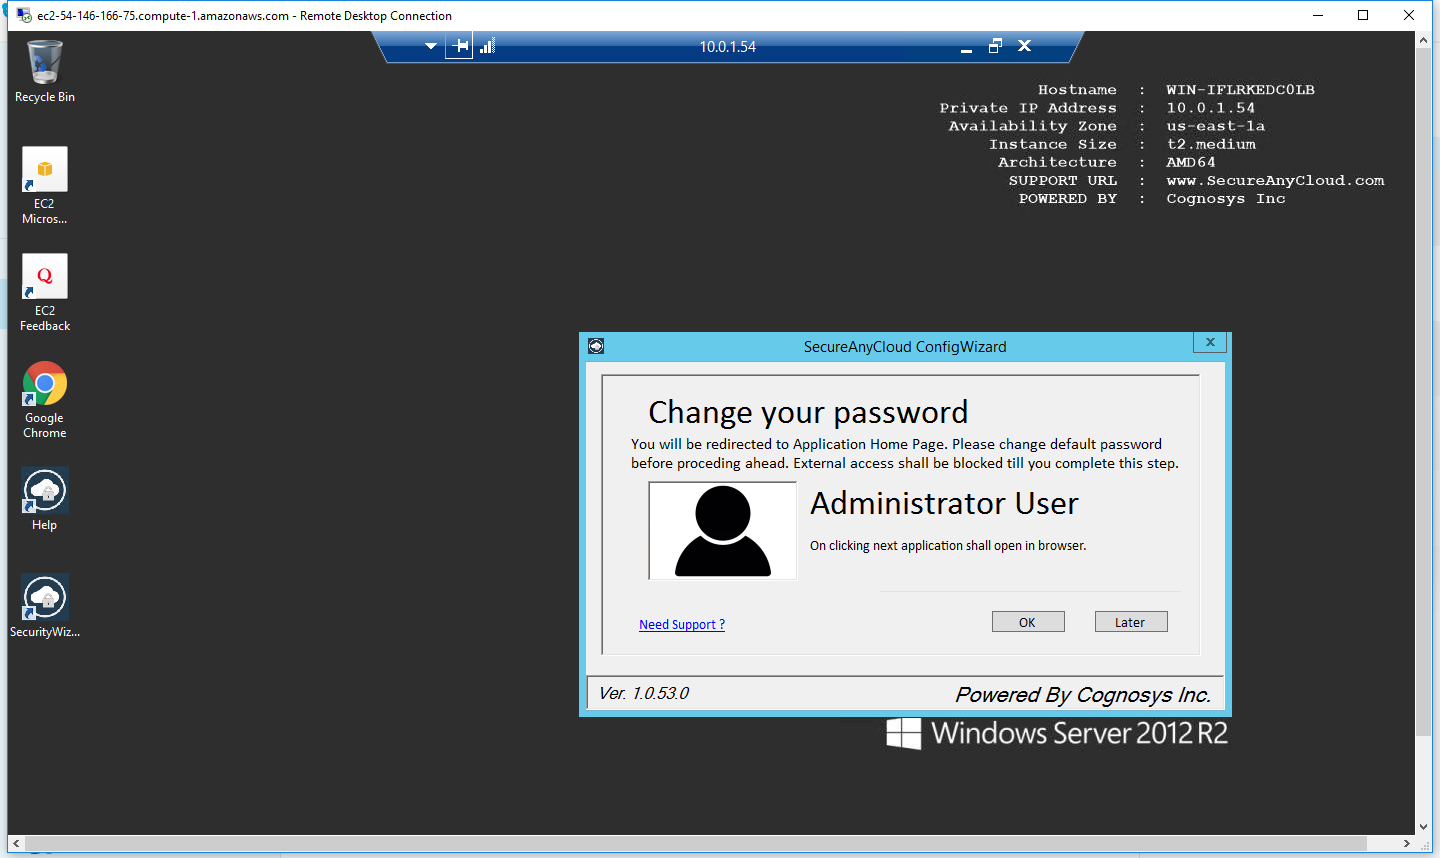
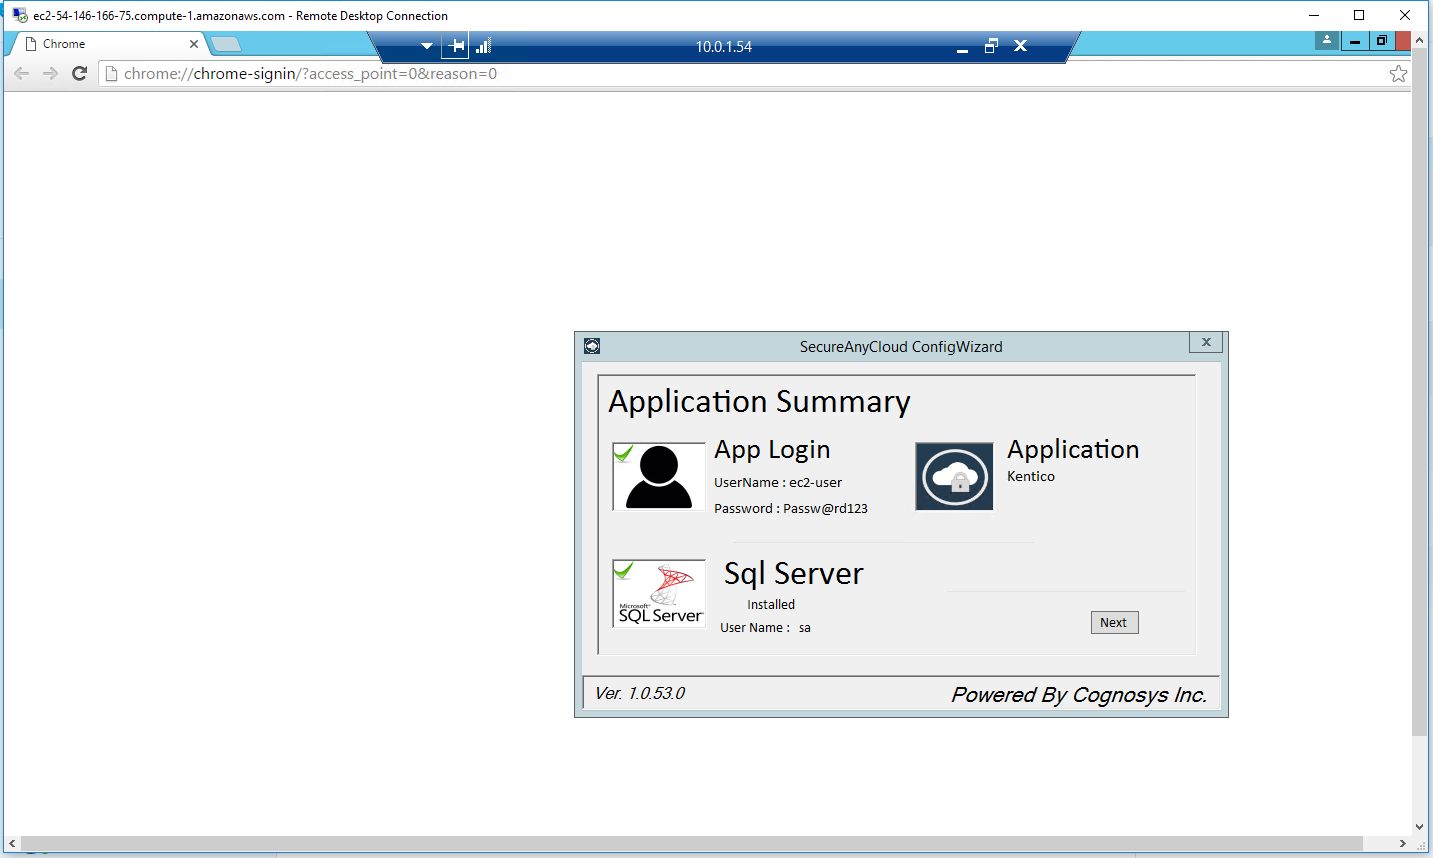
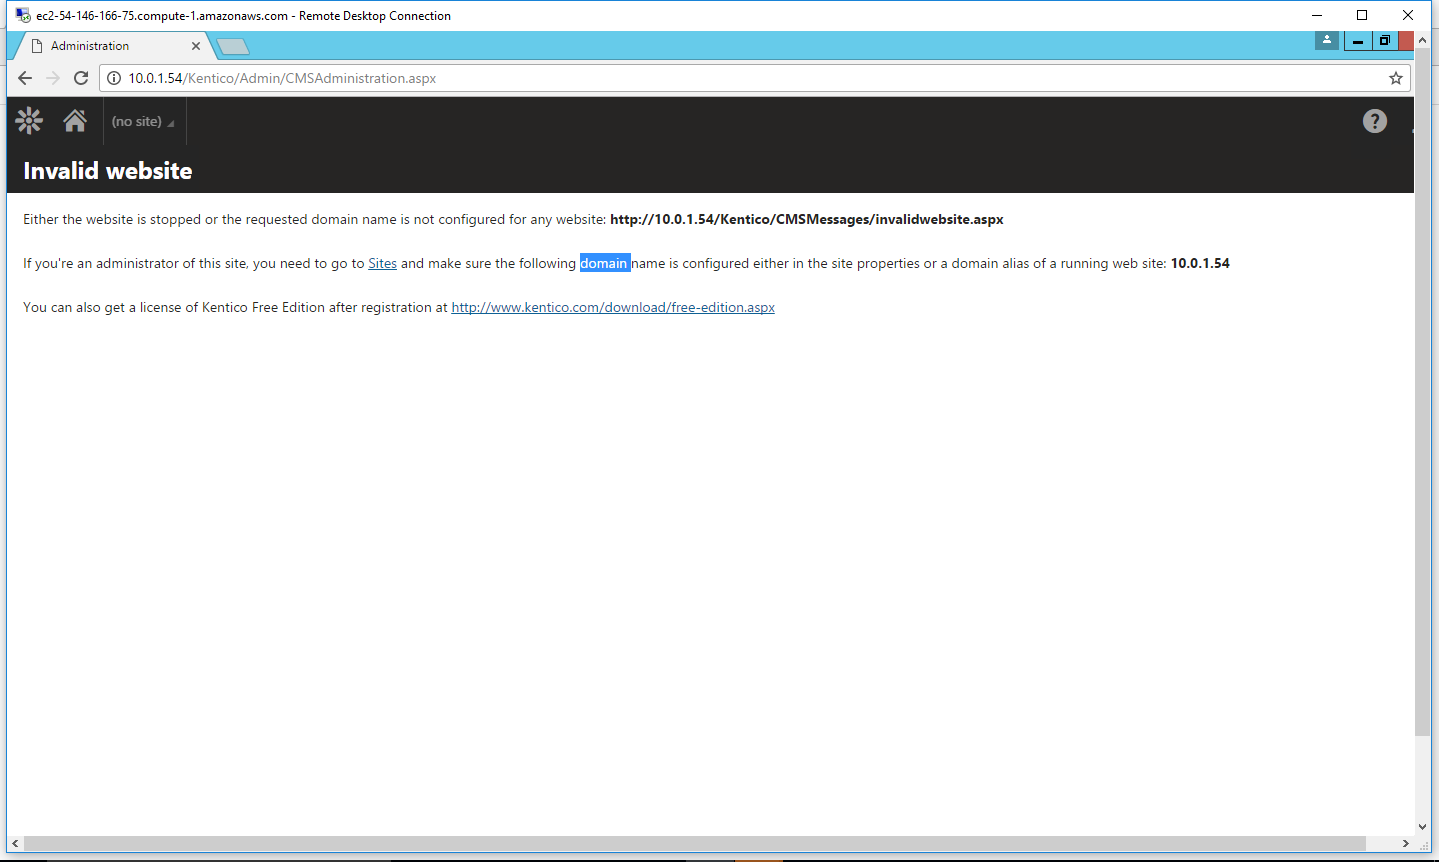
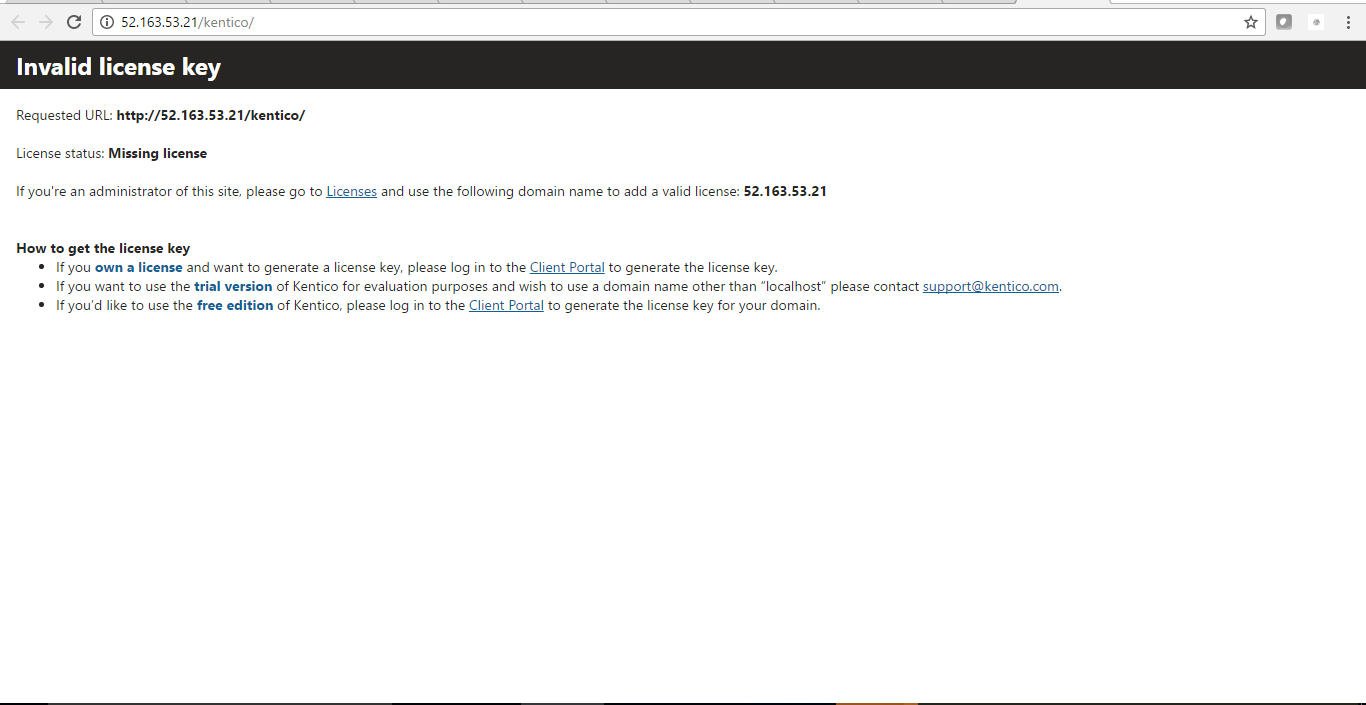
Step 3) Application URL: Access the application via a browser at http://PublicDNS/kentico
- User Name: ec2-user
- Password: Passw@rd123
Step 4) Steps to access the Admin Panel:
- To login to Kentico Administrative Panel, you need
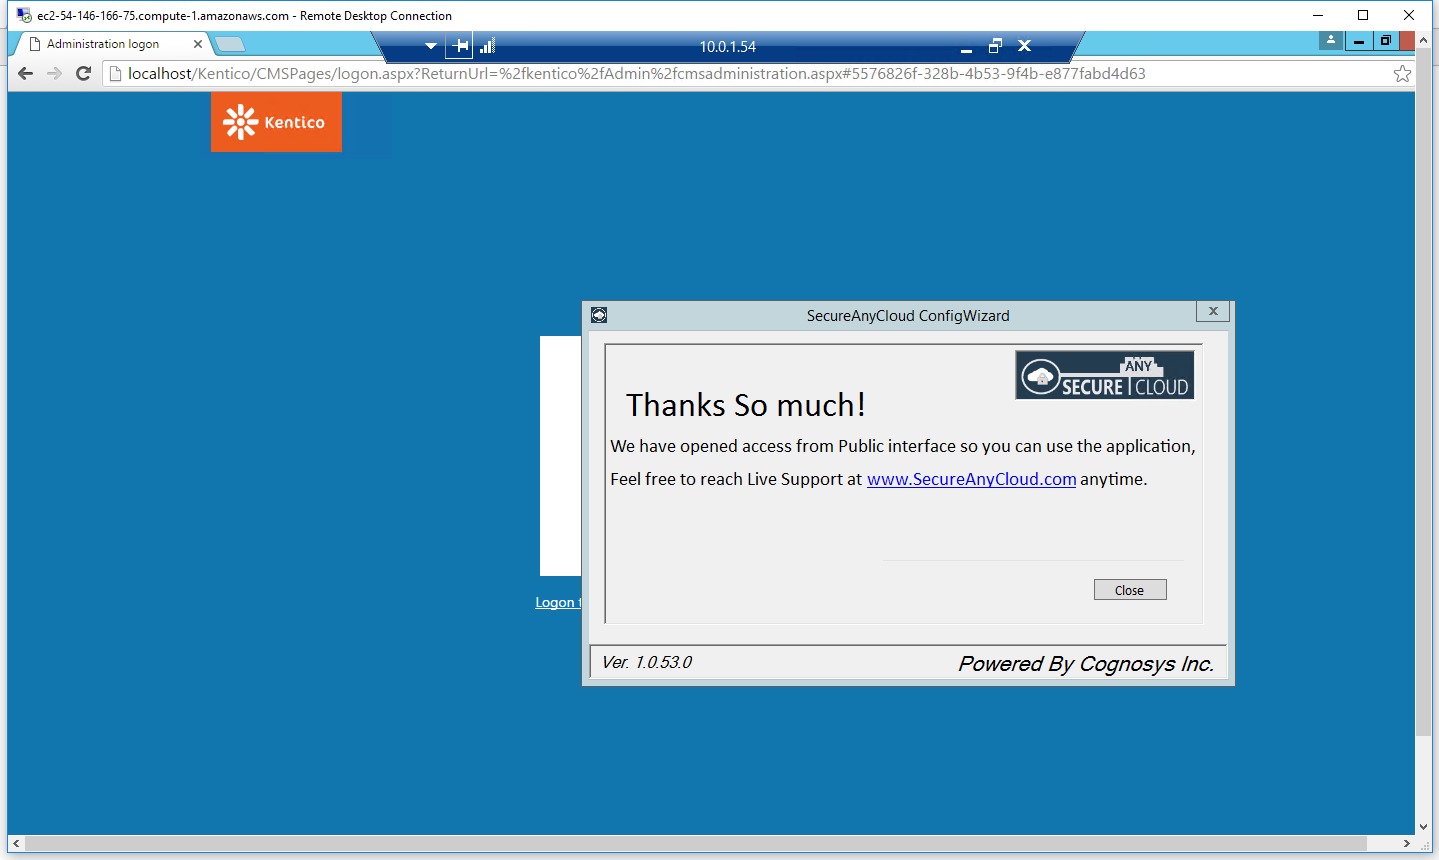
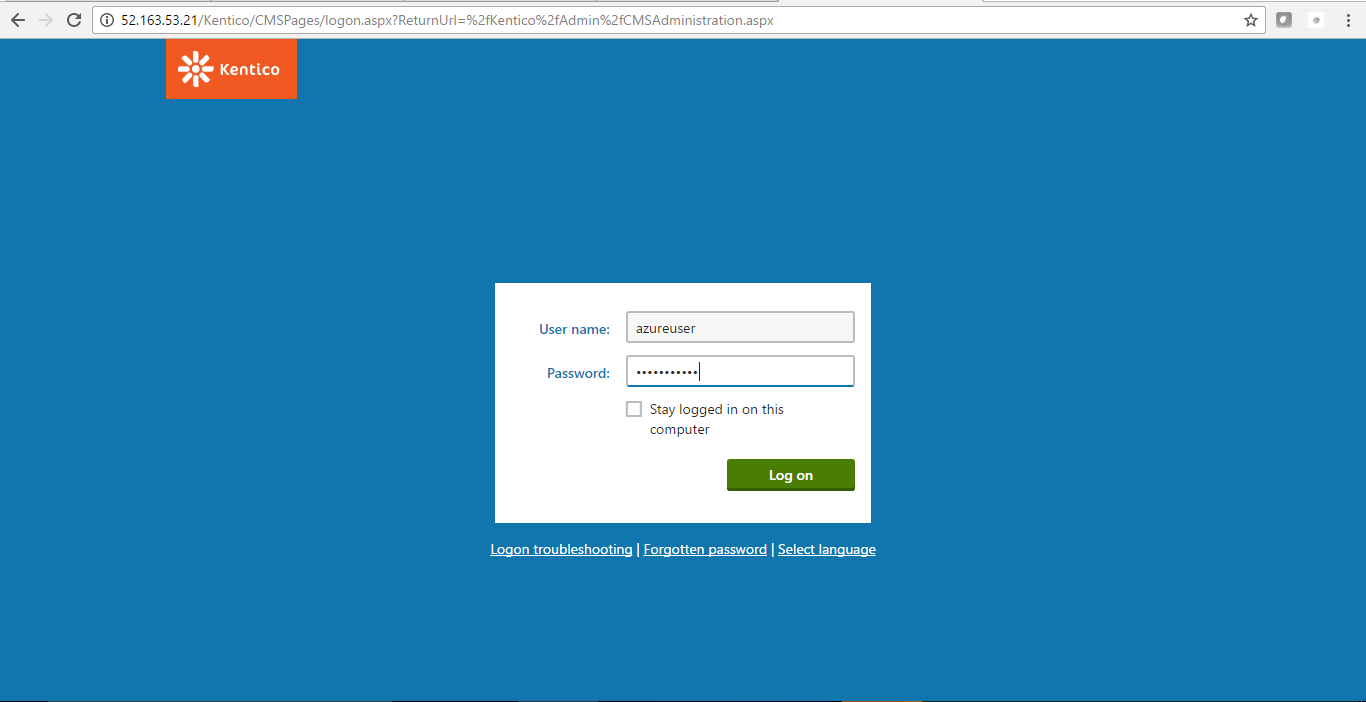
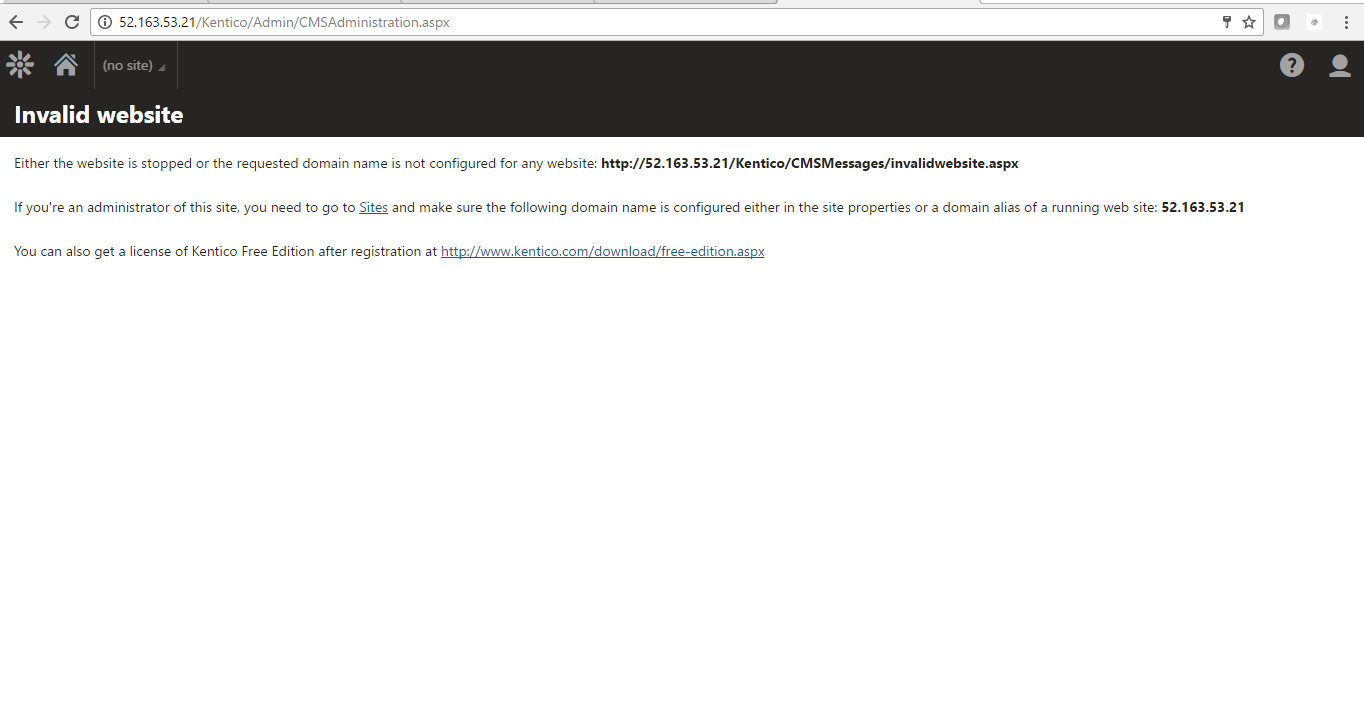
to open your browser and navigate to http://PublicDNS/Kentico/admin - Enter username and password in the given fields and click on the“Login”button to access the Admin Panel.
- After successful login to the Admin Panel, you will get access to Kentico Application.
Step 5) Other Information:
1.Default installation path: will be in your web root folder “C:\inetpub\wwwroot\kentico”
2.Default ports:
- Windows Machines: RDP Port – 3389
- Http: 80
- Https: 443
- Sql or ports: By default, these are not open on Public Endpoints. Internally Sql server: 1433.
Configure custom inbound and outbound rules using this link
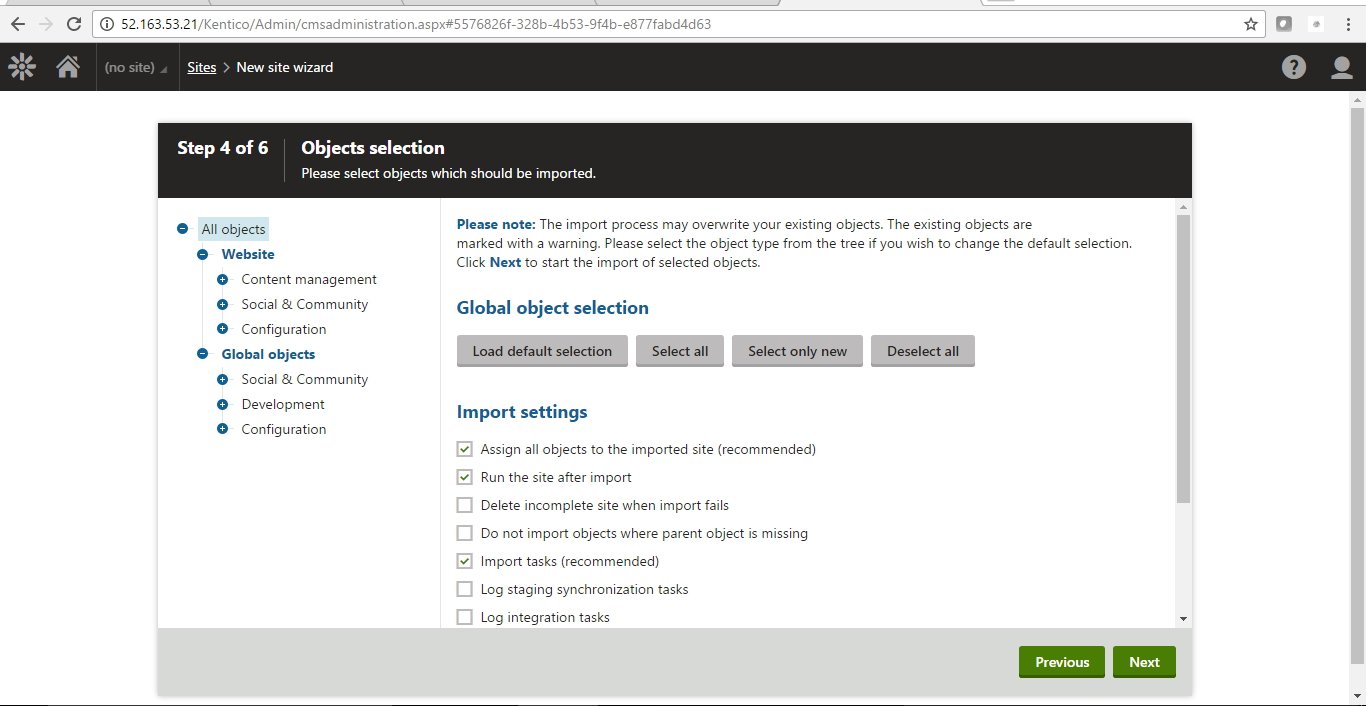
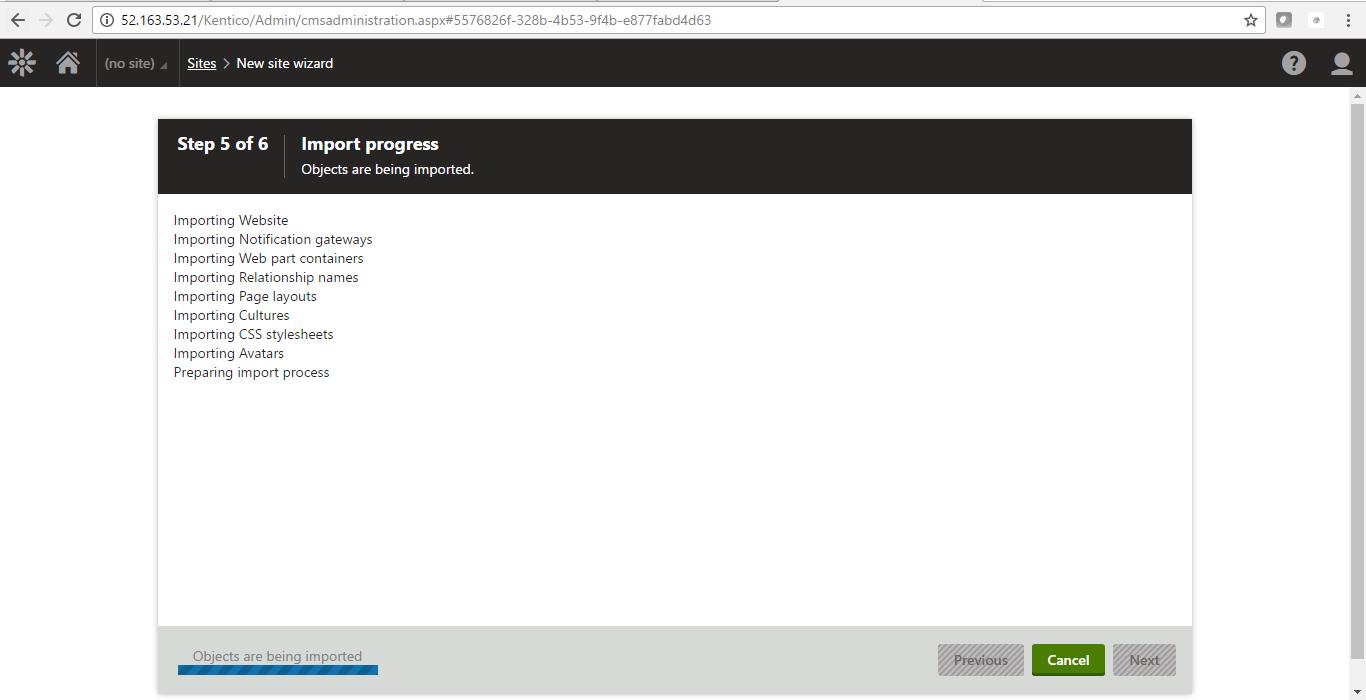
AWS Step By StepScreenshots


Azure
Installation Instructions for Windows
Note : How to find PublicDNS in Azure
Step 1) RDP Connection: To connect to the operating system,
Connect to the virtual machine using following RDP credentials:
- Hostname: PublicDNS / IP of machine
- Port : 3389
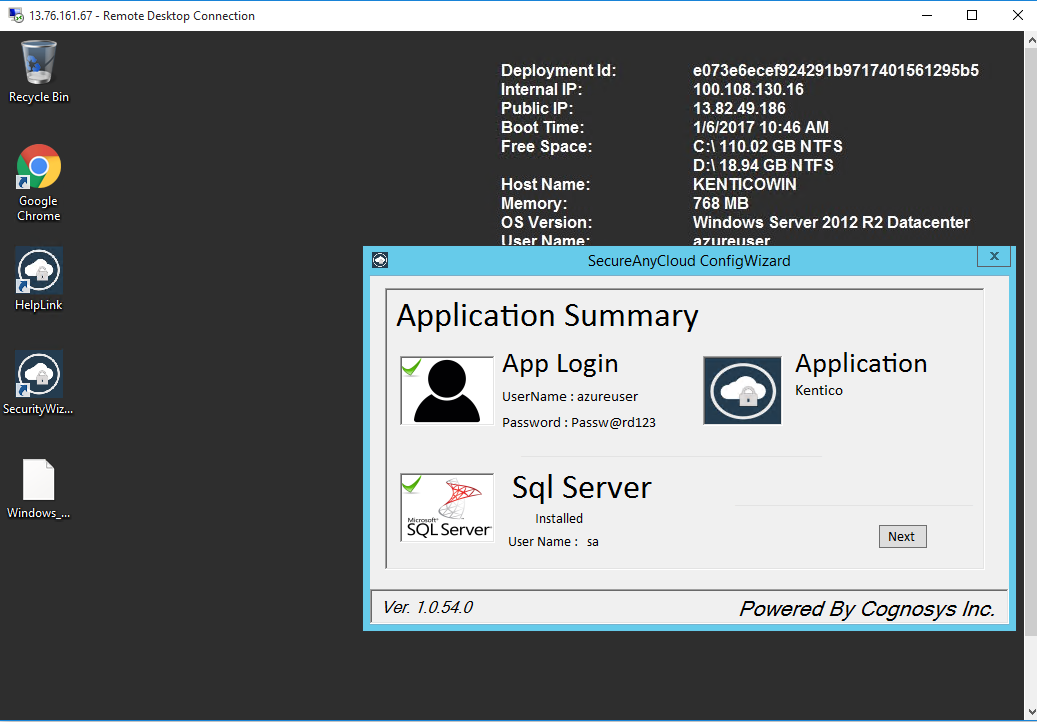
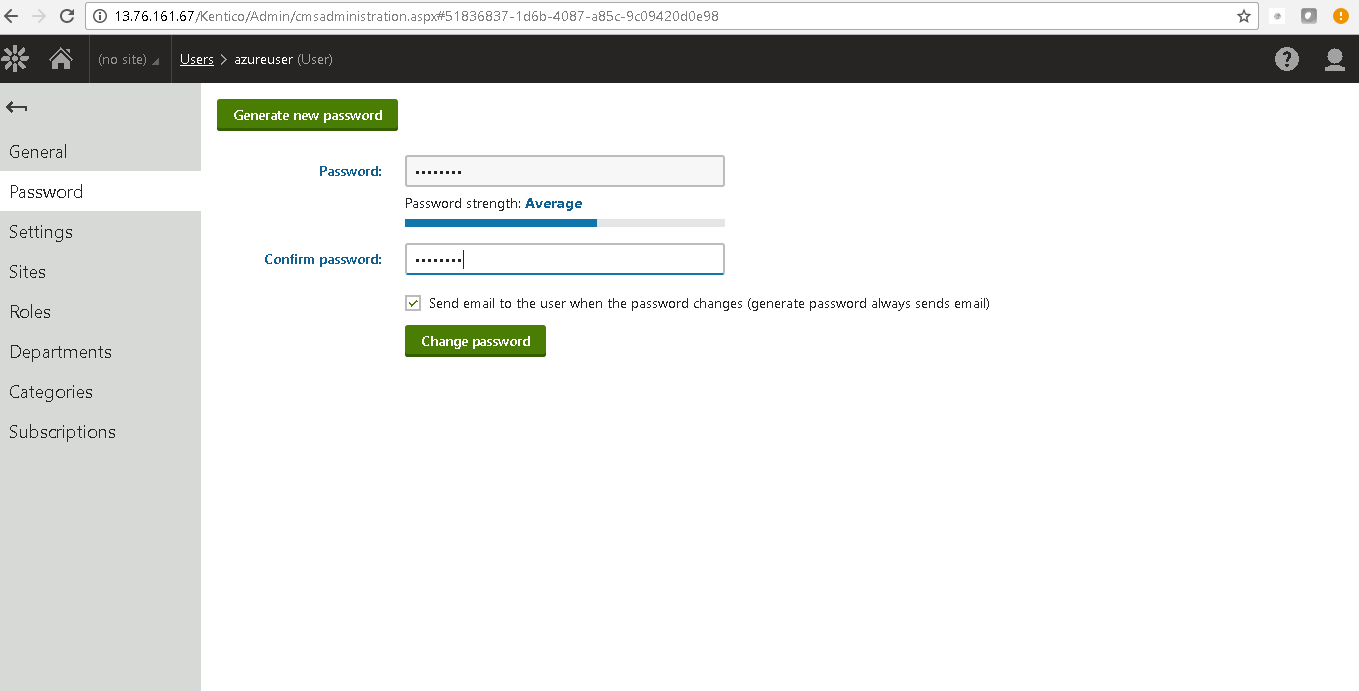
Username: Your chosen username when you created the machine ( For example: Azureuser)
Password : Your Chosen Password when you created the machine ( How to reset the password if you do not remember)
Step 2 )Database Login Details:
- SQL Username: sa
- SQL Password: Passw@rd123
Note: For Stack Database SQL DB kentico with user kentico and password Passw@rd123 has already been created.Please use this SQL database for you Stack Configuration.
Step 3) Application URL: Access the application via a browser at http://PublicDNS/kentico/admin
- User Name: azureuser
- Password: Passw@rd123
Step 4) Other Information:
1.Default installation path: will be in your web root folder “C:\inetpub\wwwroot\Kentico”
2.Default ports:
- Windows Machines: RDP Port – 3389
- Http: 80
- Https: 443
- Sql ports: By default, these are not open on Public Endpoints. Internally Sql server: 1433.
Configure custom inbound and outbound rules using this link
Azure Step by Step Screenshots


Step 1) RDP Connection: To connect to the deployed instance, Please follow Instructions to Connect to Windows instance on Google Cloud
Step 2 )Database Login Details:
- SQL Username: sa
- SQL Password: Passw@rd123
Step 3) Application URL: Access the application via a browser at http://PublicDNS/kentico/admin
Step 4) Other Information:
1.Default installation path: will be in your web root folder “C:\inetpub\wwwroot\Kentico”
2.Default ports:
- Windows Machines: RDP Port – 3389
- Http: 80
- Https: 443
- Sql ports: By default, these are not open on Public Endpoints. Internally Sql server: 1433.
Configure custom inbound and outbound rules using this link
Videos
Secured Kentico on Windows 2012 R2
Final Preview
Project Success
