
1-click AWS Deployment 1-click Azure Deployment 1-click Google Deployment
Overview
CMS Made Simple is an open source system built on PHP and using MySQL database. It is free and is one of the scripts, such as WordPress, Drupal and Joomla!, which you can use as a content management platform. It has a long history of more that 10 years, as it was founded in July 2004 by a team of developers with Ted Kulp as the Project Leader. CMS Made Simple has regular stable releases. All this adds up to a solid background, complimented by the fact that the software prides itself on winning the Packt Publishing annual award in 2010.
CMS Made Simple allow the website developers to build a number of smaller scale semi-static websites. There are some differences worth mentioning, when comparing the various other similar platforms. Some of the more popular ones, stated above, specialize in making blogs, portals and article based content in general. Whereas, the most common usage of CMS Made Simple is as a tool for corporate and organizations’ websites and this is the primary area where this particular content management system is laser-focused on and shines best. This is the reason why the script is used by fewer total number of websites than its competitors, but it is also why it has sustained its niche presence.
An apparent and definite benefit of using CMS Made Simple is the ease of navigation and the way you can re-organize the pages you need at any given point. It is worth to mention also the fact that the layout code and the content code are separated. This has the effect of making the editors be able to manage the content of the page without the need of an in-depth technical knowledge.CMS Made Simple is a software, primarily directed towards the web developers, who want to streamline and simplify the creation of a corporate or organizations’ websites and are looking at a tool which is both easy to use an expandable.
Its most important features are:
- Built-in SEF functionality
- Admin area with multiple language support
- Easy user/group management
- Group-based permission system
- Flexible template system
- Wizard-based install and upgrade functionality
- Content hierarchy with unlimited depth and size
How to reset the admin password in CMS Made Simple:
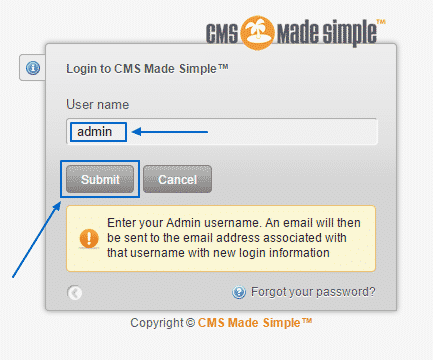
Here,we are going to explain all the measures you can take in order to rectify that issue and reset your administrative password, so that you have access to the Administration Area again.The first and most simple way to reset a forgotten password is to click on Forgot your password? Button the the bottom of the CMS Made Simple login screen:

There, you would need to write down your username and click on Submit. This will send an email to the administrative email address you have set up when installing your script:
If you happen to have put the wrong email address or you simply no longer have access to it for any number of reasons, you can change the email address on which the reset email is send to. To do that login into your cPanel, go to phpMyAdmin and search for the cms_users table in your CMS Made Simple database. Once you find it – click on it:
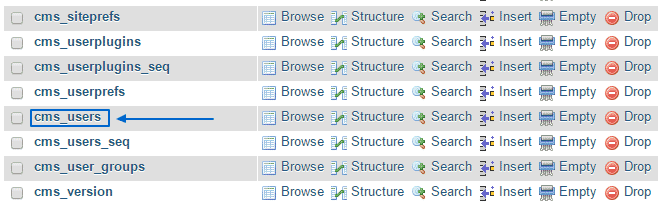
This will lead you to a table will all of the registered users. You need to click on the Edit option, next to the admin user:

In the Edit page, you have to find the email section and change the email you no longer can access with your current active email. Then simply click on Go to complete the procedure:

Afterward, you can go to the Forgot your password? reset process we discussed in the beginning and the email will be sent to the new address.
MS Made Simple Installation
In order to run CMS Made Simple properly, your hosting account has to support the following:
- PHP 4.3+;
- MySQL 3.23+;
- Apache 1.3+;
- PHP Tokenizer support
FastWebHost servers are optimized to meet all CMS Made Simple requirements and to provide the best hosting environment for it.To install CMS Made Simple, follow the steps below:
Step 1. Create a MySQL database and add a new user to it. This can easily be done with cPanel by following the MySQL database tutorial. For the purpose of this tutorial we’ll assume that you have a MySQL username and database called user_cmsms.
In case you are not using cPanel, you can refer to the MySQL manual on creating databases and adding users to it.
Step 2. Visit the CMS Made Simple download page and download the .tar.gz file with the latest version. You can download the base or the full installation package. The difference is that the base package contains only the English language files, while the full package contains all language packs. In this tutorial we will install the full package.
Step 3. Extract the file locally on your computer.
Step 4. Upload the application’s files to your hosting account. If you wish your CMSMS website to be accessible directly through http://yourdomainname.com, you should upload the files in your piblic_htmlfolder (or whatever your document root is, e.g. www, httpdocs).
If you wish the application to be accessible in a subfolder, e.g. http://yourdomainname.com/cmsms, you should create a cmsms folder inside your public_html directory and upload the application files there.
For the purpose of this tutorial, we’ll assume that you will install CMSMS in public_html/cmsms so that your CMSMS will be accessible through http://yourdomainname.com/cmsms.
Step 5. Create an empty file called config.php. The file should be created in the CMSMS main folder (in our case this is public_html/cmsms).
Step 6. Open your favorite browser and go to http://yourdomainname.com/cmsms. The CMSMS installation consists of the following steps:
- Language selection
- Step 1. Checksum test
- Step 2. System requirements checks
- Step 3. File Creation Mask check
- Step 4. Admin account information
- Step 5. Database information
- Step 6. Additional configuration settings
- Step 7. Installation end – you will be able to visit your CMS Made Simple site and admin area
How to install CMS made simple manually:
The first thing you need to do is to make sure you have created a new database through your cPanel. Your next step should be to go to the official CMS Made Simple website and download the latest version of the software. Afterward, extract the content onto your computer and then upload them via FTP to a folder (for the purposes of this tutorial we are going to name it /cms1), where you would like the CMS Made Simple to be installed in.
To start the installation procedure, open your browser and navigate to:
yourdomain.com/cms1–install.php
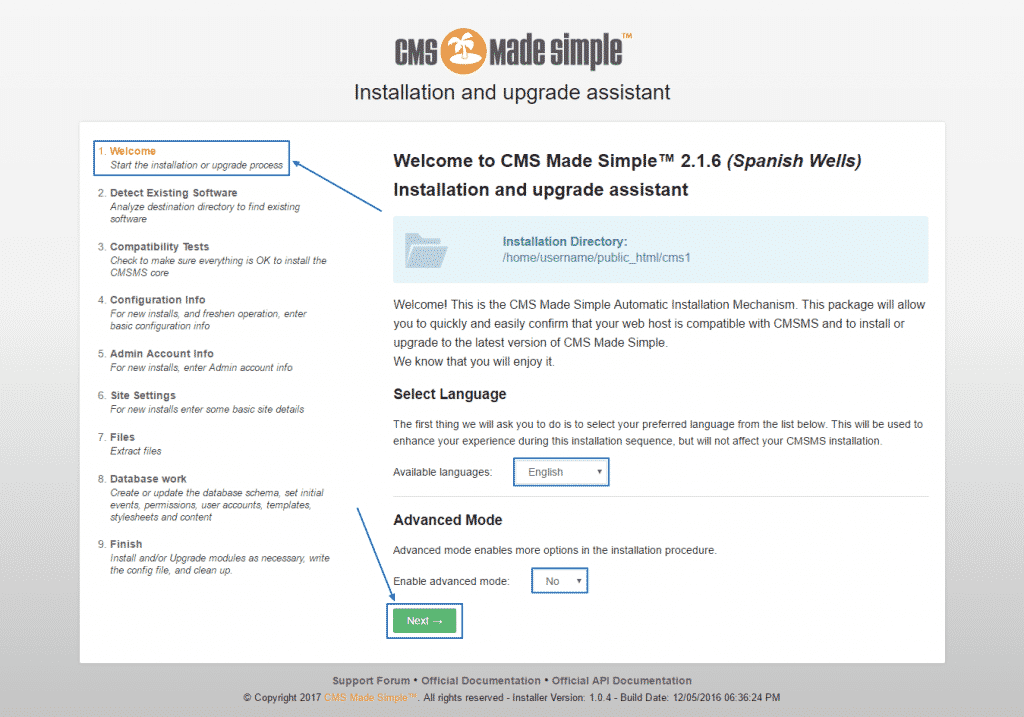
This will get you to the following installation wizard’s Welcome page, where you can select your preferred language and also decide if your want to install the script in Advanced mode or the recommended one and click Next at the bottom:
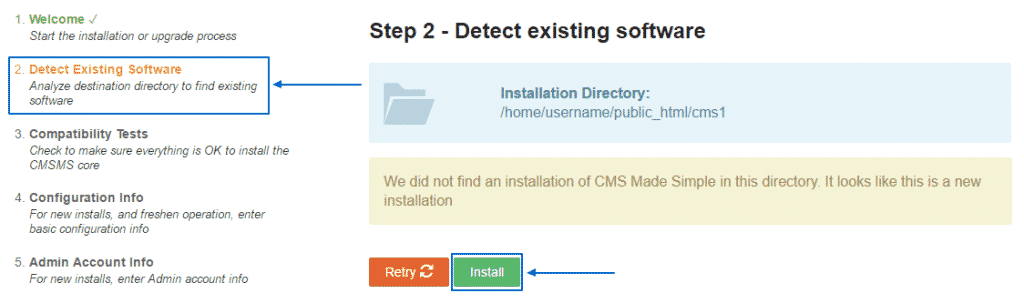
Then, you will get to step 2 – Detect Existing Software. If the chosen folder does not have a previous installation of CMS Made Simple, you will be able to freely click on Install:
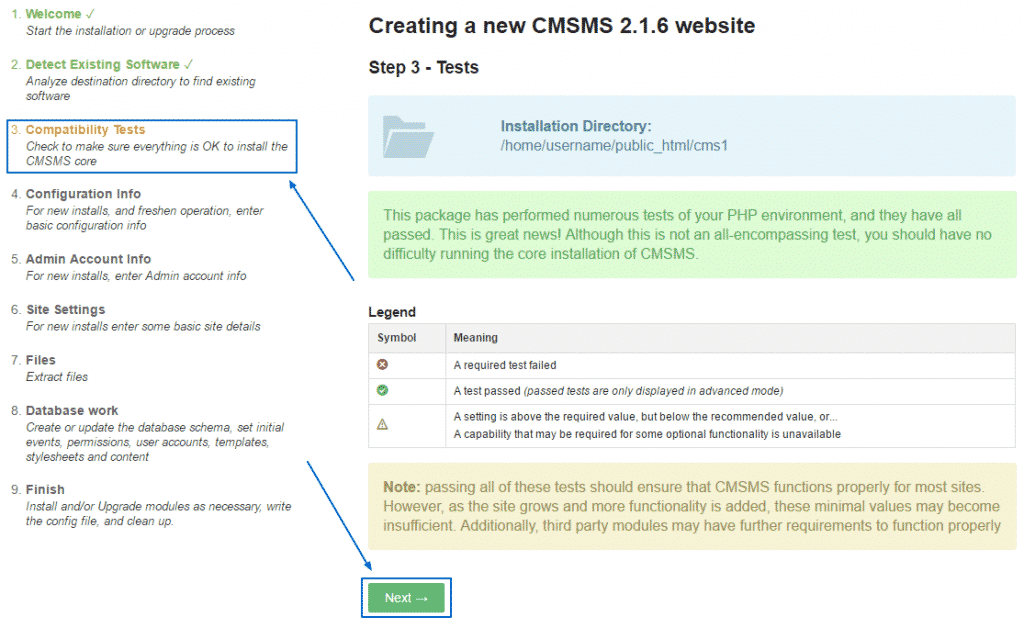
This will lead you to the third step – the Compatibility Tests. If it has successfully passed you will get a green text and you can proceed by clicking Next:
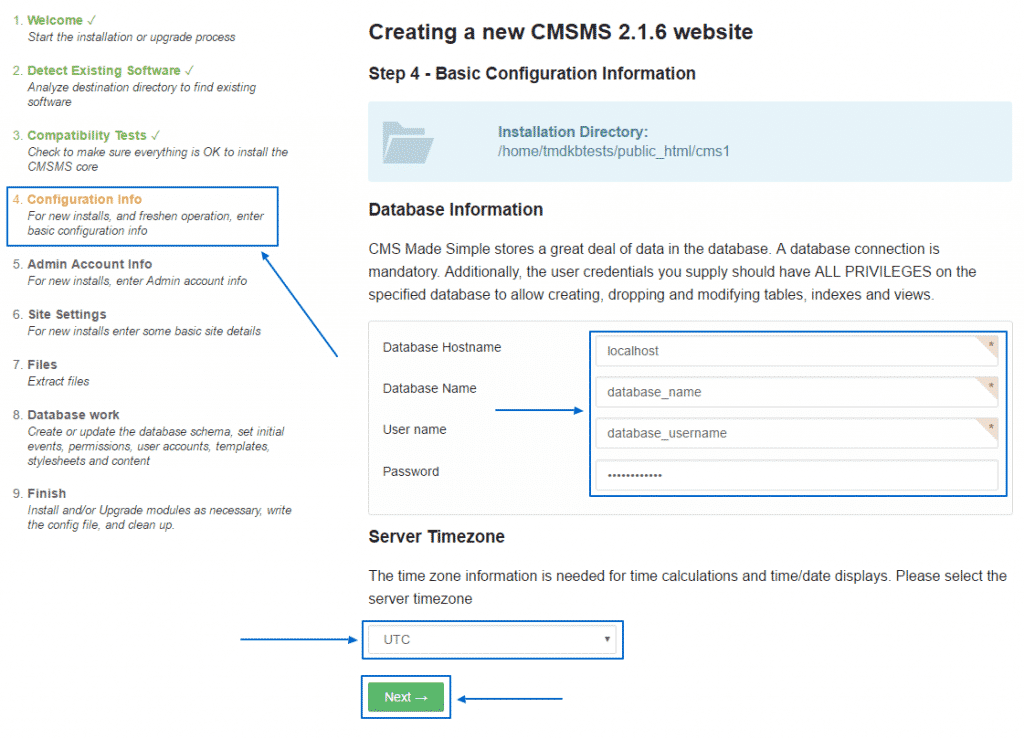
In Configuration Info, you need to put in the details of the fresh Database you have created, make sure you have set the correct Server Timezone and then click Next:
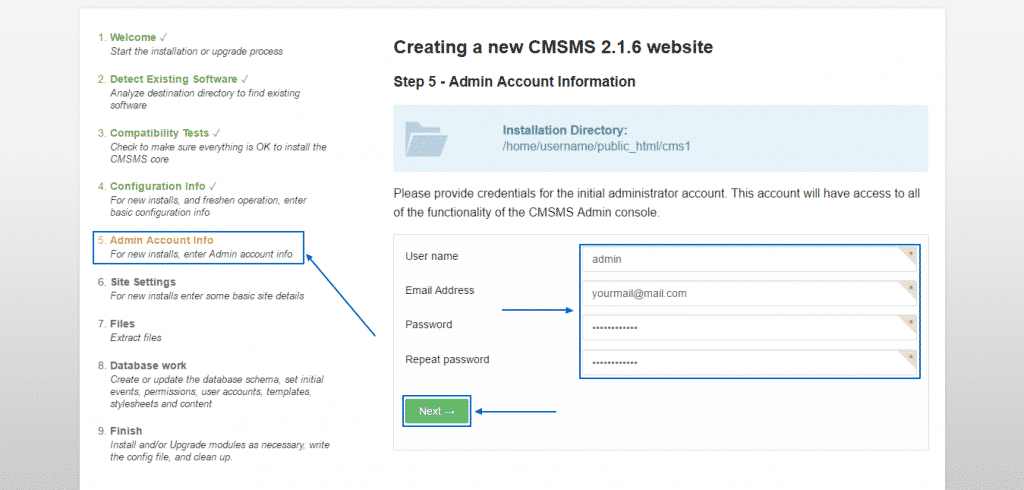
At step 5 you have to put in the Admin Account info. We recommend you to write it down and save it somewhere as it will be required when entering your administrator account. After you are done, just click on Next:
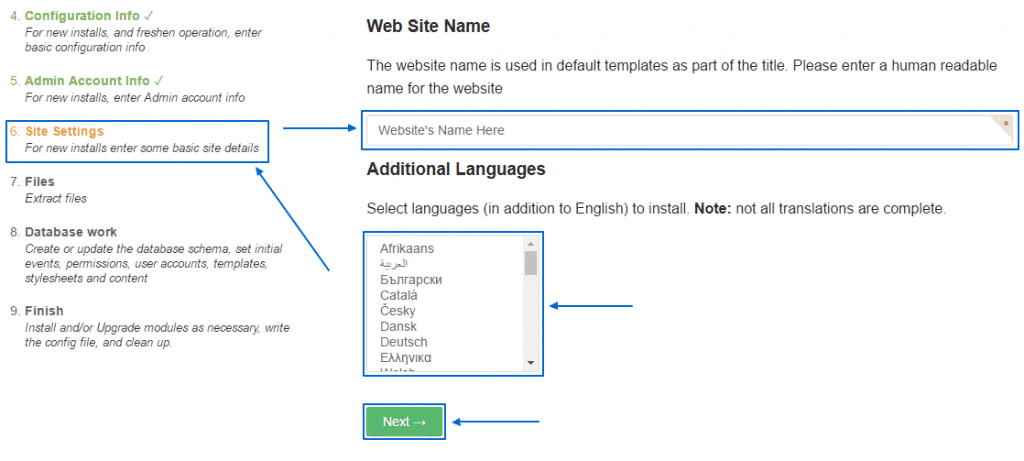
At Site Settings you can select a Web Site Name and an Additional Language (if you need one, otherwise you do not have to choose one) and then go to Next again:
Reaching step number 7, you can simply click on Next to continue with the procedure, because you have already extracted the needed Files:
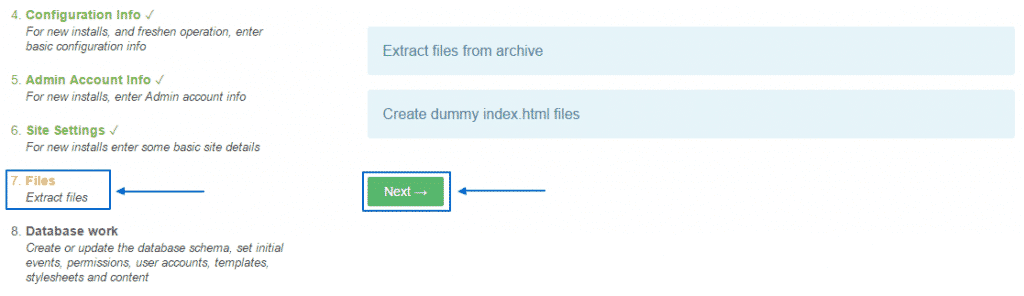
On the next step, you only need to select Next again in order to complete the installation process:
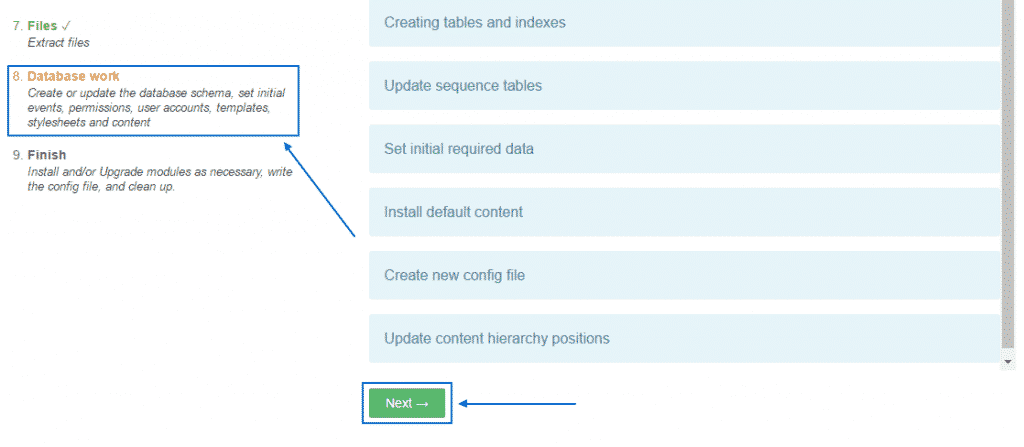
Step number 9 is the Final one and when you reach it, your CMS Made Simple has been successfully installed. You can then use the two links below to either visit your page or go to your administration panel:

How to transfer CMS Made Simple from another server?
If you have chosen to use one of the packages but your CMS Made Simple platform is currently hosted on another server, we can definitely help you out with this process. Our Genius Support Тeam, would assist you with this process at any time. If you wish to do that on your own, here are some tips of how you can proceed with doing so.First of all, you would have to copy all of your website’s files via FTP. Afterward, you need to export your website’s database through your cPanel, using the phpMyAdmin option.Once this is done you should upload the application files on the server where you want to move your website, again using an FTP client and create an empty MySQL database.
Once this is done, import the “.sql” file you have exported before.
Then, the final step towards the transfer process is to update your “config.php” file with the new database credentials, editing the following lines:
$config[‘db_hostname’] = ‘localhost’;
$config[‘db_username’] = ‘Database Username’;
$config[‘db_password’] = ‘password’;
$config[‘db_name’] = ‘Database Name’;
Be aware that you need to replace ”Database Username”, ”password” and ”Database Name” with the details of the database, you have created earlier.The only thing left to do then is to clear the cache of your application and the process would be successfully completed.
How to upgrade CMS Made Simple:
The latest currently available version of CMS Made Simple was released in 2015. If you still have not upgraded to it this part of the tutorial will be very useful for you.There are, indeed, some simple steps you need to go through to successfully complete the procedure but before you start with them – we do highly recommend you to create a backup of your website. If you do not how to do that – we have covered this topic extensively in another part of this tutorial, which you can check out at any time.
After you are done with creating your backup, you can then move to the first step of upgrading your CMS Made Simple, namely to download the latest package of the script from its official website.Then, you need to upload and extract the files from the latest version into your CMS Made Simple installation directory, so that the core files are overwritten. You can do that via FTP.When you are done with this procedure, just go to your domain with typing down /install/upgrade.php at the end of it:https://yourdomain.com/install/upgrade.php
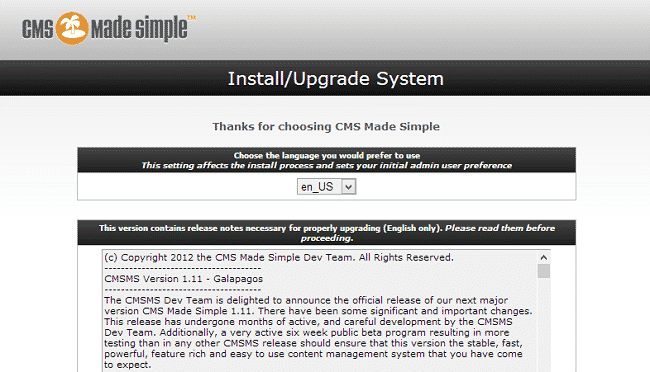
Typing that will lead you to the first part of the Install/Upgrade System, where you can read the terms and conditions, choose a default language and click on Continue:
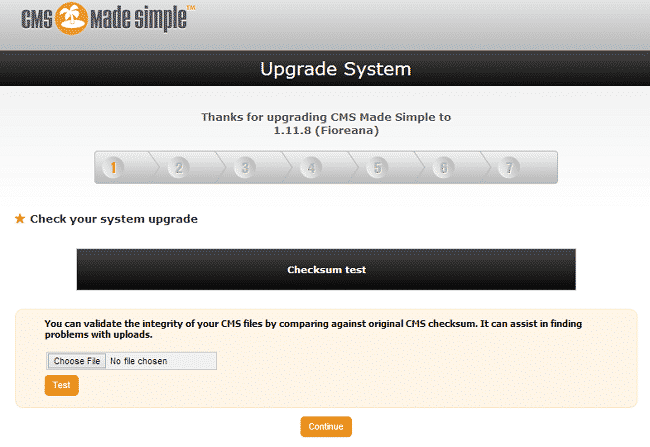
In the first step of the upgrading, you will be able to run an integrity check on your website. This is a pretty straightforward process, where you simply need to upload the .dat file, available on CMS Made Simple download page, click on Test and after you are finished – go to Continue:
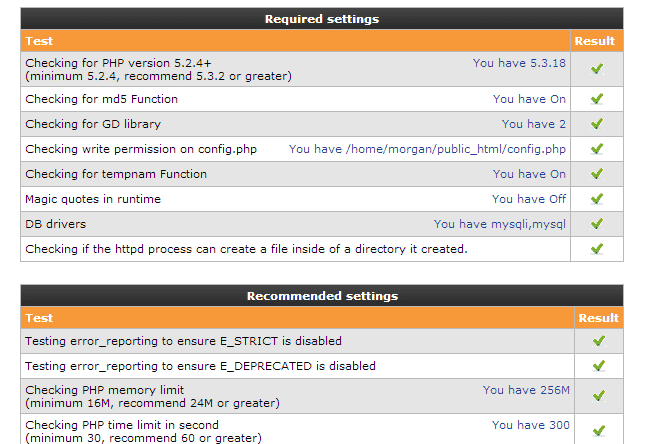
Proceeding further, you will see all the required and recommended settings for this version of the script. Make sure everything is set, so that all of the results come back with green ticks and then go to the next page:
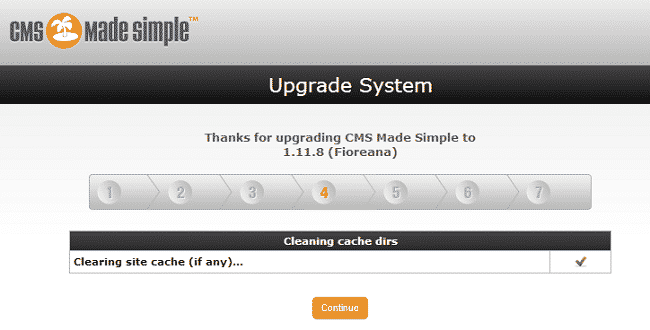
Afterward, the script will clear all the site cache and indicate that the process is complete by showing a green tick:

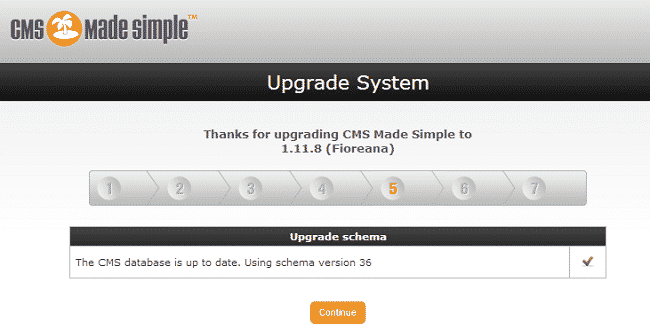
On the next page, you have to wait for the system to upgrade the database structure as well and then press Continue:
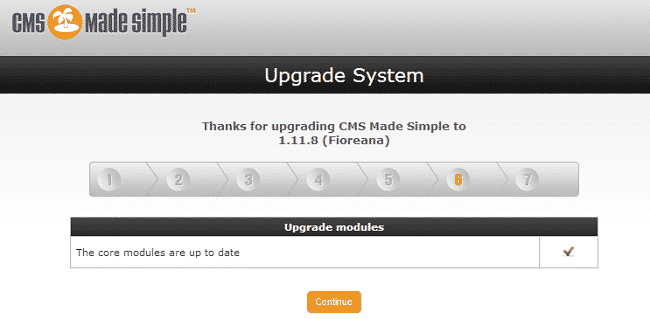
The final step is to upgrade the core modules of CMS Made Simple and then click on Continue again:
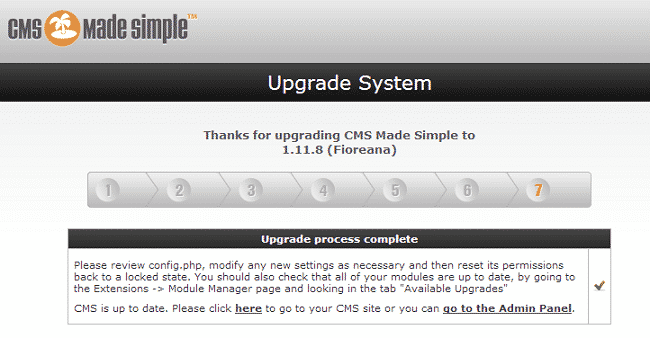
This will lead you to the final page of the installation wizard, indicating that the upgrade of your CMS Made Simple script has been successful:
How to create a backup of CMS Made Simple:
Every website need a sufficient amount of security to be provided. One of the ways you can make sure that even if there is any kind of security breach, your website could be restored and your data – kept safe, is to perform a backup of your online project.CMS Made Simple does not have its own method of creating a backup from the script itself, but you can easily make one yourself.First of all, you need to download all of the files, contained in the script’s installation folder to your local machine via FTP. The only other thing you need to go through then, is to export the database of your CMS Made Simple application via phpMyAdmin.
CMS Made Simple Content Management
Here,we will show you how to manage your content in CMS Made Simple.Adding new content in CMS Made Simple is really easy. All you need to do is go to your CMSMS admin area > Content > Pages. Click Add New Content and fill in the necessary details.
How to reorder existing pages
When you have a lot of pages, organizing them properly is essential for maintaining easy-to-follow content structure.Fortunately, CMS Made Simple gives you an intuitive interface through which you can reorder your pages.
CMSMS Image Manager
CMS Made Simple has a built-in Image Manager through which you can easily upload and edit images directly through the CMSMS admin area. You can then insert the uploaded and edited image directly into your pages.
News module
One of the great features of CMS Made Simple is the News module. Through it you can display different news articles on your website.
How to enable pretty URLs in CMS Made Simple:
CMS Made Simple has many functionalities to offer, especially when you are creating platforms for small and medium-sized corporations or organizations. It also has the capacity for the so-called pretty URLs to be enabled (which are also known as Search Engine Friendly – SEF URLs) in order to optimize your presence in search engines. In order to perform this procedure you first need to go to your cPanel. There, you need to go the the File Manager:

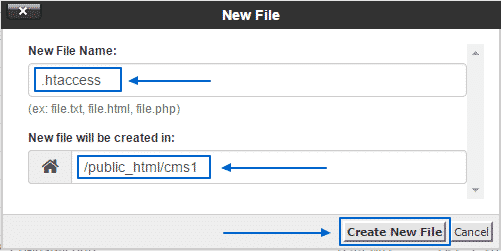
Over there, you have to go to the CMS Made Simple’s installation folder, choose the Add New File button at the top right:
![]()
![]()
Then, you must name the new file “.htaccess”. Make sure you double check that you are making this file into the folder, where you script is installed and simply click on Create New File:
Afterward, enter the following code in the newly created file and then just go to Save Changes:
RewriteEngine On
RewriteCond %{REQUEST_FILENAME} !-f [NC]
RewriteCond %{REQUEST_FILENAME} !-d [NC]
RewriteRule ^(.+)$ index.php?page=$1 [QSA]

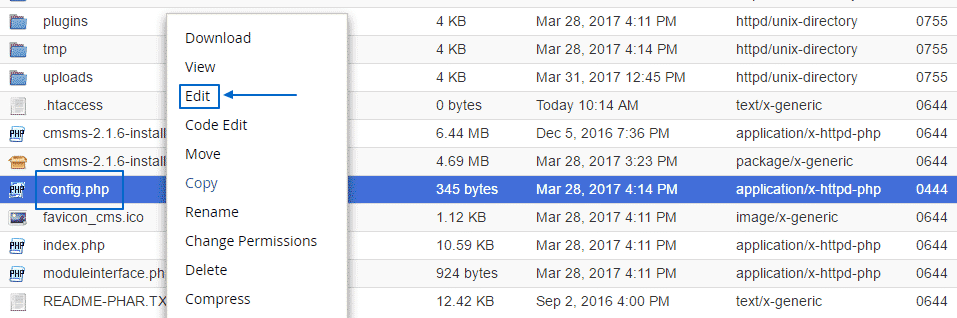
The last step you need to do to enable the pretty URLs is to go to the CMS Made Simple installation folder, find “config.php”, right click on it and select Edit:
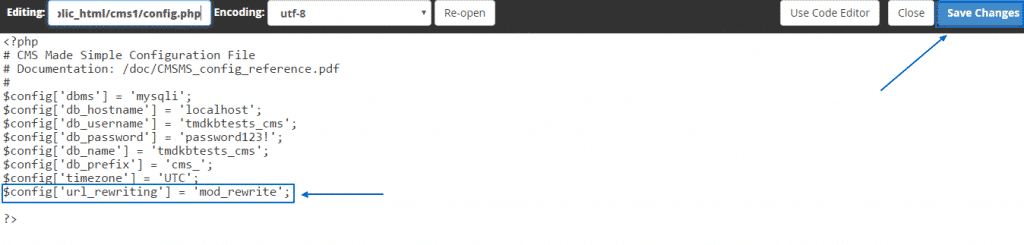
Over there, you only have to add this row of code and then implement the changes by clicking on Save Changes:
$config[‘url_rewriting’] = ‘mod_rewrite’;
CMS Made Simple Security
.After you have checked security guidelines (and, hopefully, applied at least some of them), you can additionally secure your CMS Made Simple site. By inserting a few lines into your .htaccess file you can stop many hacking attempts.These rules reject HTTP requests containing characters commonly used by exploits, but will not affect the normal functionality of your application.Here are the rules you should add to your .htaccess file:
# BEGIN Optional settings

# Turns off directory browsing
# not absolutely essential, but keeps people from snooping around without
# needing empty index.html files everywhere
Options -Indexes

# Deny access to config.php
# This can be useful if php ever breaks or dies
# Use with caution, this may break other functions of CMSms that use a config.php
# file. This may also break other programs you have running under your CMSms
# install that use config.php. You may need to add another .htaccess file to those
# directories to specifically allow config.php.
<Files "config.php">
order allow,deny
deny from all
</Files>

# Sets your 403 error document
# not absolutely essential to have,
# or you may already have error pages defined elsewhere
ErrorDocument 403 /forbidden403.shtml

# No sense advertising what we are running
ServerSignature Off

# END Optional Settings

# BEGIN CMSMS and Rewrite Rules
# Make sure you have Options FollowSymLinks
# and Allow on

RewriteEngine On

# Might be needed in a subdirectory
#RewriteBase /

# URL Filtering helps stop some hack attempts
#IF the URI contains a "http:"
RewriteCond %{QUERY_STRING} http: [OR]
#OR if the URI contains a "["
RewriteCond %{QUERY_STRING} [ [OR]
#OR if the URI contains a "]"
RewriteCond %{QUERY_STRING} ] [OR]
#OR if the URI contains a "<script>"
RewriteCond %{QUERY_STRING} (<|%3C).*script.*(>|%3E) [NC,OR]
#OR script trying to set a PHP GLOBALS variable via URL
RewriteCond %{QUERY_STRING} GLOBALS(=|[|%[0-9A-Z]{0,2}) [OR]
#OR any script trying to modify a _REQUEST variable via URL
RewriteCond %{QUERY_STRING} _REQUEST(=|[|%[0-9A-Z]{0,2})
RewriteRule ^.*$ - [F,L]
# END Filtering

# CMSMS Rewriting
# Set assume mod_rewrite to true in config.php and clear CMSMS cache
RewriteCond %{REQUEST_FILENAME} !-f
RewriteCond %{REQUEST_FILENAME} !-d
RewriteRule ^(.+)$ index.php?page=$1 [QSA]
# END CMSMS

# END Rewrite rules
CMS Made Simple Admin Shortcuts
CMSMS allows you to add shortcuts to different parts of your admin panel, as well as shortcuts for external resources.Let’s say that you want to add a shortcut to the Templates section of your admin panel.
To do this, go to Layout > Templates and click the + button on the right of the screen. Then click Add Shortcut.
That’s it! Now you can see the new shortcut by going to CMS > Home or by clicking the + button and then clicking the Templates shortcut.CMS Made Simple gives you the option to add an external shortcut to your admin panel.In our example we’ll set up an external shortcut to FastWebHost website. Go to My Preferences > Manage Shortcuts and click Add Shortcut.Type a title for your shortcut and enter its URL. Click Submit to save the shortcut. That’s it! Now you can see the new shortcut by going to CMS > Home or by clicking the + button and then clicking the shortcut’s name.
How to change themes in CMS Made Simple:
Sometimes, the need or necessity for changing the appearance of your CMS Made Simple website arises. In the previous part of the tutorial, we have discussed in detail how you can install a new theme, but here, we will cover the steps towards changing the different already installed themes. This procedure is actually extremely easy and requires just a couple of simple steps.
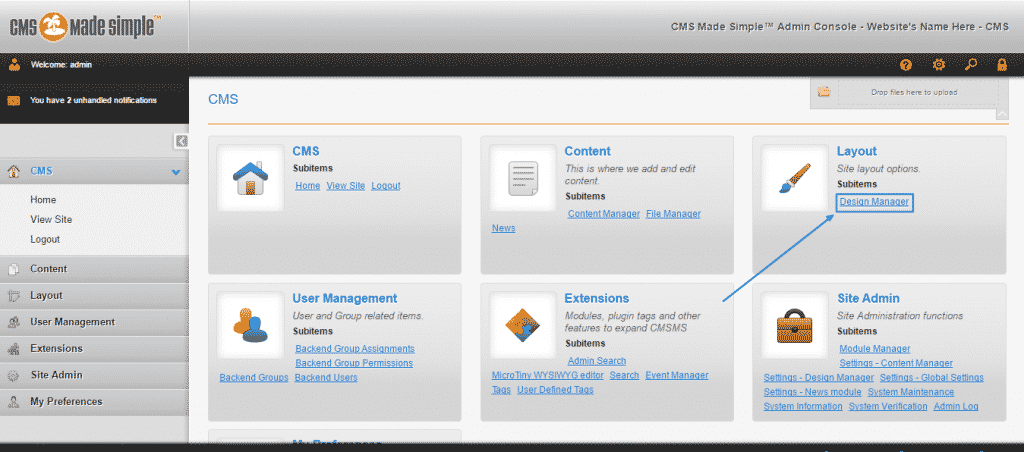
First, as in any other script management process, you are going to need to get to your Administration Area and sign in.Then, look for the Layout menu and click on the Design Manager button in it:
This will lead you to the Designs page of the Manager, where all the currently installed and available themes are located. You can see in our screenshot that the name of the theme we have chosen by default in this example is NCleanBlue and on its right the tick icon is the only one of all the other ticks, colored in green, which means that it is currently active:
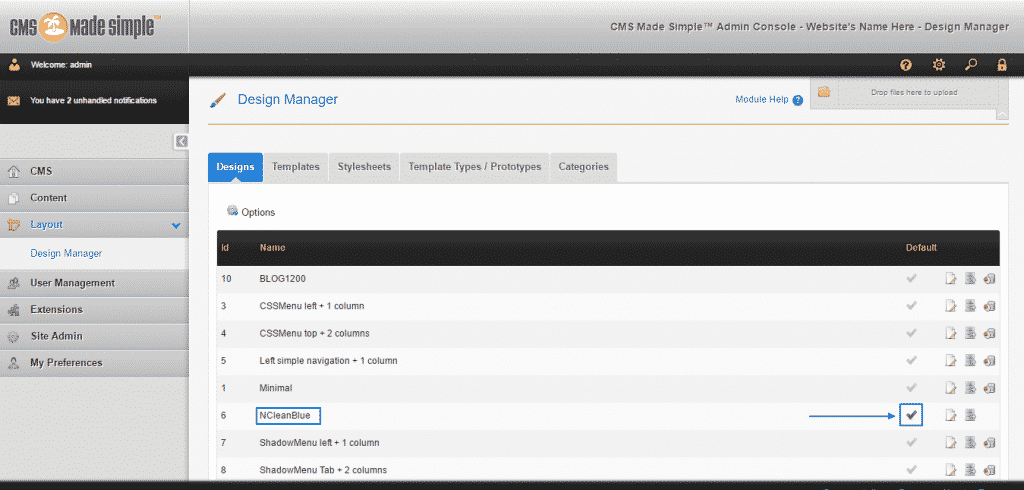
To change it, you simply have to click on the tick button of another theme. In the example below, we have selected the one named Minimal and instantly – the tick button becomes green and the message “Default design changed” appears on the top of the screen, indicating the the procedure has been successful and now the newly selected design is the active one:

How to manage users and groups in CMS Made Simple:
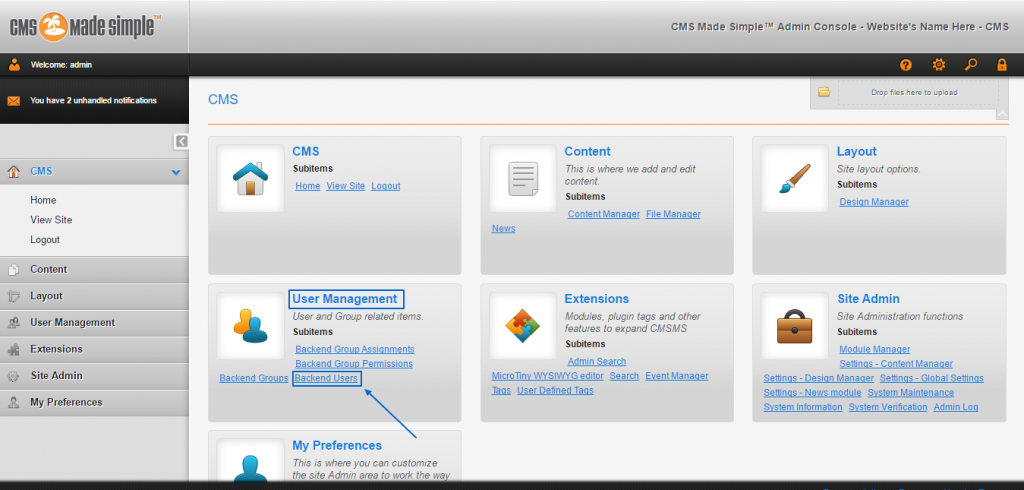
One of the key areas for the whole content management are the users and the groups, where they belong. CMS Made Simple will allow you to create and manage them and assign them specific permissions. This is crucially important if you, for example, need a new content to be created and uploaded to the page by a certain user, without allowing this user to have administrative access to the website.Your first step should be to get into your Administration Area by signing in. Then, find the User Management menu as this is where all the options we are going to cover here are located. As a beginning, go to Backend Users:
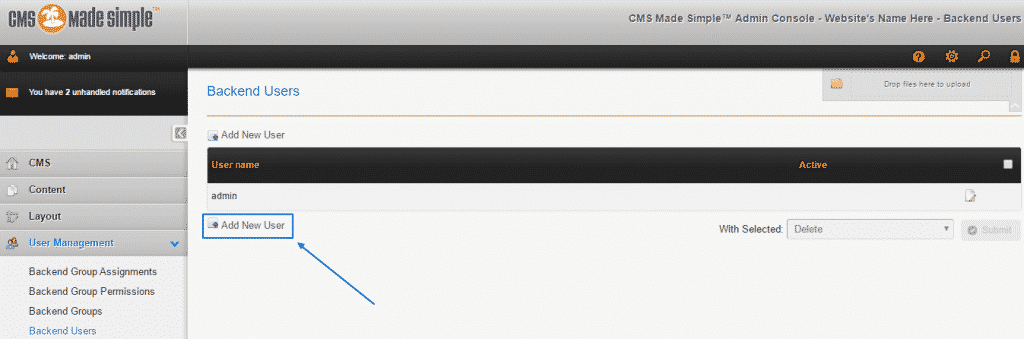
You will see a list with all of the users, registered on your CMS Made Simple here. As it is a fresh installation, we only have the default admin user, so we will just create a new one by clicking on Add New User:
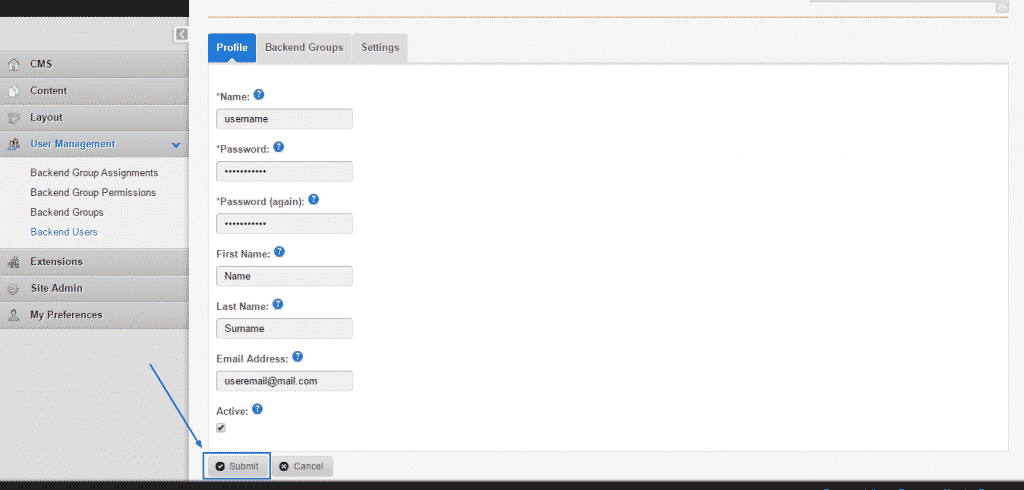
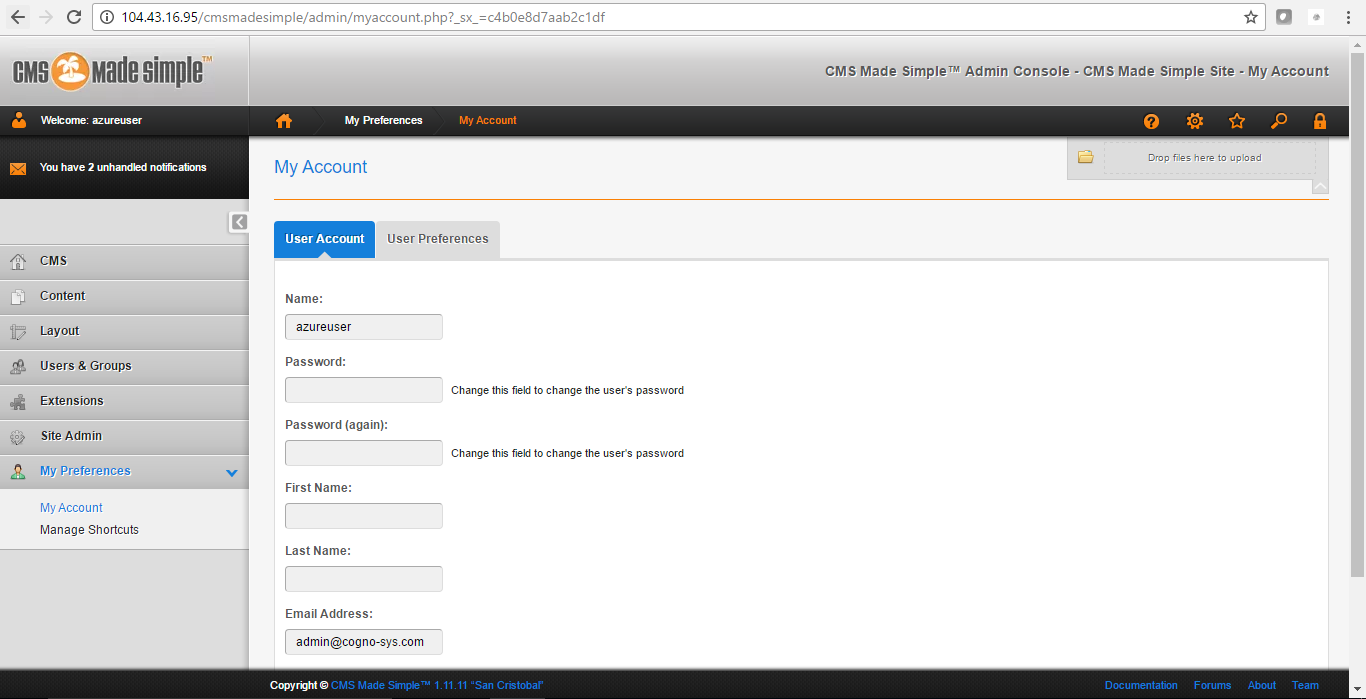
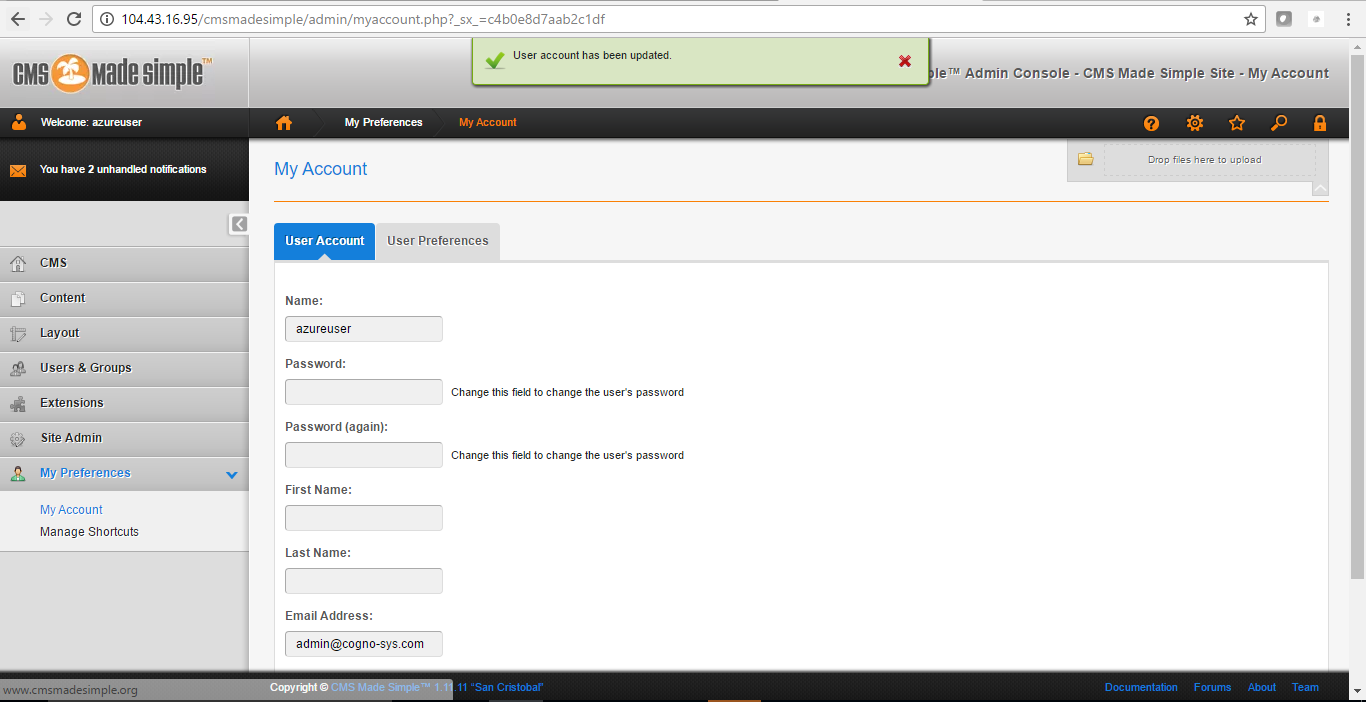
This will lead you to a Profile page, where you have to fill in the required information, such as Name, Password, First and Surname, the Email of the user and tick Active of you would like for this account to be functional. Then simply press Submit and you user would be successfully created:
Back in the Background Users page, you will see that the new user will be active. You can change any of the just filled in details, as well as additional settings by clicking on the Edit icon at the right:

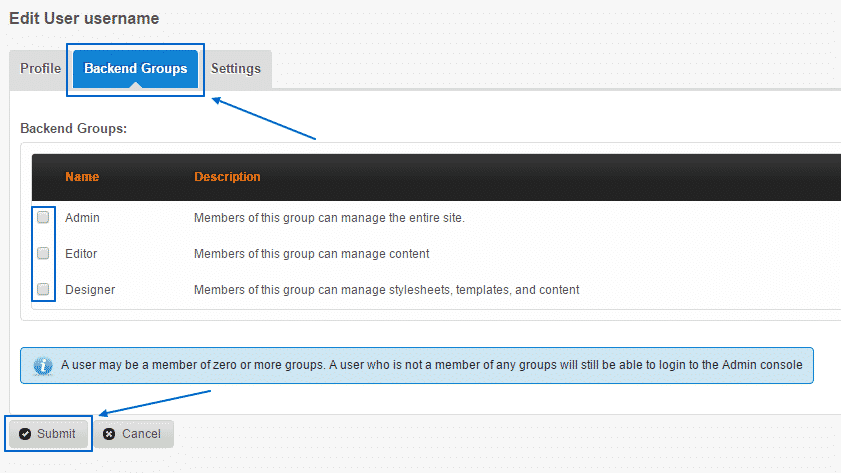
While editing, you can click on Backend Groups and assign the user to any of the available groups, by ticking the box next to the desired one/s and selecting Submit:
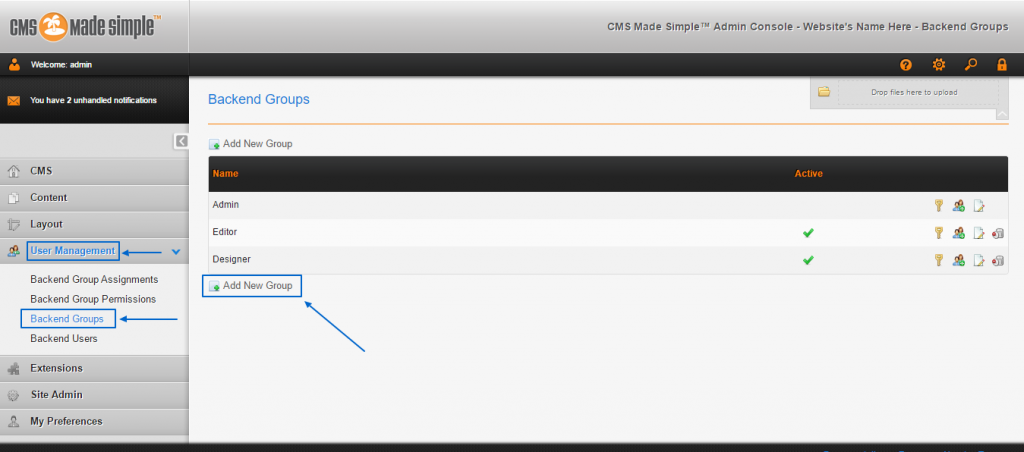
If you need to add some more groups, here is how you can do that. Go to User Management > Background Groups and select Add New Group:
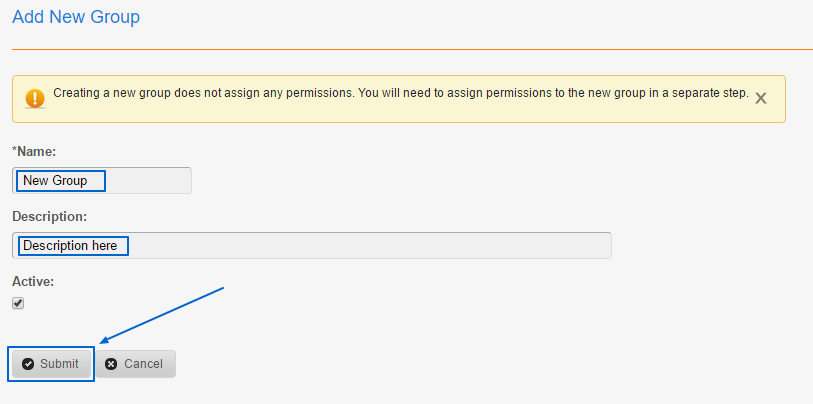
Fill in the Name and the Description, tick on the Active box and click on Submit to complete the process:
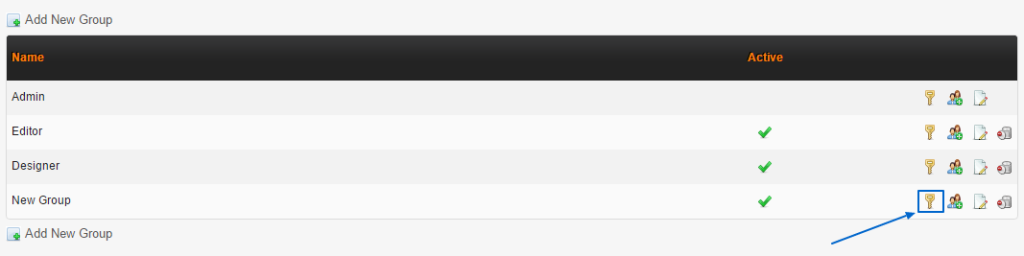
Then, you will be able to see the new group appearing with the already created ones in the Backround Groups section. If you want to give specific permissions to the members of this or any other group, simply click on the Permissions icon on their right (the one, shaped like a key):
There, you will see that you have a long page with a list of Permissions at the left and a list of all the available groups:
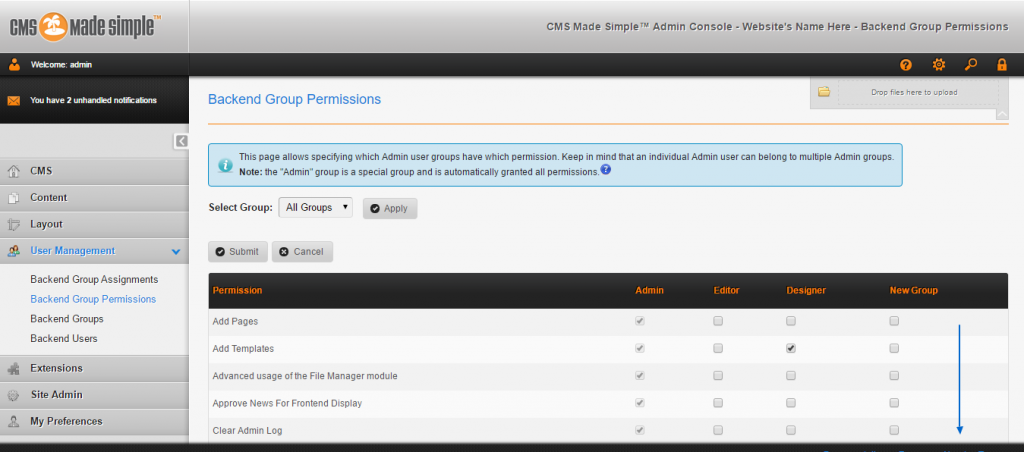
To enable/disable the access to a certain area and/or function for the members of a specific group, simply tick/untick the box, corresponding to it. When you are finished with that just click on Submit and all the changes will be enacted:

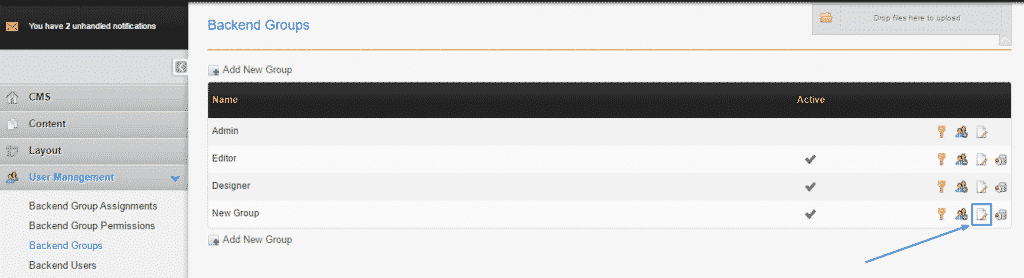
If you want to edit the details of a certain group, that is possible as well. You only need to be in the Background Groups section and click on the Edit button at the right of the chosen group:
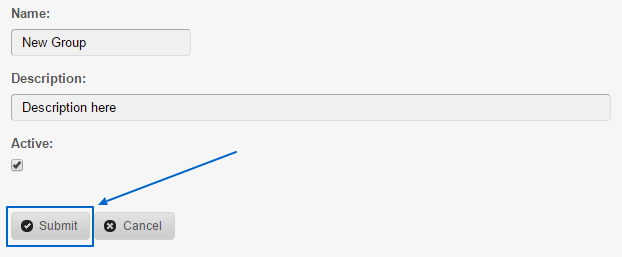
This will get you to the same page as when you were creating a fresh group, where you can put in new Name, Description and choosing whether or not the group to be Active. You can then enact the changes by clicking on Submit:
How to create global content block in CMS Made Simple:
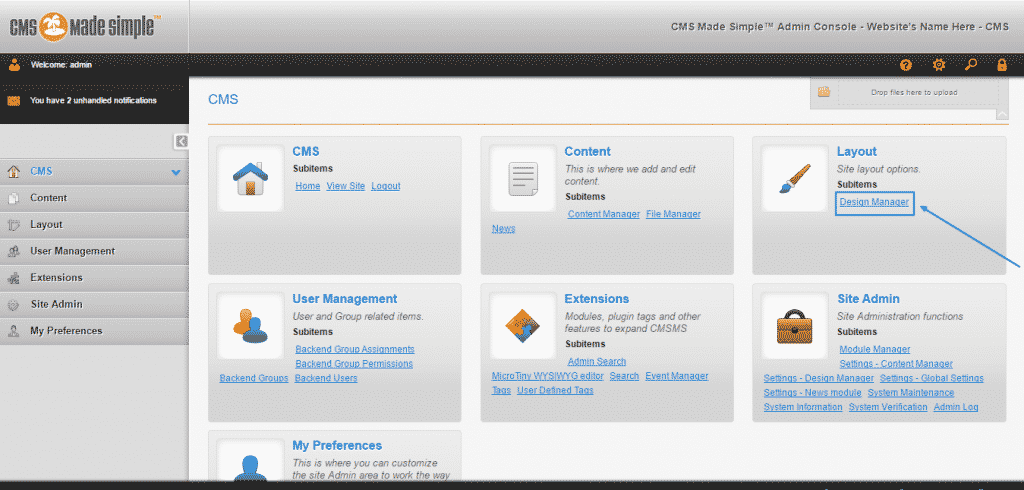
Global Content Blocks are chunks of simple content you can place in your templates in CMS Made Simple. Such blocks that contain information is the footer of the website. In this part of our tutorial we are about to show you how to create one yourself. The first step would be to login into your Administration Area. Afterward, look at the Layout menu and click on Design Manager:

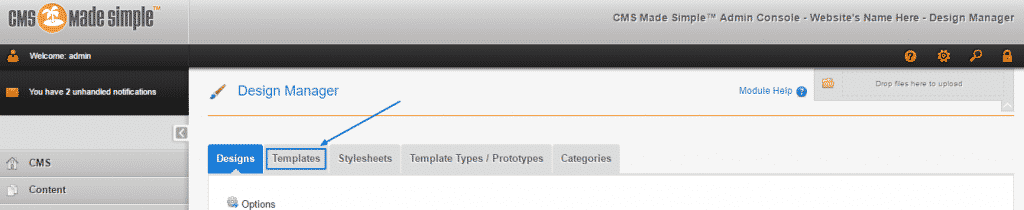
Once you are there go to the Templates section:
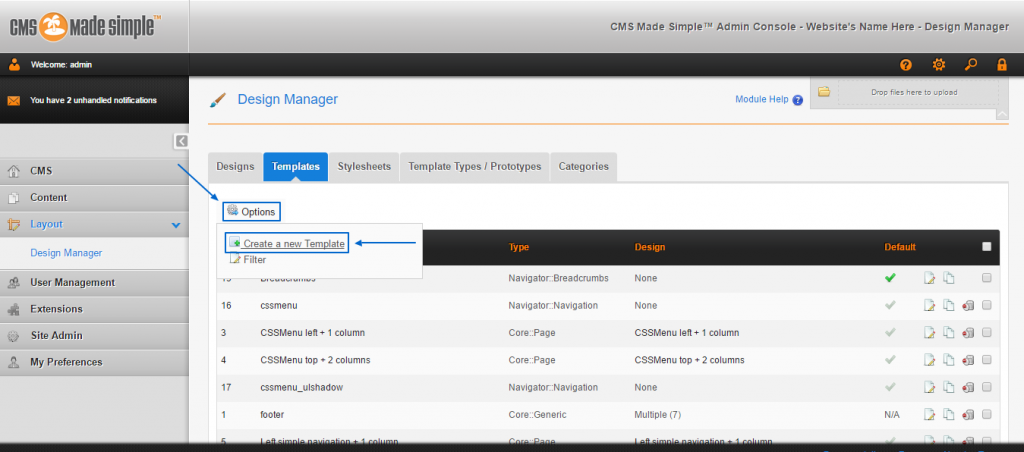
After the page loads, go to the Options icon and choose Create a new Template from the drop-down menu:
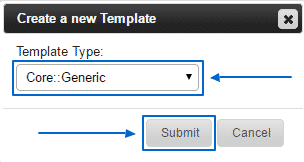
When a pop-up bar appears, you must select the Template Type to be Core::Generic and then just click on Submit to proceed further:
Then, give a Name to your new template. In this tutorial, we are going to use “sampleBlock” as an example. Then in the Template section, you need to write down:
{global_content name=’sampleBlock’}
Where “sampleBlock” is the name of your template:
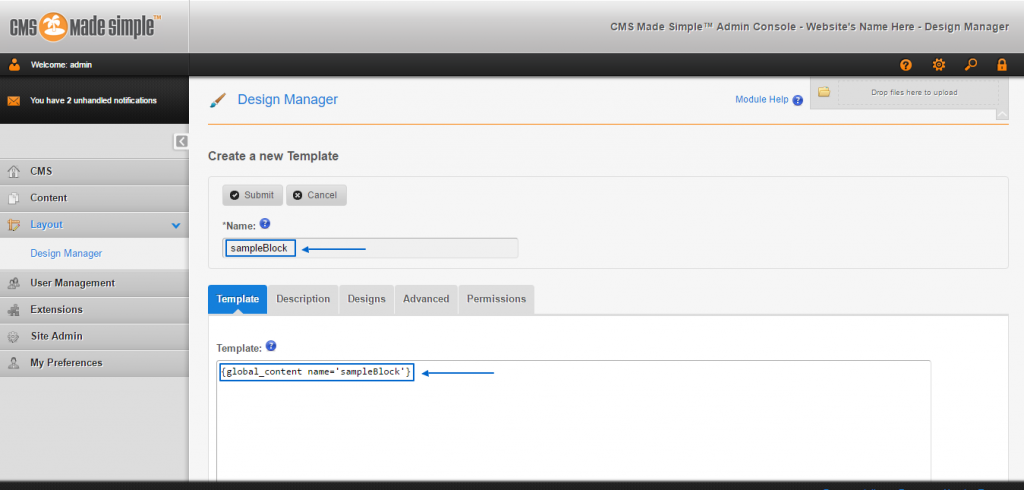
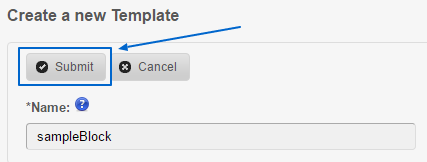
Finally, simply click on Submit to successfully finish the procedure:
CMS MADE SIMPLE – HOW TO ADD & EDIT PAGES
After you have logged in, from the Dashboard mouse over the “Content” tab and in the drop down menu click on “Pages”.
- Before you click on the “Add New Content” button. If you want to create a page with a similar format as another page, just mouse over the icon on the far right side of the screen that looks like two sheets of paper. If you hold your courser over this icon it will read “Copy”, click on this icon to create a duplicate page.
- If you want to create and entirely new page, click on the “Add New Content” button near the top of all of the page titles.
- Under the field labeled “Title:” input the title for the name of the page.
- Under the “Menu Text:” field input the name of the page as you want it to appear in your CMS pages directory.
- For the “Parent” drop down menu only select one of your other pages if you want this new page to be a sub page or “child” of another page.
- Now you can paste in the content from a word document into the “Content*:” field. You have to click on the 4th icon from the left in the top row.
- Once you have entered the content you can hit “Apply” to process your changes or you can hit “Submit.” Hitting Apply will allow you to make changes and continue to keep editing. Hitting Submit will process your changes and shoot you back to the Pages directory.
Editing an Existing Page
- After you have logged in, from the Dashboard mouse over the “Content” tab and in the drop down menu click on “Pages”.
- Then click on the “Name of the Page” you want to edit.
- Make any changes and once you have edited the content you can hit “Apply” to process your changes or you can hit “Submit.” Hitting Apply will allow you to make changes and continue to keep editing. Hitting Submit will process your changes and shoot you back to the Pages directory.
-CMS Made Simple is a wonderful open source Content Management System that helps you to manage your website content in much faster, easier and simpler way. The CMS Made Simple is scalable to any size of the business operation from small businesses to large corporate organizations.CMS Made Simple is owned by CMS Made Simple (https://www.cmsmadesimple.org/) and they own all related trademarks and IP rights for this software.
Cognosys provides hardened and ready to run images of CMS Made Simple websites on all public cloud ( AWS marketplace and Azure).
Deploy your CMS Made Simple websites securely on cloud i.e. AWS marketplace and Azure with Reliable Services offered by Cognosys at one-click with easy written and video tutorials.
CMS Made Simple on cloud for Azure-Ubuntu

Features
CMS Made Simple Feature List:
- SEO Friendly URLs
- Integrated and online help
- Modular and extensible
- Easy user and group management
- Group-based permission system
- Full template support, for unlimited looks without changing a line of content
- Easy wizard based install and upgrade procedures
- Minimal server requirements
- Admin panel with multiple language support
- Content hierarchy with unlimited depth and size
- Integrated file manager w/ upload capabilities
- Integrated audit log
- Friendly support in forums
- Small footprint
-Major Features Of CMSMadeSimple
The CMS Made Simple offers a wide number of features as listed below:
- Audit log integration
- SEO friendly URL links
- Manages users and groups easily
- Online help in addition to the integrated help in CMS
- Modular CMS with extensible features
- Permission system on group basis
- Easy installation and upgrade process
- Full length template support
- Least server requirements
- File manager integration
- Multiple language support for admin panel
- Unlimited size for content hierarchy
- Support through forums and IRC
AWS
Installation Instructions For Ubuntu
Note: How to find PublicDNS in AWS
Step 1) SSH Connection: To connect to the deployed instance, Please follow Instructions to Connect to Ubuntu instance on AWS Cloud
1) Download Putty.
2) Connect to virtual machine using following SSH credentials :
- Hostname: PublicDNS / IP of machine
- Port : 22
Username: To connect to the operating system, use SSH and the username is ubuntu.
Password : Please Click here to know how to get password .
Step 2) Database Login Details :
- MYSQL Username : root
- MYSQL Password : Passw@rd123
Note :-Please change password immediately after first login.
Step 3) Application URL: Access the application via a browser at http://PublicDNS/cmsmadesimple/admin
Step 4) Other Information:
1.Default installation path: will be on your web root folder “/var/www/html/CMS”.
2.Default ports:
- Linux Machines: SSH Port – 22 or 2222
- Http: 80 or 8080
- Https: 443
- Sql or Mysql ports: By default these are not open on Public Endpoints. Internally Sql server: 1433. Mysql :3306
Configure custom inbound and outbound rules using this link
AWS Step by Step Screenshots
Azure
Installation Instructions For Ubuntu
Note : How to find PublicDNS in Azure
Step 1) SSH Connection: To connect to the deployed instance, Please follow Instructions to Connect to Ubuntu instance on Azure Cloud
1) Download Putty.
2) Connect to virtual machine using following SSH credentials :
- Hostname: PublicDNS / IP of machine
- Port : 22
Username: Your chosen username when you created the machine ( For example: Azureuser)
Password : Your Chosen Password when you created the machine ( How to reset the password if you do not remember)
Step 2) Database Login Details :
- MYSQL Username : root
- MYSQL Password : Passw@rd123
Note :-Please change password immediately after first login.
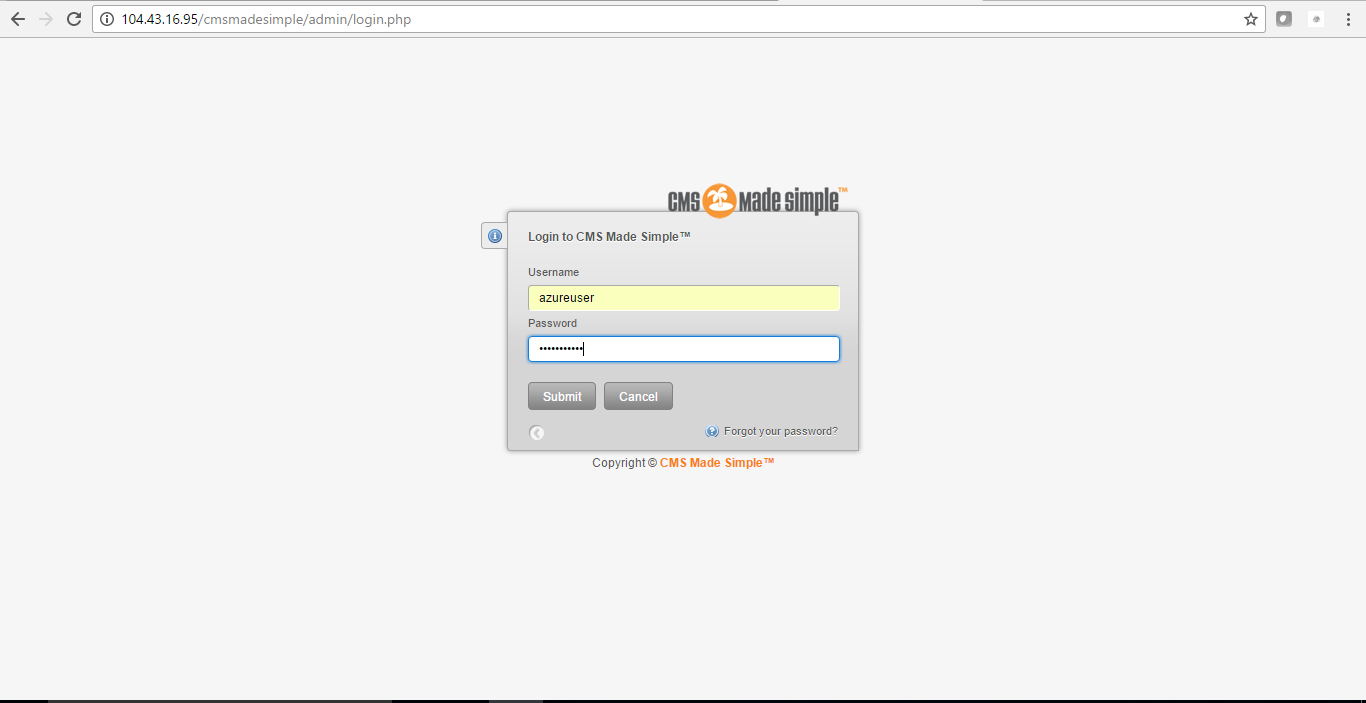
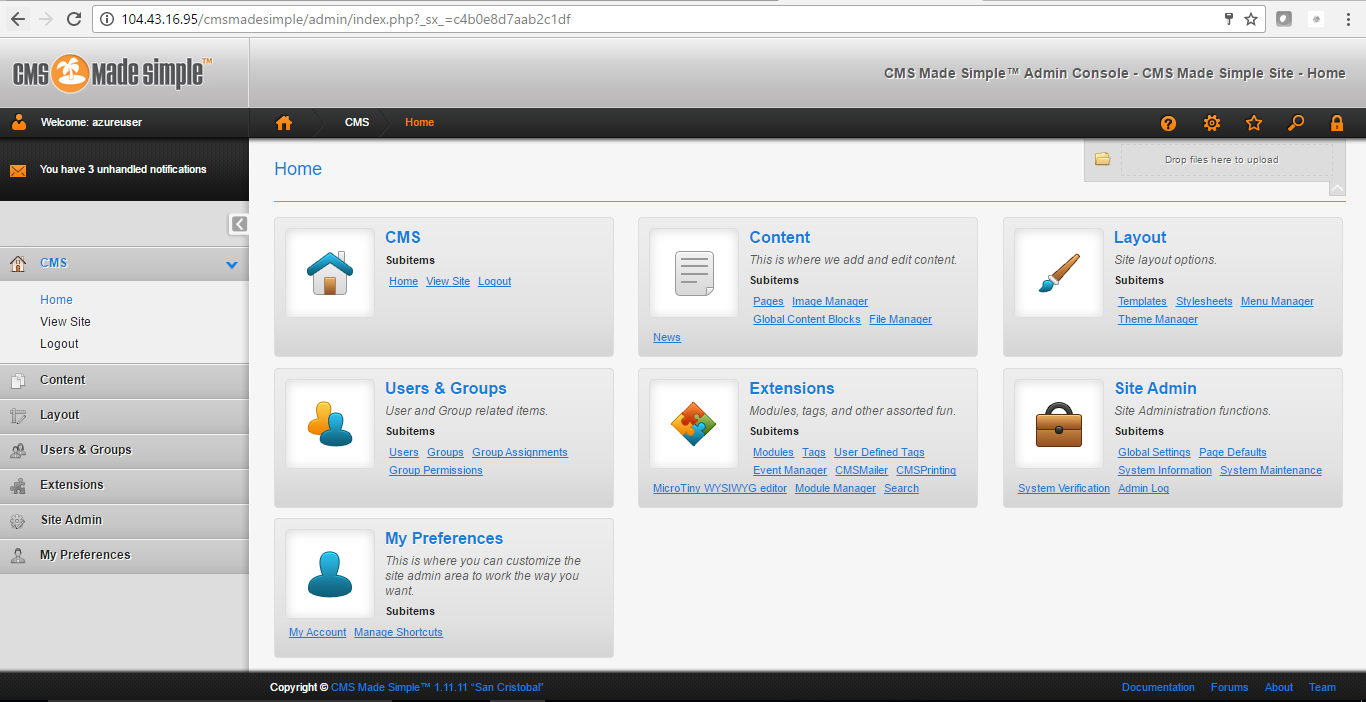
Step 3) Application URL: Access the application via a browser at http://PublicDNS/cmsmadesimple/admin
- Username : azureuser (Please create new user and delete this user)
- Password : Passw@rd123
Note: How to find PublicDNS in Azure
Step 4) Other Information:
1.Default installation path: will be on your web root folder “/var/www/html/cmsmadesimple”
2.Default ports:
- Linux Machines: SSH Port – 22 or 2222
- Http: 80 or 8080
- Https: 443
- Sql or Mysql ports: By default these are not open on Public Endpoints. Internally Sql server: 1433. Mysql :3306
Configure custom inbound and outbound rules using this link
Installation Instructions For Centos
Note : How to find PublicDNS in Azure
Step 1) SSH Connection: To connect to the deployed instance, Please follow Instructions to Connect to Centos instance on Azure Cloud
1) Download Putty.
2) Connect to virtual machine using following SSH credentials :
- Hostname: PublicDNS / IP of machine
- Port : 22
Username: Your chosen username when you created the machine ( For example: Azureuser)
Password : Your Chosen Password when you created the machine ( How to reset the password if you do not remember)
Step 2) Database Login Details :
- MYSQL Username : root
- MYSQL Password : Passw@rd123
Note :-Please change password immediately after first login.
Step 3) Application URL: Access the application via a browser at http://PublicDNS/cmsmadesimple/admin
- Username : azureuser (Please create new user and delete this user)
- Password : Passw@rd123
Step 4) Other Information:
1.Default installation path: will be on your web root folder “/var/www/html/cmsmadesimple”
2.Default ports:
- Linux Machines: SSH Port – 22 or 2222
- Http: 80 or 8080
- Https: 443
- Sql or Mysql ports: By default these are not open on Public Endpoints. Internally Sql server: 1433. Mysql :3306
Configure custom inbound and outbound rules using this link
Azure Step by Step Screenshots

Installation Instructions For Windows
Step 1) VM Creation:
1.Click the Launch on Compute Engine button to choose the hardware and network settings.
2.You can see at this page, an overview of Cognosys Image as well as some estimated costs of VM.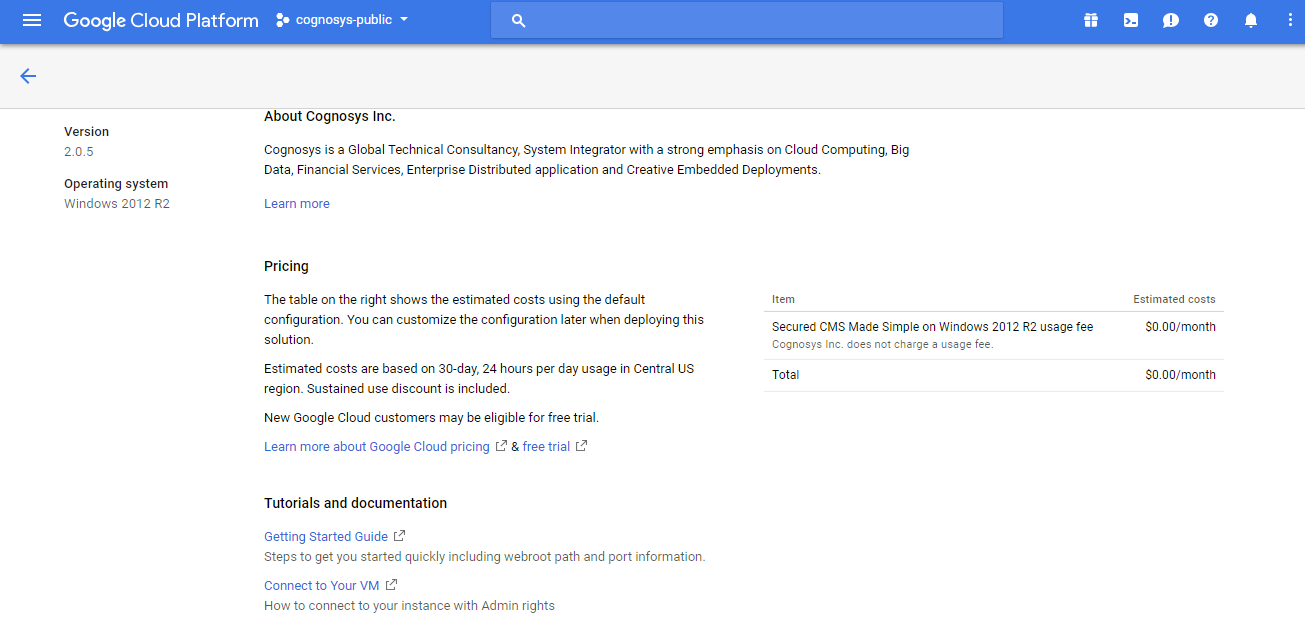
3.In the settings page, you can choose the number of CPUs and amount of RAM, the disk size and type etc.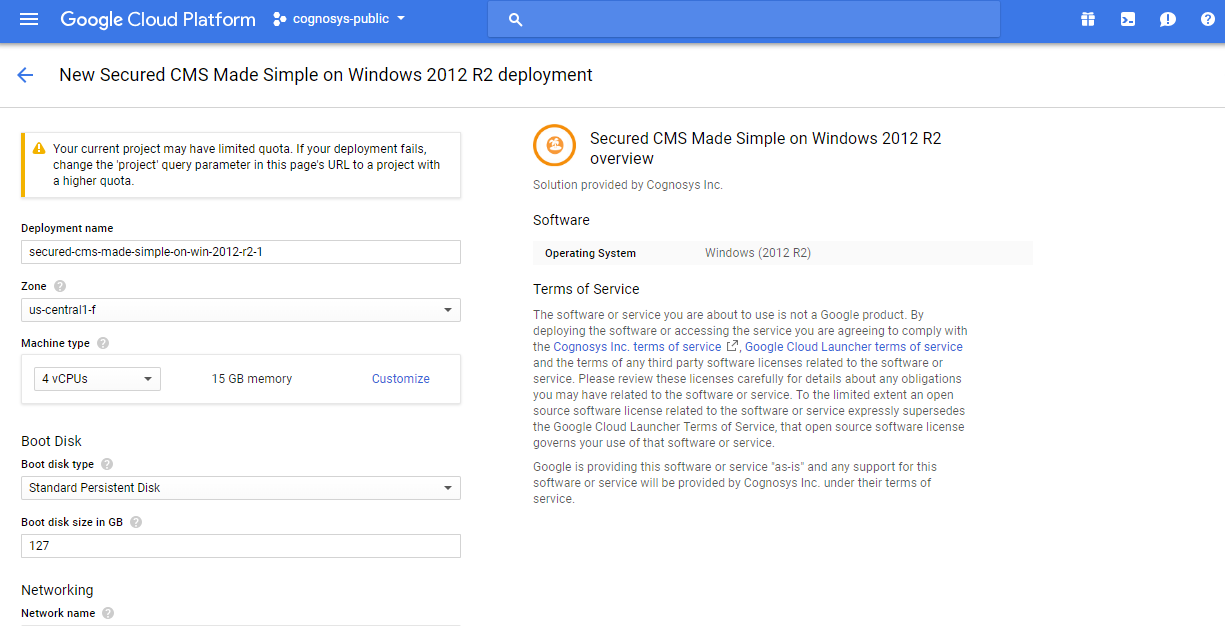
Step 2) RDP Connection: To initialize the DB Server connect to the deployed instance, Please follow Instructions to Connect to Windows instance on Google Cloud
Step 3) Database Login Details:
The below screen appears after successful deployment of the image.

For local MySQL root password, please use the temporary password generated automatically during image creation as shown above.
i) Please connect to Remote Desktop as given in step 2 to ensure stack is properly configured and DB is initialized.
ii) You can use MySQL server instance as localhost, username root and password as shown above.
If you have closed the deployment page you can also get the MySQL root password from VM Details “Custom metadata” Section
Videos
CMS Made Simple Tutorial – Getting Started
